AI insights
 About us
 Careers
 Security
 Customer reviews
 Contact us
 Affiliate program
 Solution partners
 Looker Studio templates
 Tableau templates
 Facebook Ads templates
 Google Ads templates
 Data fields & Metrics
 AI prompt library & Guides
 Product documentation
 API documentation
 Case studies
 Blog
Blog Data models
 Windsor vs Supermetrics
 Windsor vs Fivetran
 Windsor vs Portermetrics
 Last updated: 21 May 2025

Hello! Today, I’ll explain the steps you need to take in your Google Analytics 4 (GA4) account to prepare for attribution in Windsor.ai.
Preparing for attribution involves two steps:
- Setting up a client_id for users on the Google Tag Manager (GTM) side.
- And adding custom dimensions.
We will cover all these steps now, but before you get started, make sure you have set up GA4 with a data stream and have GTM installed. Also, make sure you’re using the standard connector between GA4 and GTM in Google Analytics 4: Configuration tag type, if you don’t we create this tag at step 2.
Requirements
Setup before reading:
- Google Analytics 4 (with data stream activated)
- Google Tag Manager account with admin rights(!)
Google Tag Manager (GTM Configuration)
Now, let’s set everything up in GTM.
Step 1: Create a Variable in GTM and paste this script into the custom JavaScript.
function() {
var match = document.cookie.match('(?:^|;)\\s*_ga=([^;]*)'),
raw = match ? decodeURIComponent(match[1]) : null;
if (raw) {
match = raw.match(/(\d+\.\d+)$/)
}
return (match) ? match[1] : null;
}
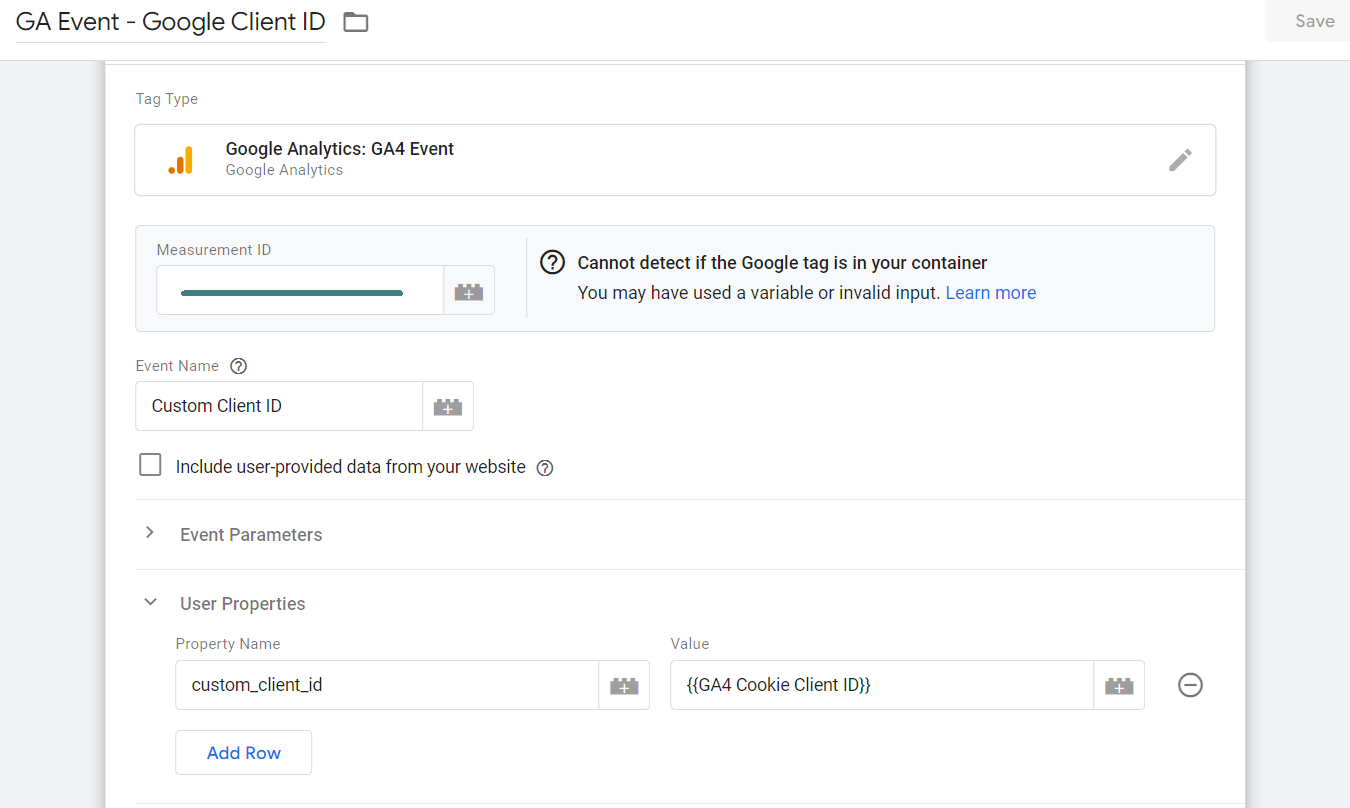
Step 2: Create a GTM Tag and pass the above variable in User Properties Value. Set the Trigger of this tag is ALL PAGES or what you want.

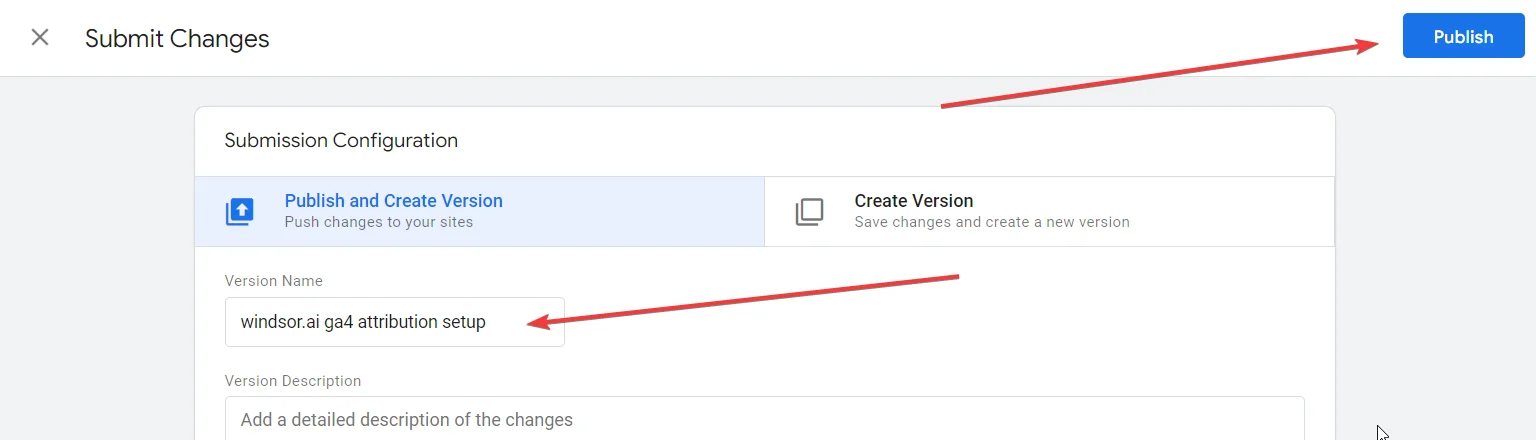
- Now after you made all these changes go to the main menu and click on “Submit”

here you need to name these changes, let’s use “windsor.ai ga4 attribution setup” and click “Publish”


Google Analytics 4 (GA 4) Configuration
Now that all the settings in GTM are complete, we can move on to Google Analytics 4 (GA4).
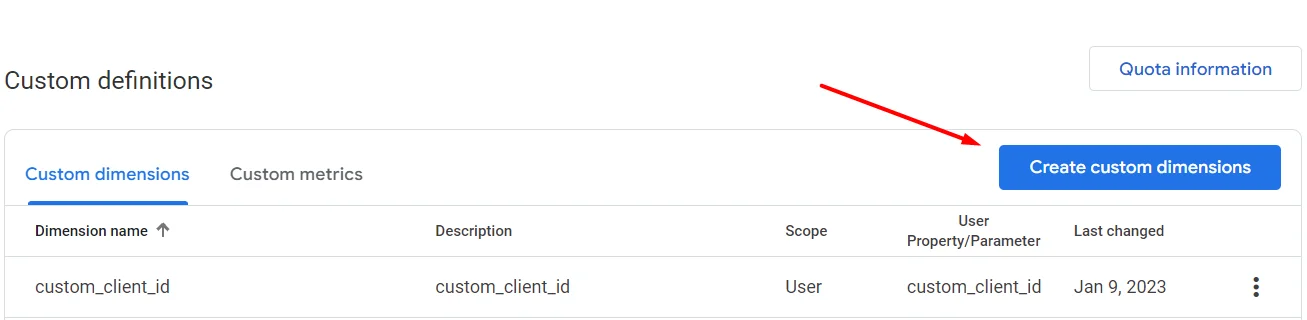
- Open your admin panel in GA4.

- Then, open Custom Definitions.

- Click the Create custom dimensions button.

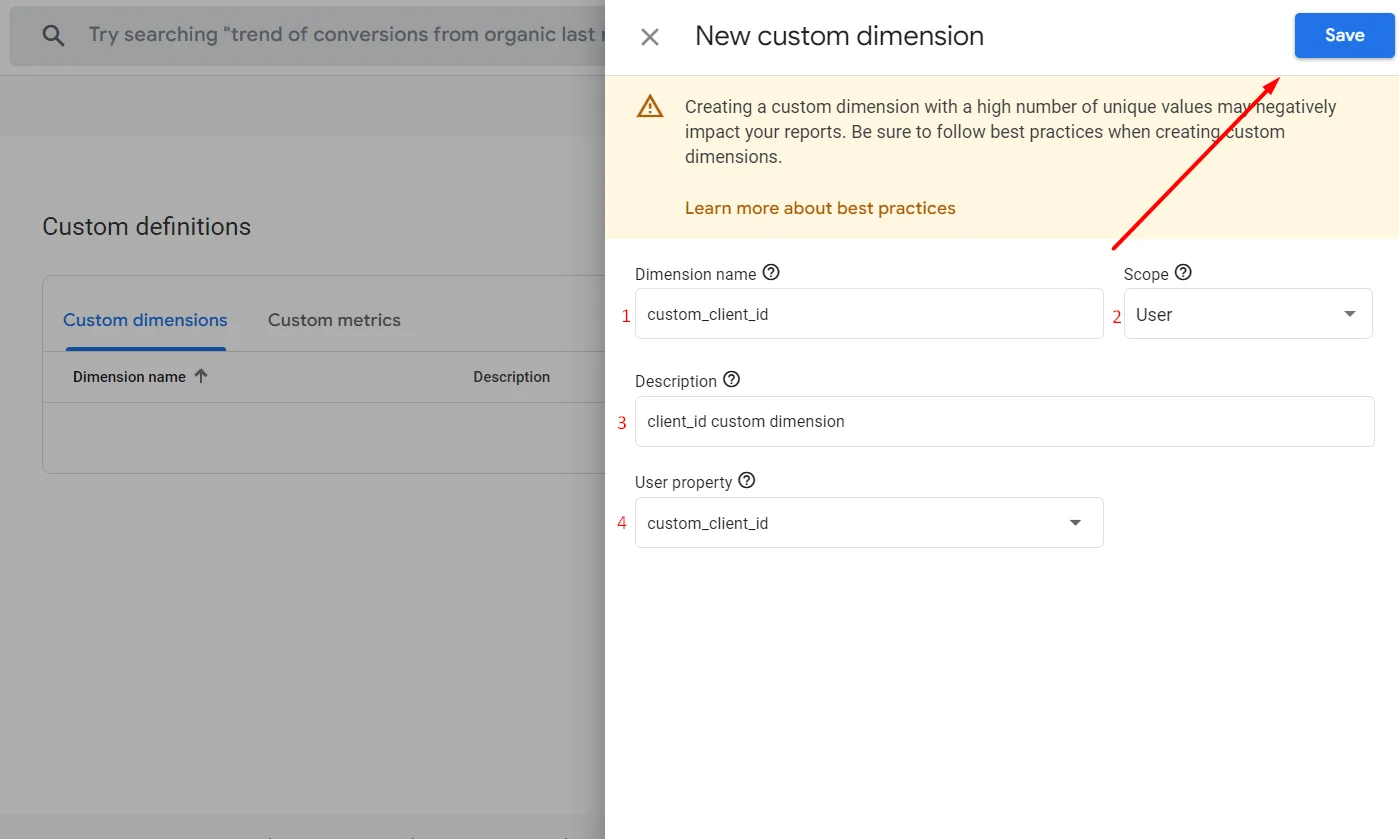
And here we need to add a field from our `fetch_user_data` that we created at the end of GTM section.
Dimension name: custom_client_id
Scope: User
Description: client_id custom dimension
User property: custom_client_id

- Now you can go to Explore -> Create blank report

- Click the “+” sign to add a new dimension

- You can also add “sessions” metric to be able to see the number of sessions by client_id.
NOTE: you won’t be able to see client_id instantly because GA4 need some time to gather them, we recommend checking them in 24h. - From there, you should be able to see the custom dimensions you added and use them to explore your data.


Up next here are the instructions on how to proceed with the setup on Windsor.ai:
Setting up Google Analytics 4 (GA4) Multitouch Attribution with Windsor.ai is simple and can be done by following these easy steps:
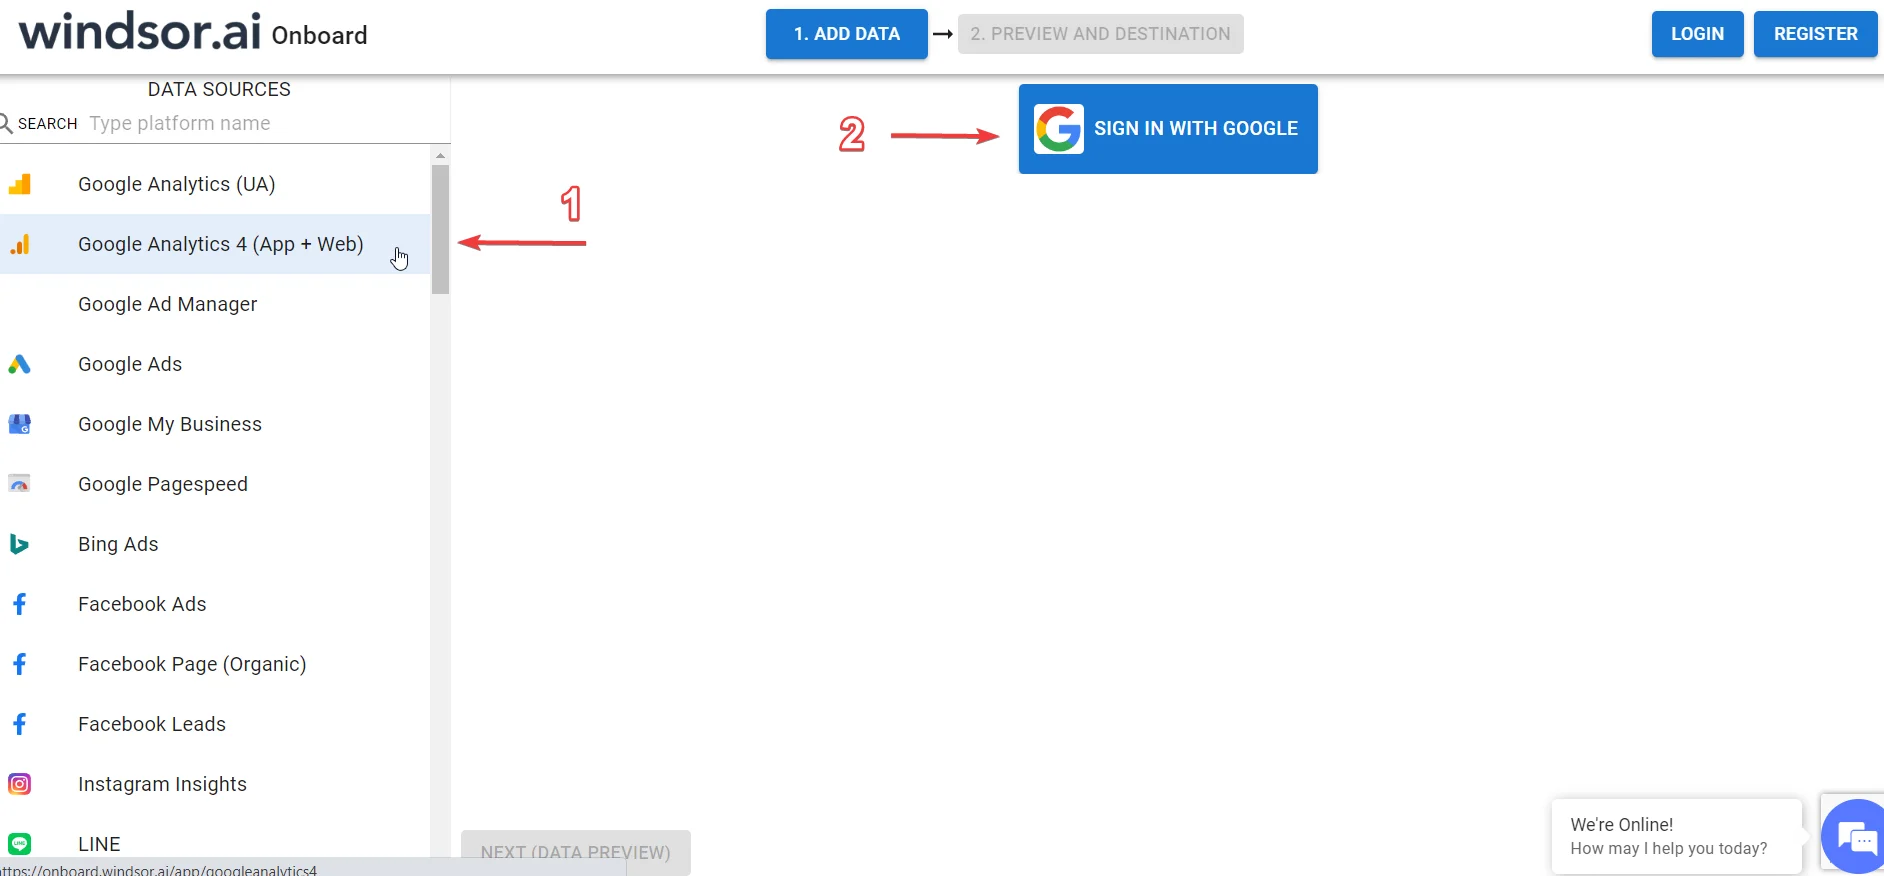
- Go to onboard.windsor.ai and log in to your account. Register one if you don’t have one.

- Select the Google Analytics 4 (App+Web) data source and sign in to your GA4 account using your Google credentials. Provide Windsor.ai with all the necessary permissions.

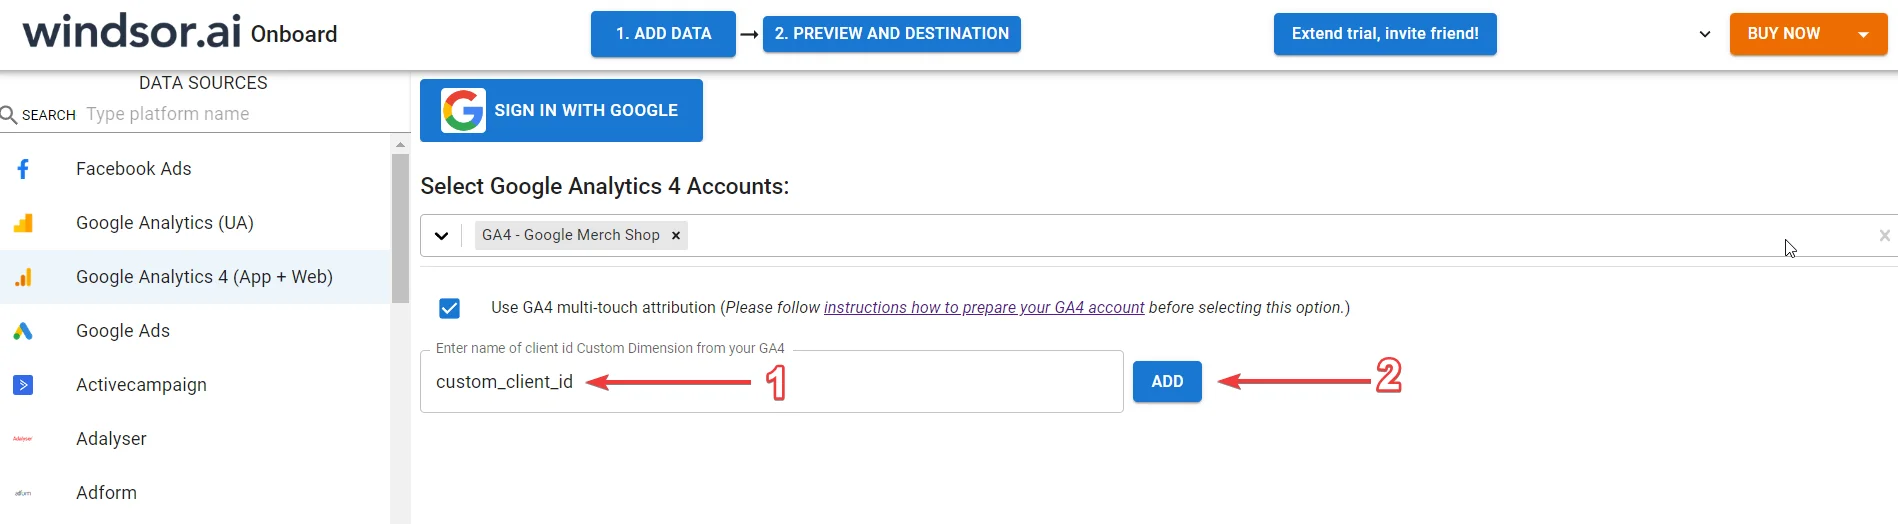
- Select the GA4 accounts that you want to use for Multitouch Attribution.
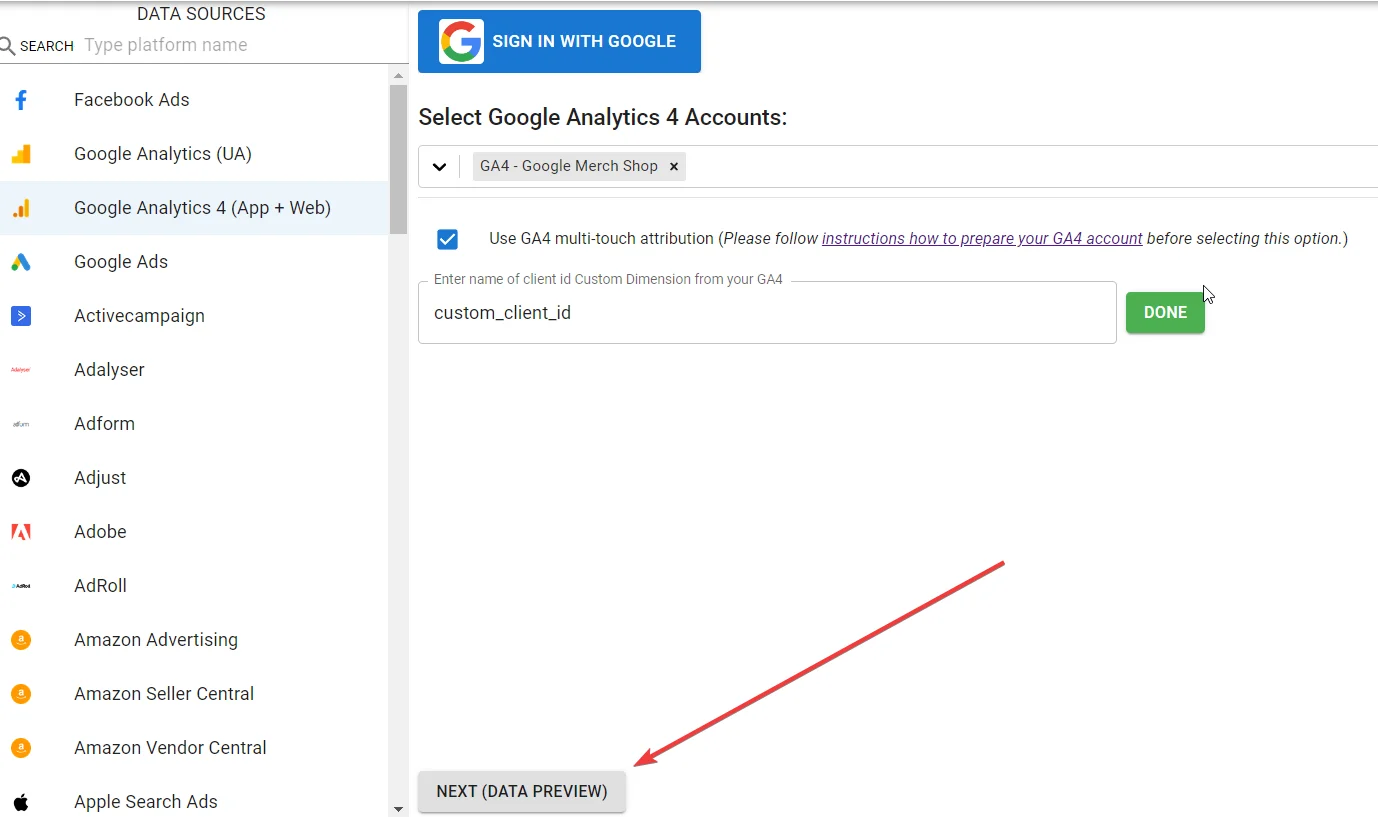
- Check the checkbox to use GA4 Multitouch Attribution. After this, a field will appear where you need to enter the name of the client ID Custom Dimension that you set in GA4 during the first step of the guide. Then click “Add”. NOTE: if you refresh the page you will see the“customuser_” was attached to the name of custom_client_id. This is expected behavior and you don’t need to change it back just leave it as it is.

- Go to the data preview page.

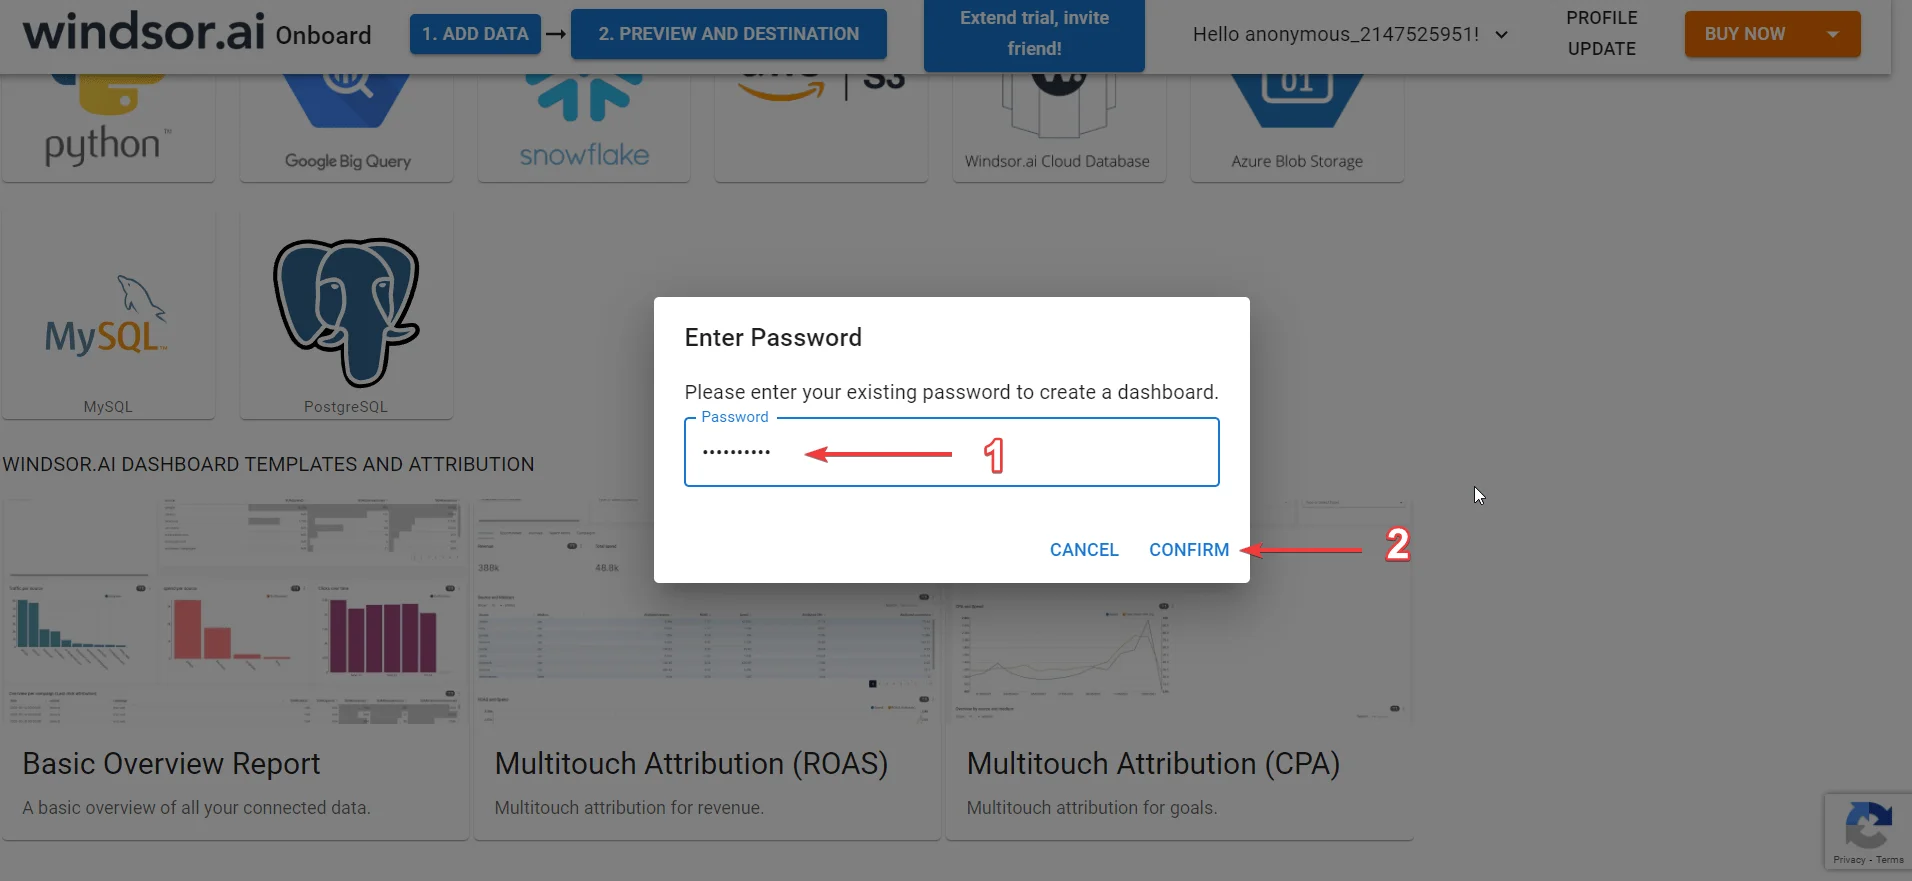
- On the data preview page, select one of the desired Multitouch Attribution dashboards: ROAS or CPA.

- We will ask you to enter your Windsor.ai account password, which will also be used to access your dashboard in the future on charts.windsor.ai.

- Wait a few minutes while we create your dashboard.
- Once the dashboard is ready, click on the hyperlink to view it.

- Congratulations! Your dashboard is now available at https://charts.windsor.ai and can be accessed using your Windsor.ai login and password. Please note that the data on the dashboard will be updated once a day at 01:00.
- Here you can read how to increase Marketing ROI with our Multi-touch Attribution Modelling Software.