 Destinations
 Data sources
 AI insights
 About us
 Careers
 Security
 Customer reviews
 Contact us
 Affiliate program
 Solution partners
 Template gallery
 Looker Studio templates
 Power BI templates
 Excel templates
 Google Sheets templates
 Tableau templates
 Facebook Ads templates
 Google Ads templates
 Data fields & Metrics
 AI prompt library & Guides
 Product documentation
 API documentation
 Case studies
 Blog
Blog Data models
 Windsor vs Supermetrics
 Windsor vs Funnel.io
 Windsor vs Fivetran
 Windsor vs Rivery
 Windsor vs Portermetrics
 Windsor vs Coupler.io
 Last updated: 26 August 2026




Data integration for blended, cross-channel reporting is clearly a topic that is often talked about but hardly ever implemented. This introduction should help you to understand what steps you will need to take to get started with windsor.ai on your own, in a few minutes:
Connect your analytics data
- Go to https://onboard.windsor.ai/register and create your account.
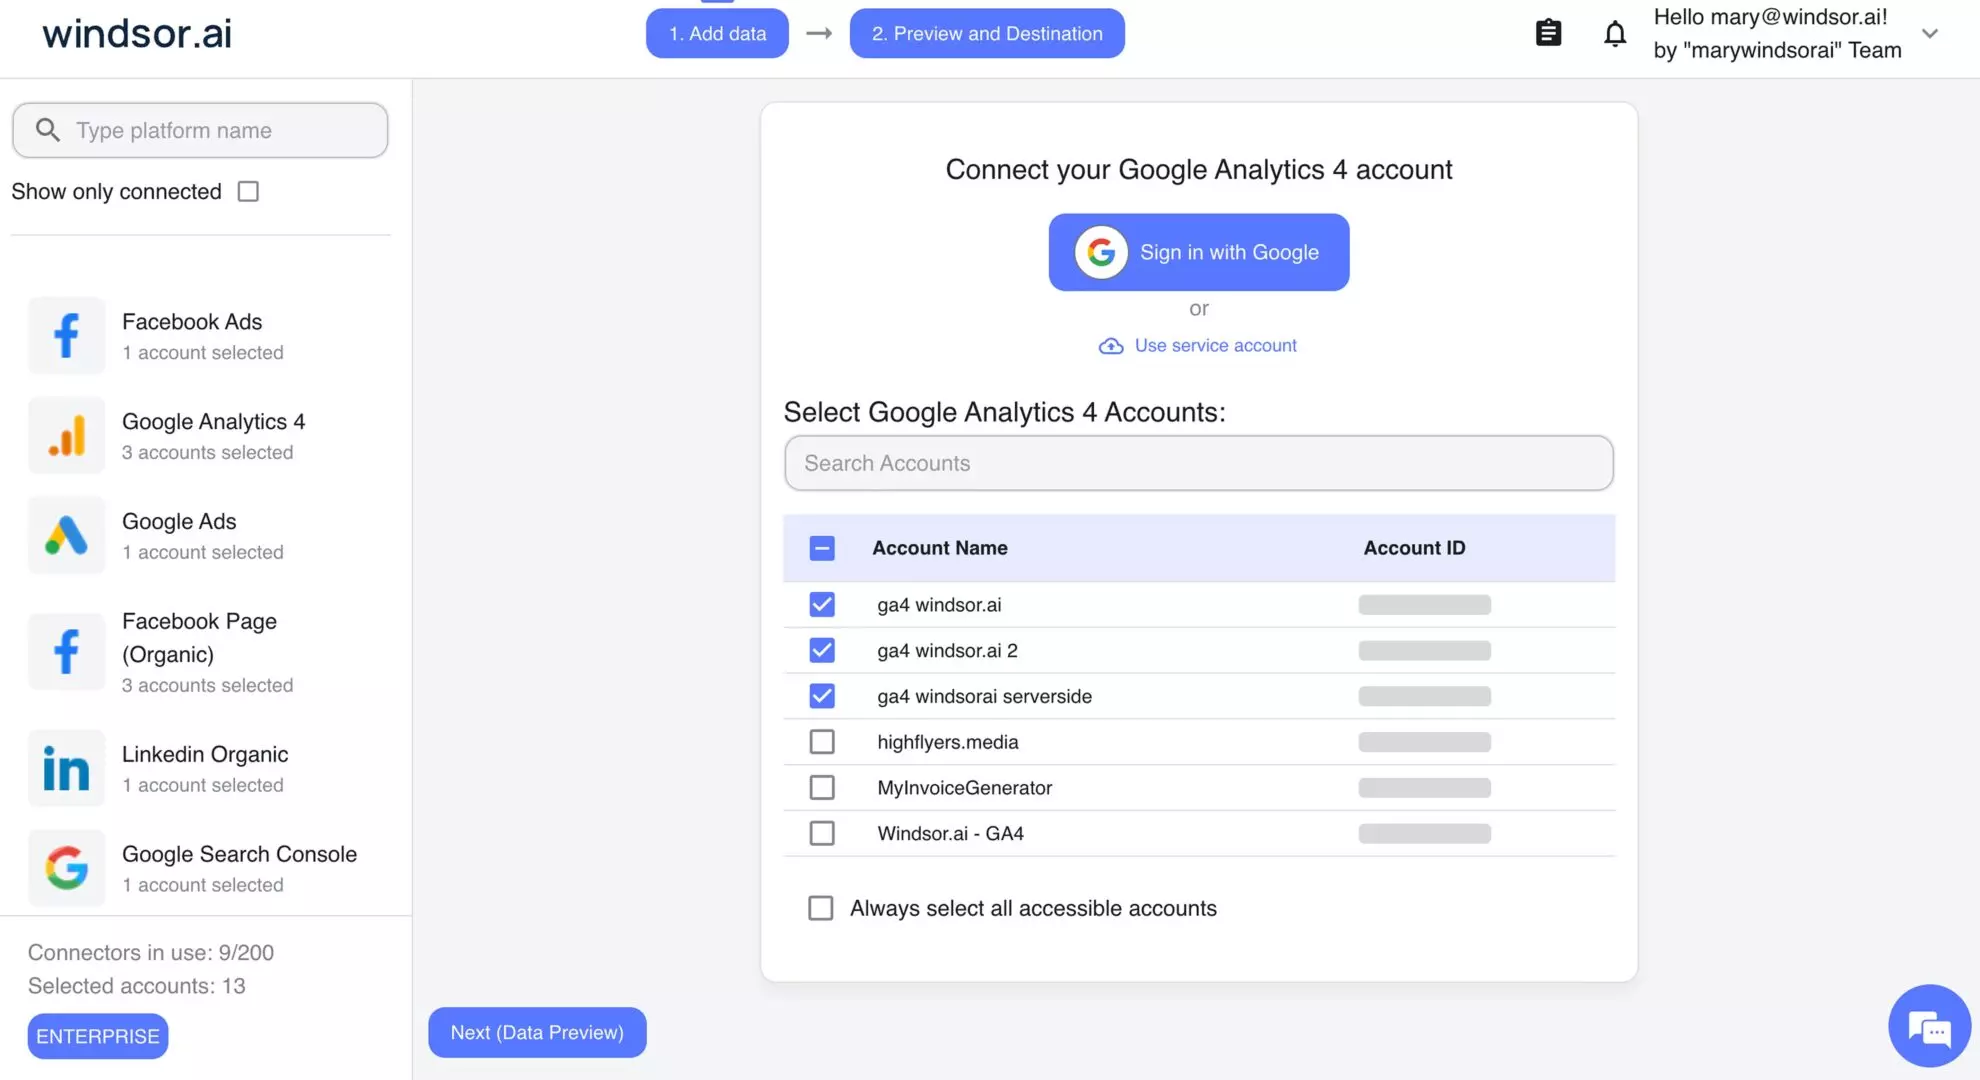
- Select Google Analytics 4 as your data source.

- Grant access to your Google account and select the GA4 property you want to connect.
Connect your cost data
Google Ads
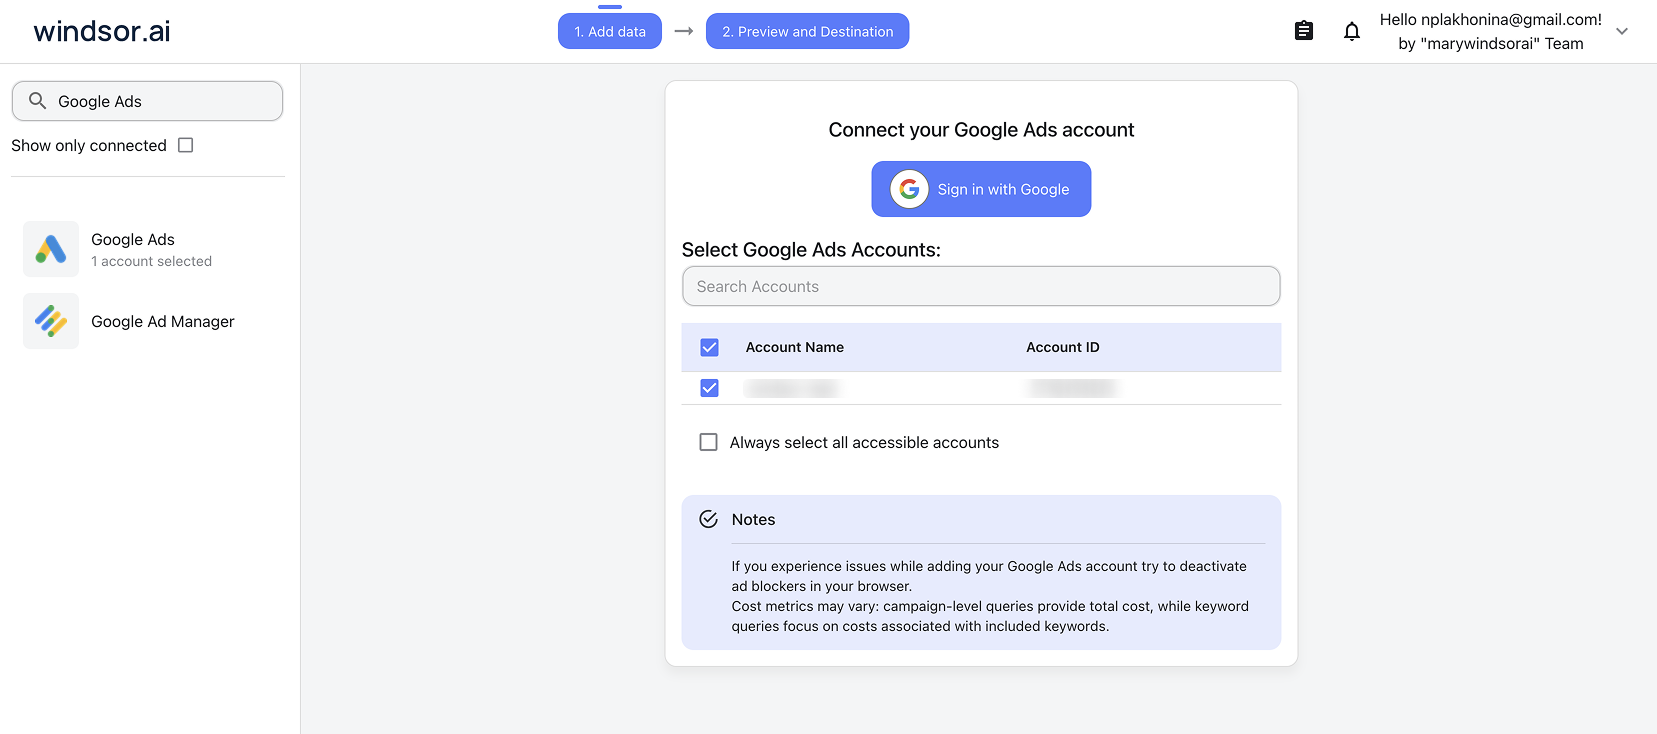
- Select Google Ads as a data source and authorize access to your account.
- Select the Google Ads account(s) you want to connect.
Facebook Ads
- Select Facebook Ads as a data source and authorize access via Facebook.
- Select the ad account(s) you want to connect.
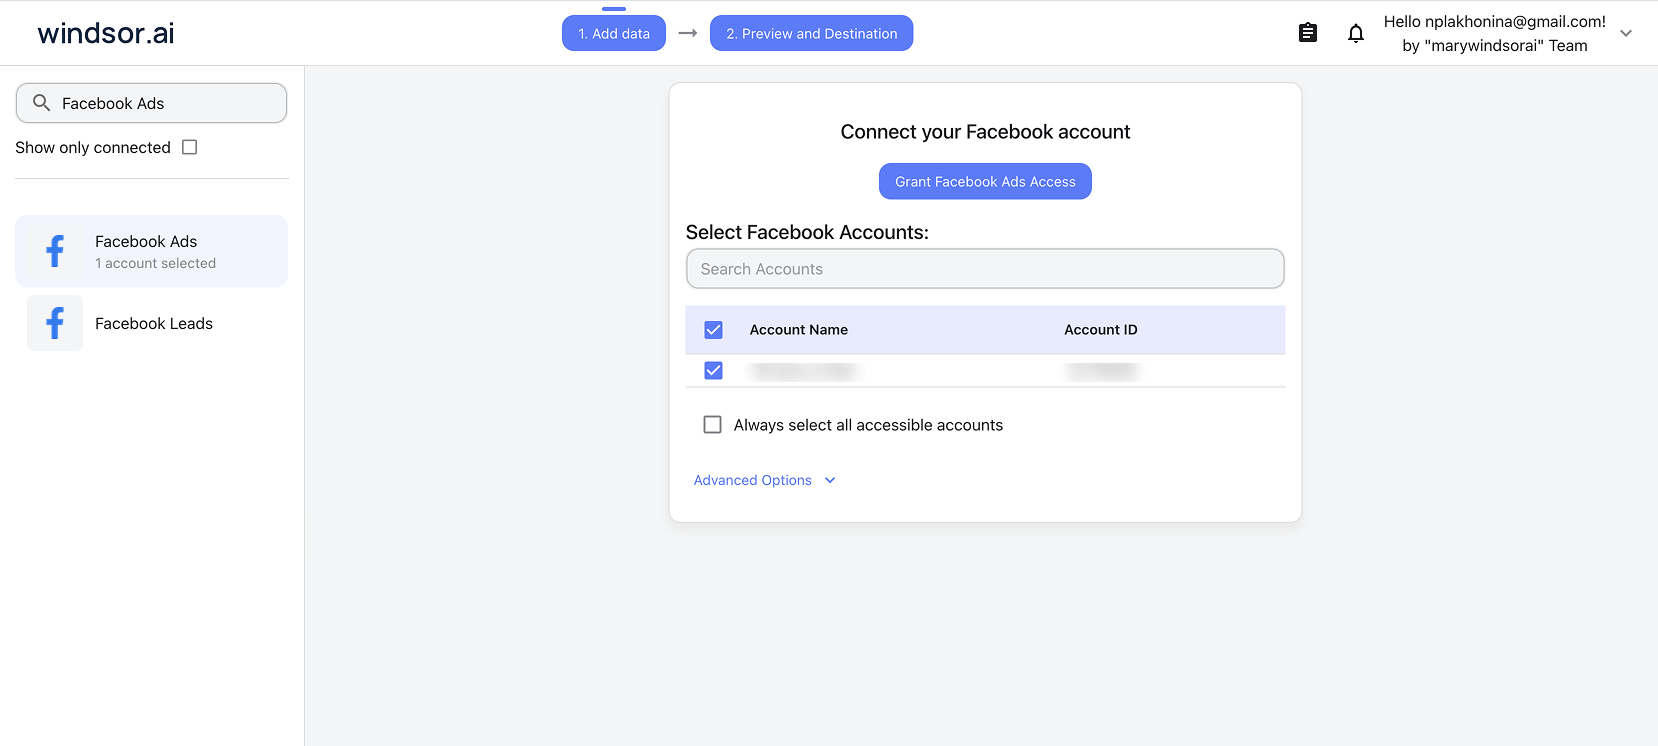
Repeat the same “select as data source, authorize, pick the account” pattern for any other platform you want to add. Windsor.ai supports 350+ sources this way, so the setup for a CRM, another ad platform, or a warehouse looks the same as the three above.
Pick the fields you need, then preview your blended data:
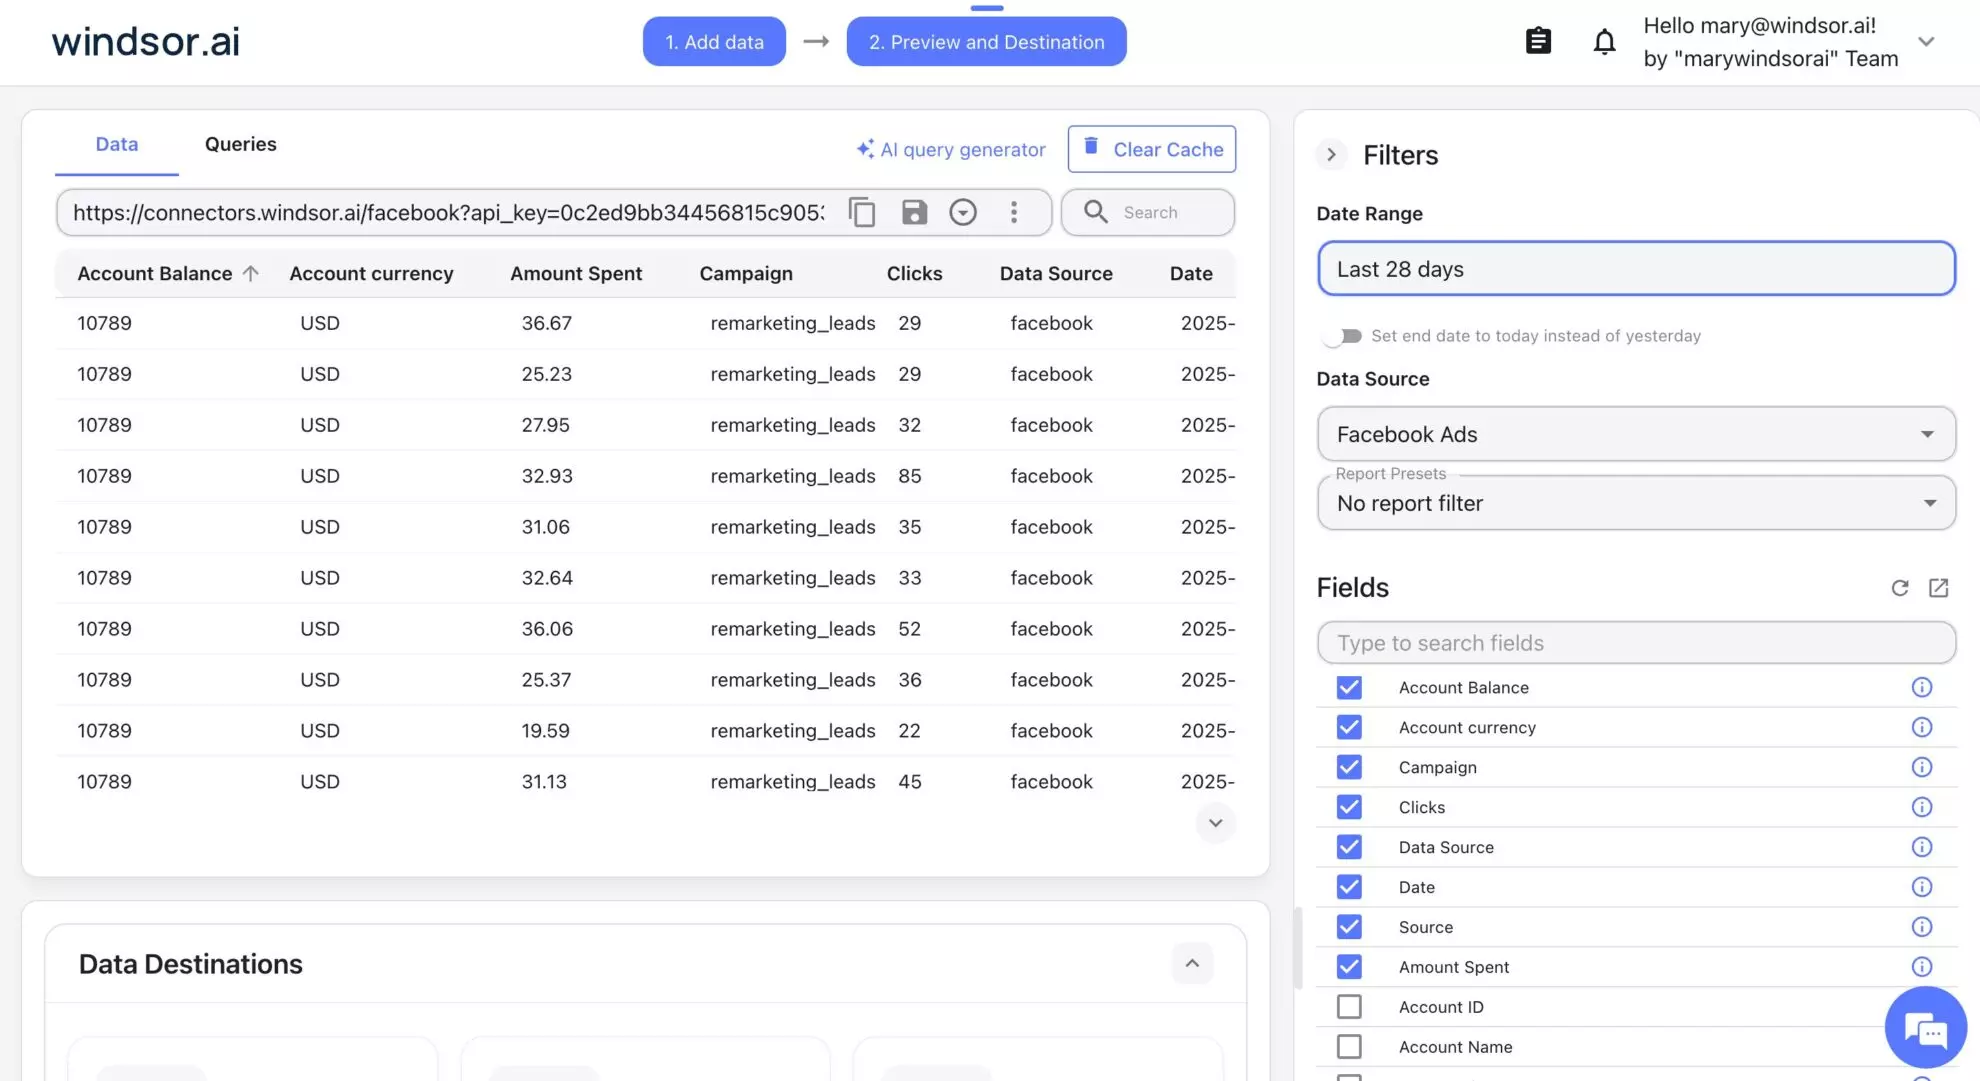
Choose a destination and use your data
Once your sources are connected, choose a destination for the blended data:
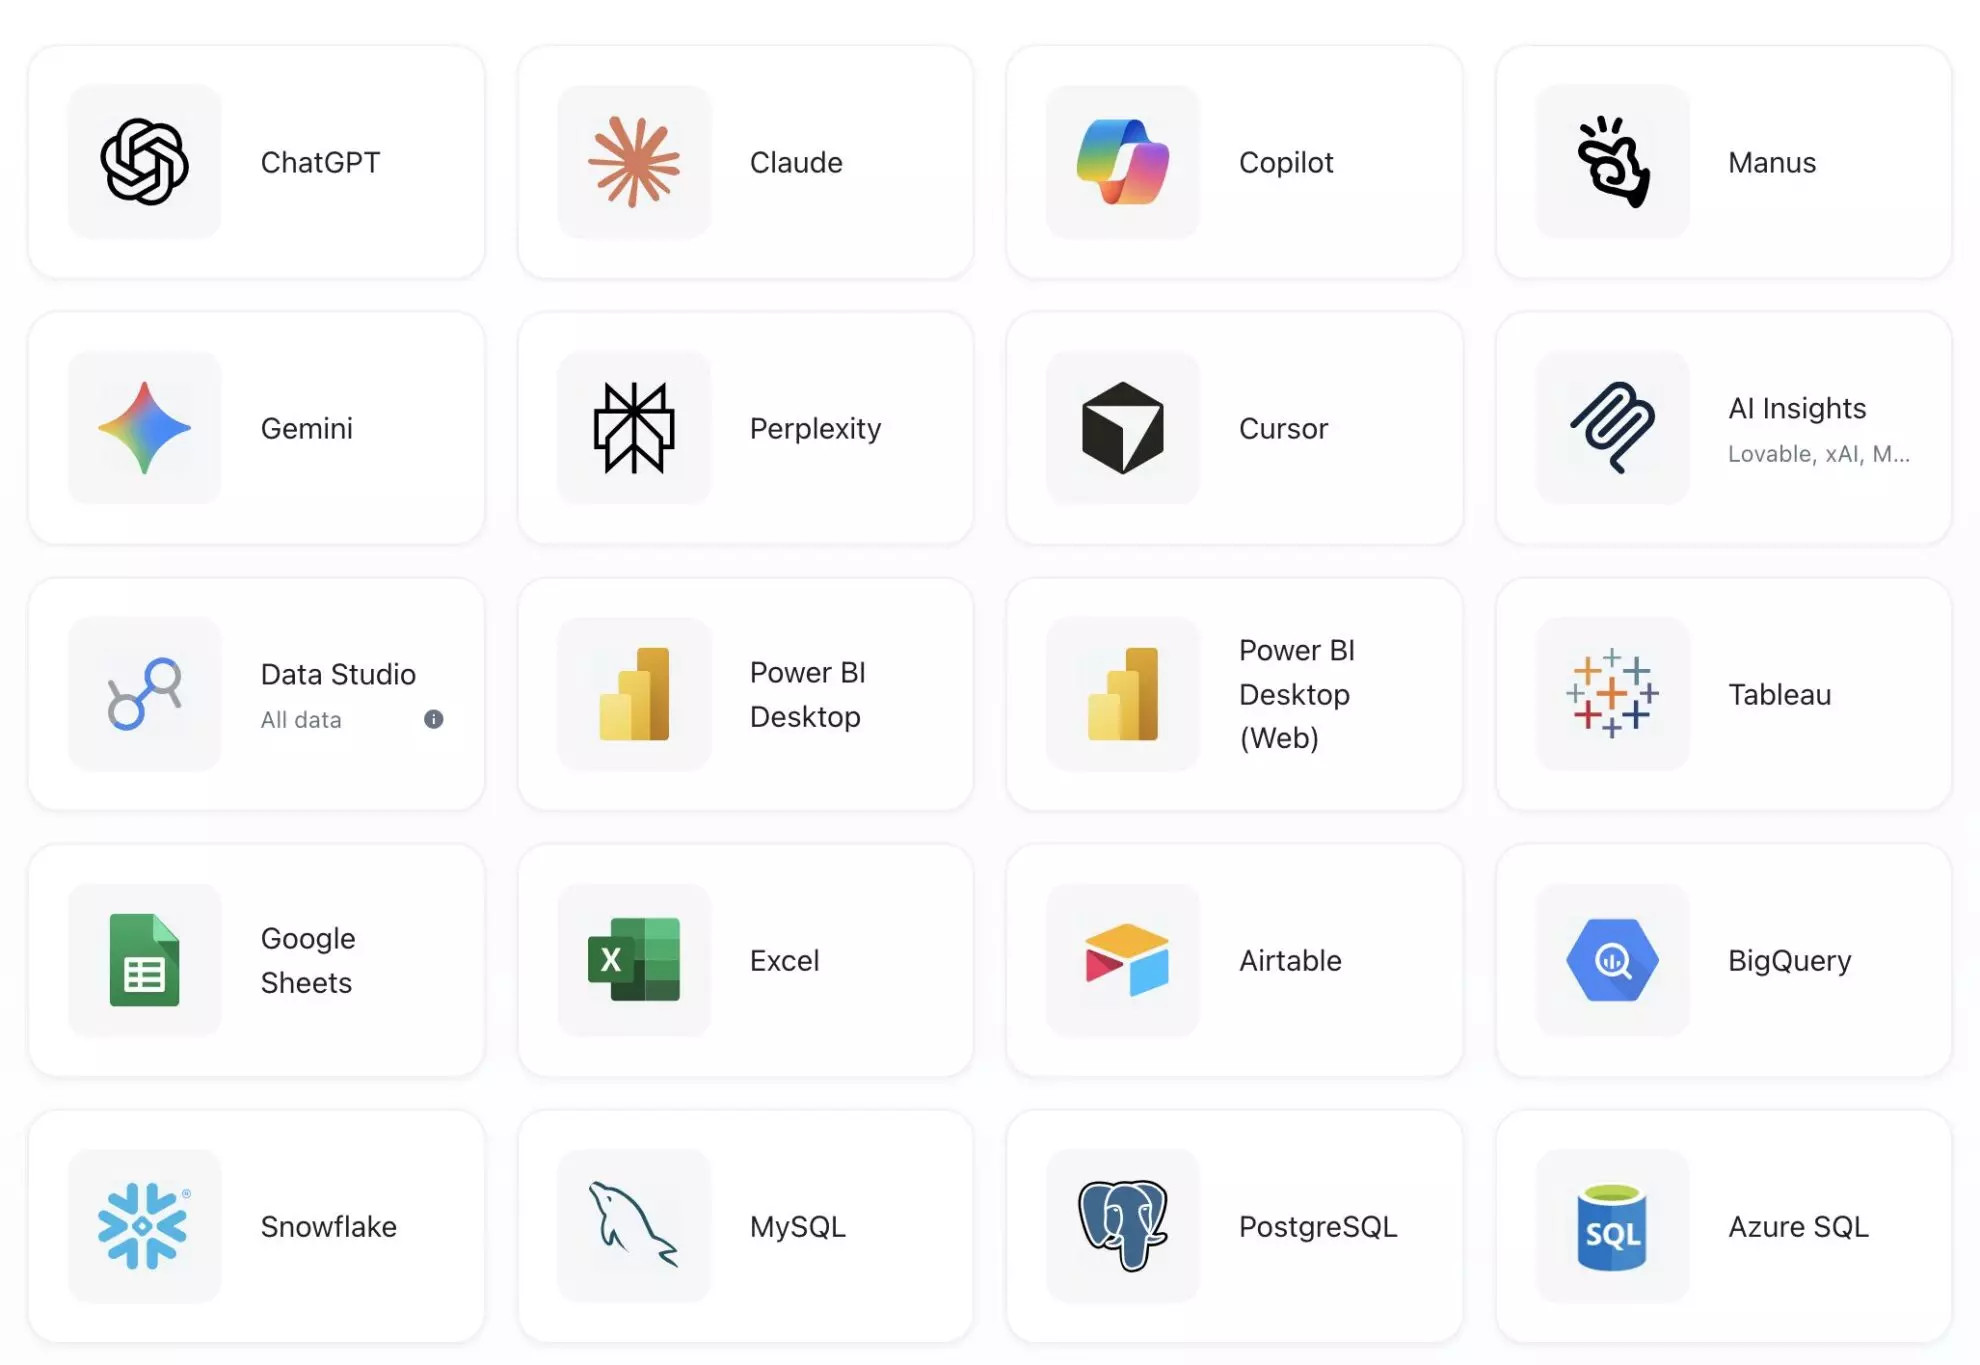
- A BI tool, spreadsheet, or warehouse. Looker Studio, Power BI, Google Sheets, BigQuery, and Snowflake are all supported destinations.
- An AI assistant. Add the Windsor.ai connector to Claude (or the native app in ChatGPT) and ask questions about your connected data directly in a chat, no dashboard-building required.
See the Windsor.ai overview guide for the full walkthrough of what’s possible once your data is connected, or the prompt library for ready-made questions to ask about your data.
If you haven’t already, get started for free. Free forever plan, no credit card.


