 AI insights
 About us
 Careers
 Security
 Customer reviews
 Contact us
 Affiliate program
 Solution partners
 Looker Studio templates
 Tableau templates
 Facebook Ads templates
 Google Ads templates
 Data fields & Metrics
 AI prompt library & Guides
 Product documentation
 API documentation
 Case studies
 Blog
Blog Data models
 Windsor vs Supermetrics
 Windsor vs Fivetran
 Windsor vs Portermetrics
 Last updated: 25 June 2026

This guide provides step-by-step instructions for creating and configuring a new app using the Shopify Dev Dashboard, required to integrate with Windsor.ai for data streaming.
How to set up a Shopify app for Windsor.ai integration
Step 1. Creating and configuring a new Shopify app
📝 Check the official Shopify instructions: Create Apps Using the Dev Dashboard.
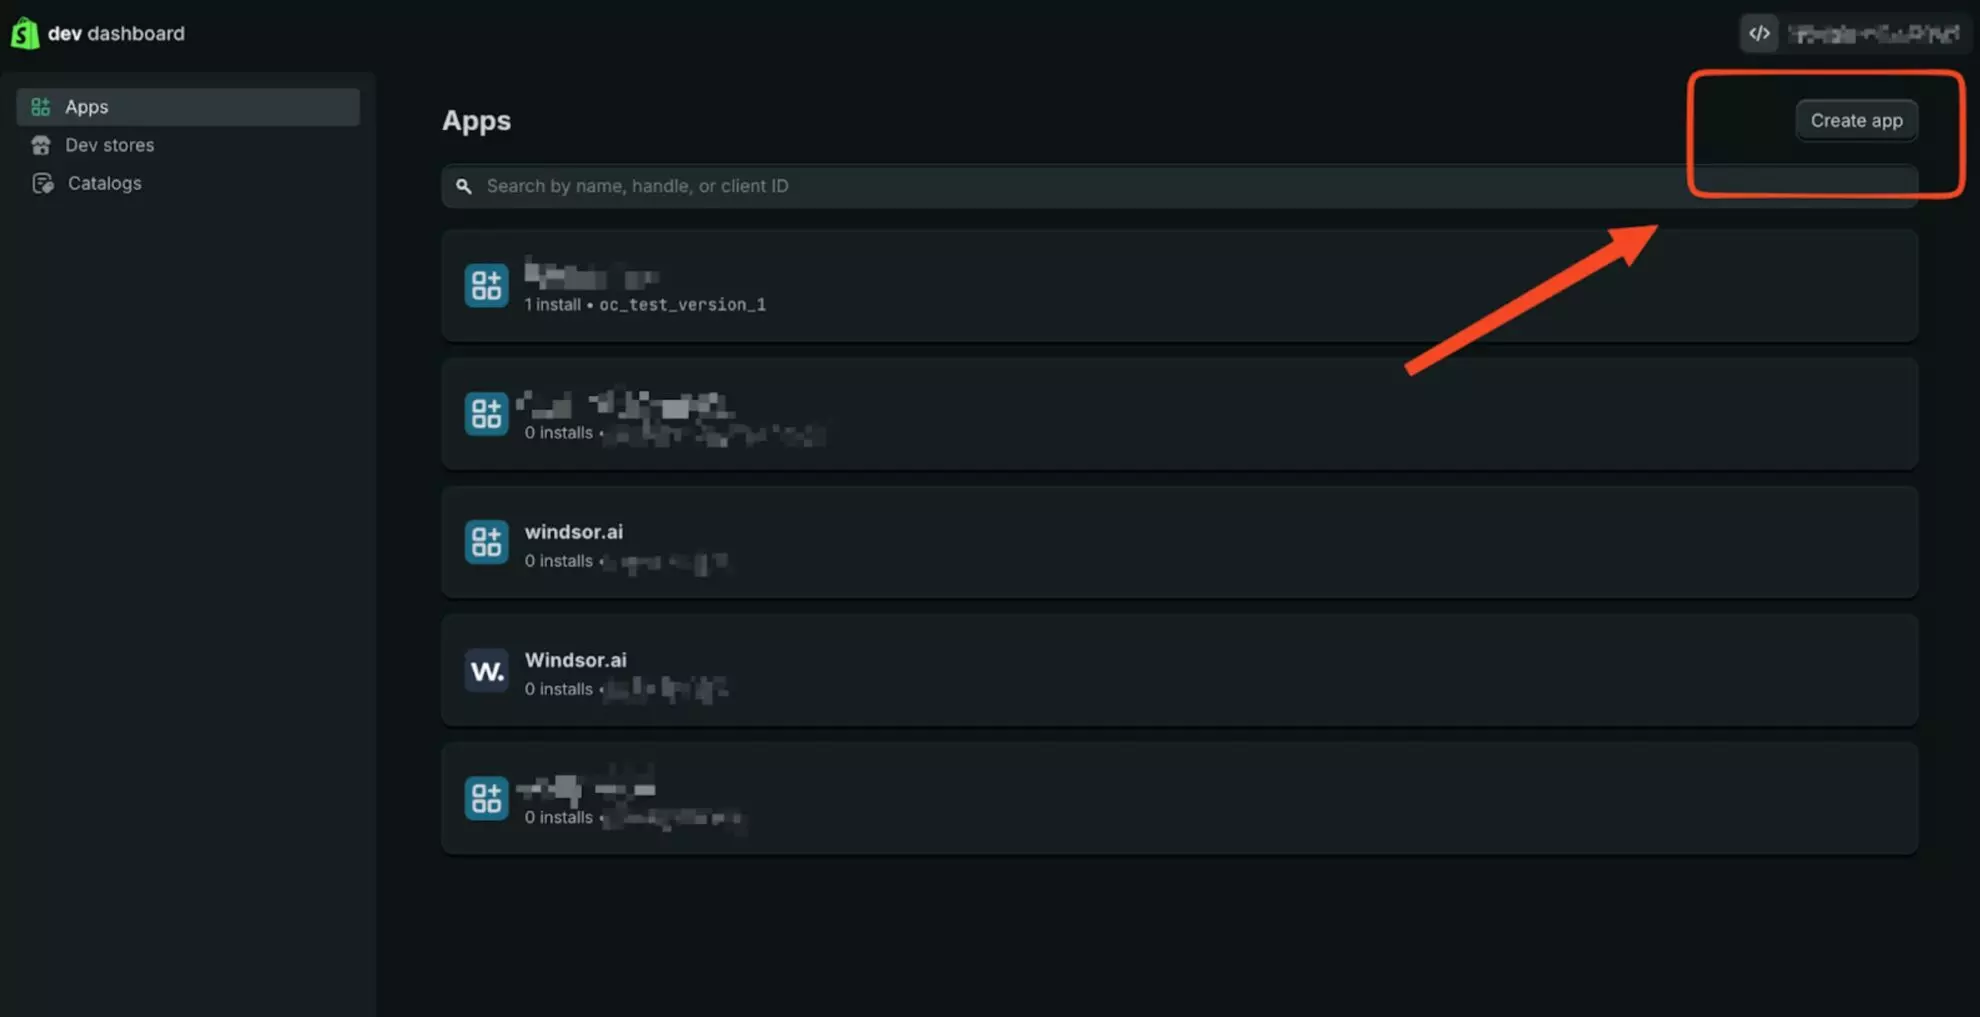
1. Go to https://dev.shopify.com/dashboard/ and click “Create App.”
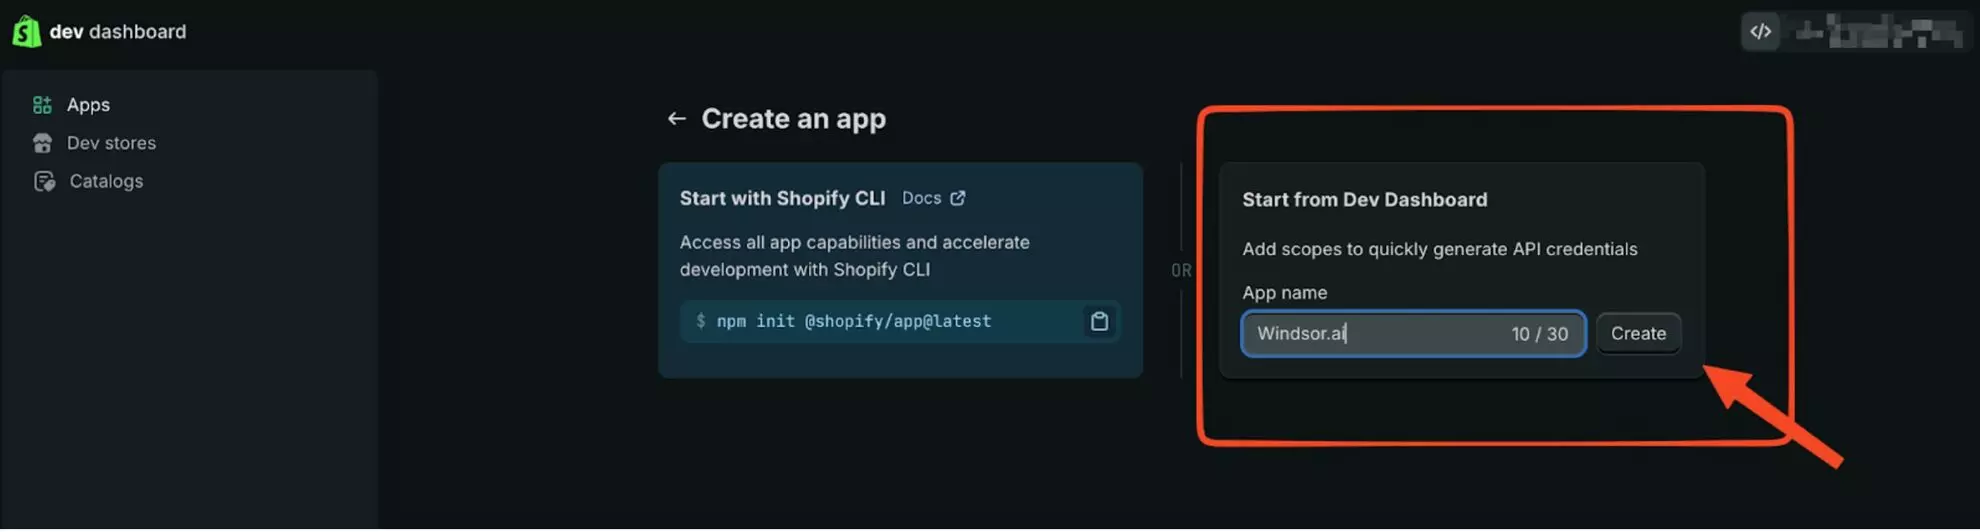
2. Enter an app name, f.e, Windsor.ai, and click “Create.”
3. Specify the App URL:
https://onboard.windsor.ai
And make sure to use all the required scopes:
read_customers,read_inventory,read_marketing_events,read_orders,read_products,read_returns,read_all_orders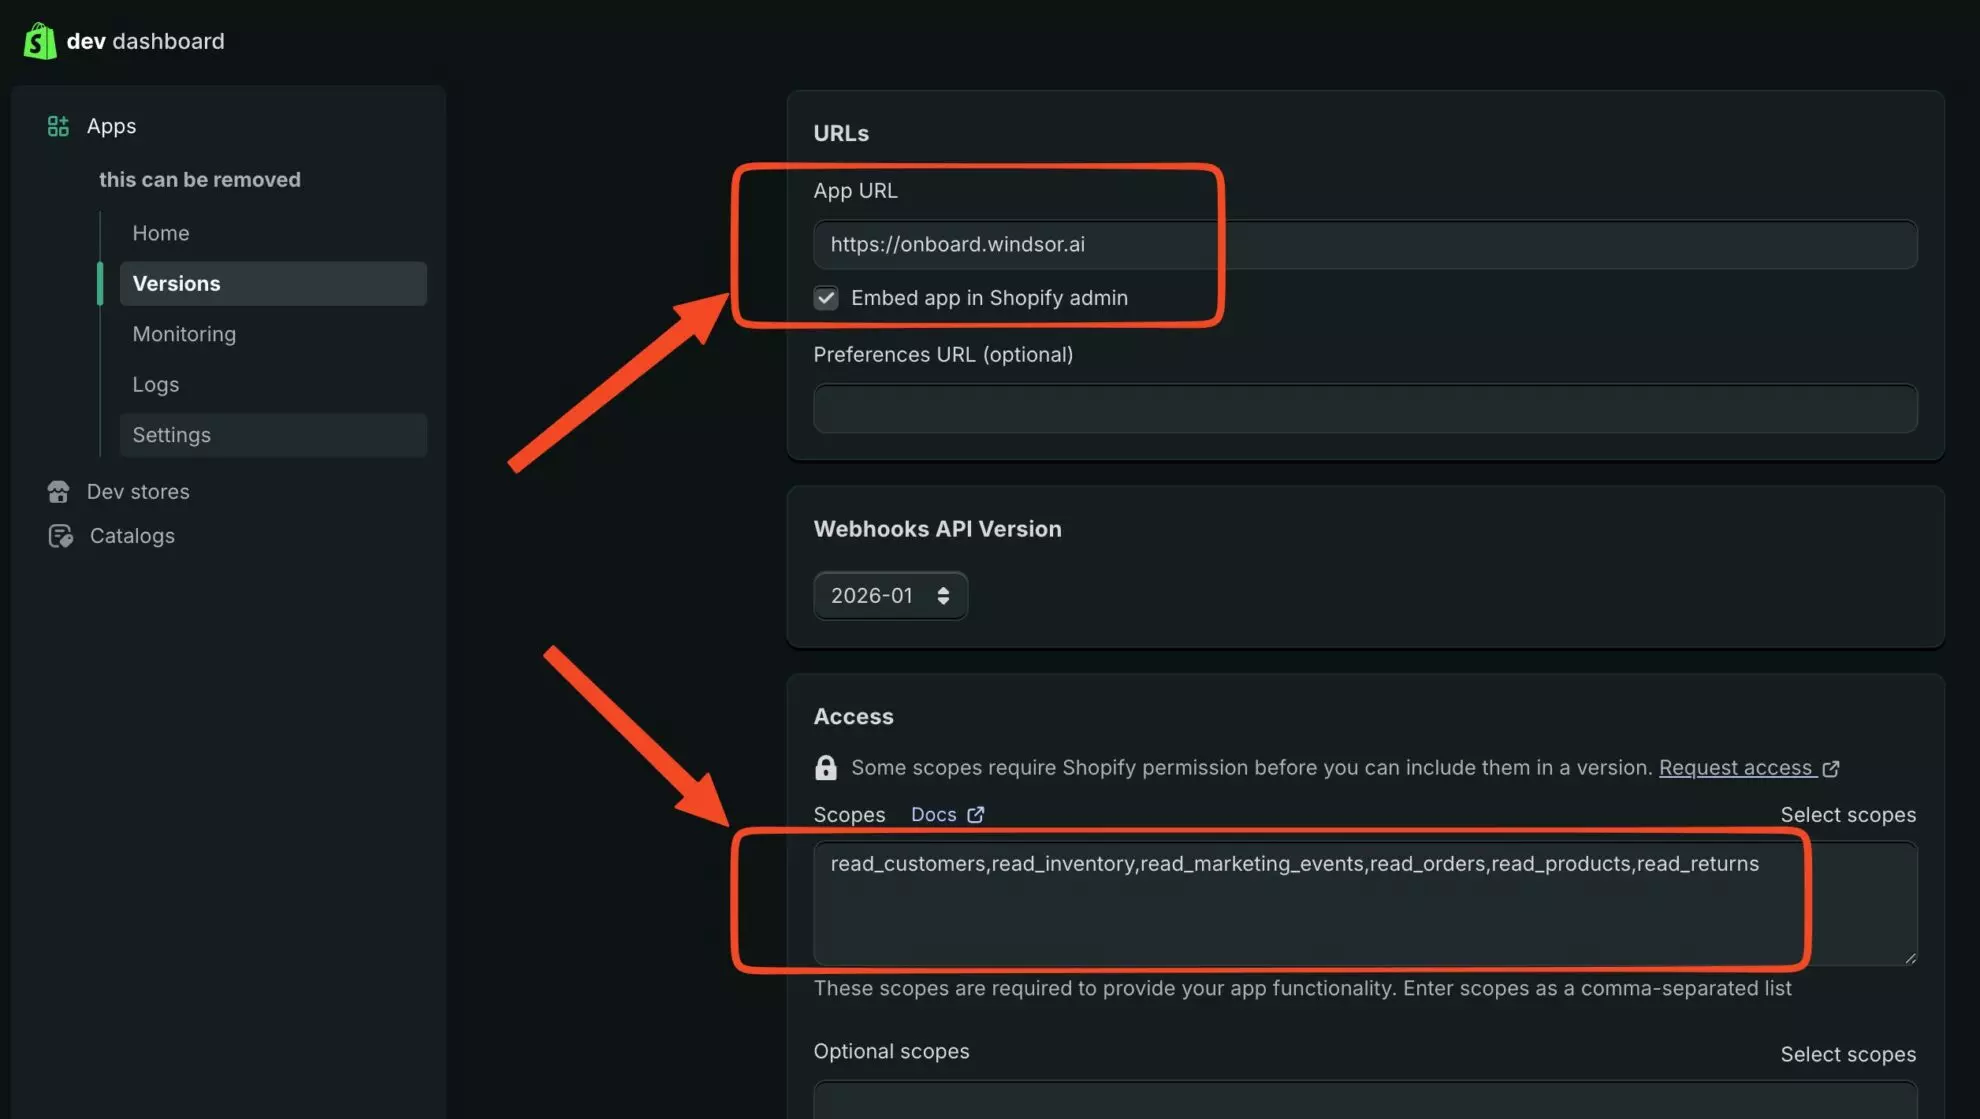
Note: If you connect your Shopify account to Windsor before getting access to
read_all_ordersscope, you will not see data older than 60 days.The
read_all_ordersscope requires an explicit request to Shopify. Details on how to add it.
To request the read_all_orders scope from Shopify, click on the “Request access” button above the scopes field. You’ll be redirected to the API access requests page. Here, in the “Read all orders” section, click on “Request access” again. In the explanatory field about why your app requires access to old orders, you can write “Read historical orders data.” You can go back to the API access requests page to verify that Shopify has provided you with this access. Now, return to the “Versions” screen where you’ve entered the scopes and add the read_all_orders scope. If Shopify shows an error after saving, refresh the page. Click ‘Select scopes,’ and manually add “read_all_orders” next to the other scopes.
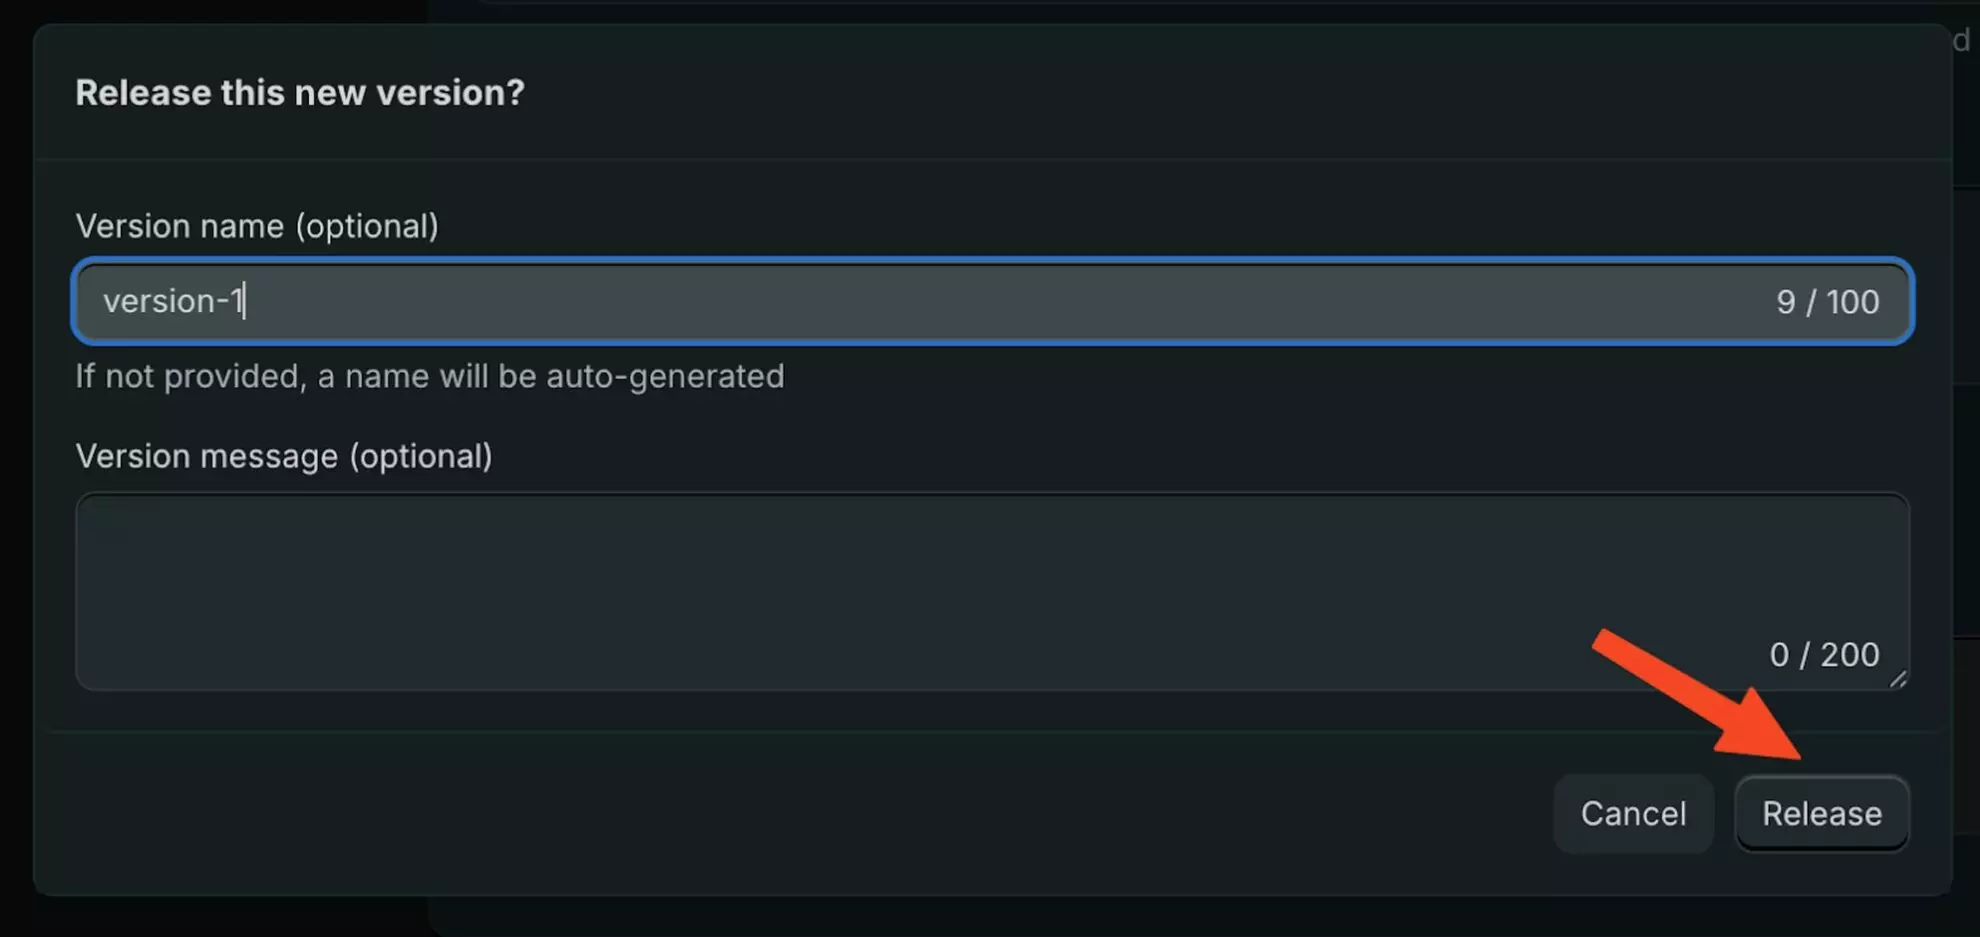
After specifying all the required scopes, click “Release.”
4. Click “Release again” to confirm the action (you can optionally write down a version name and message).
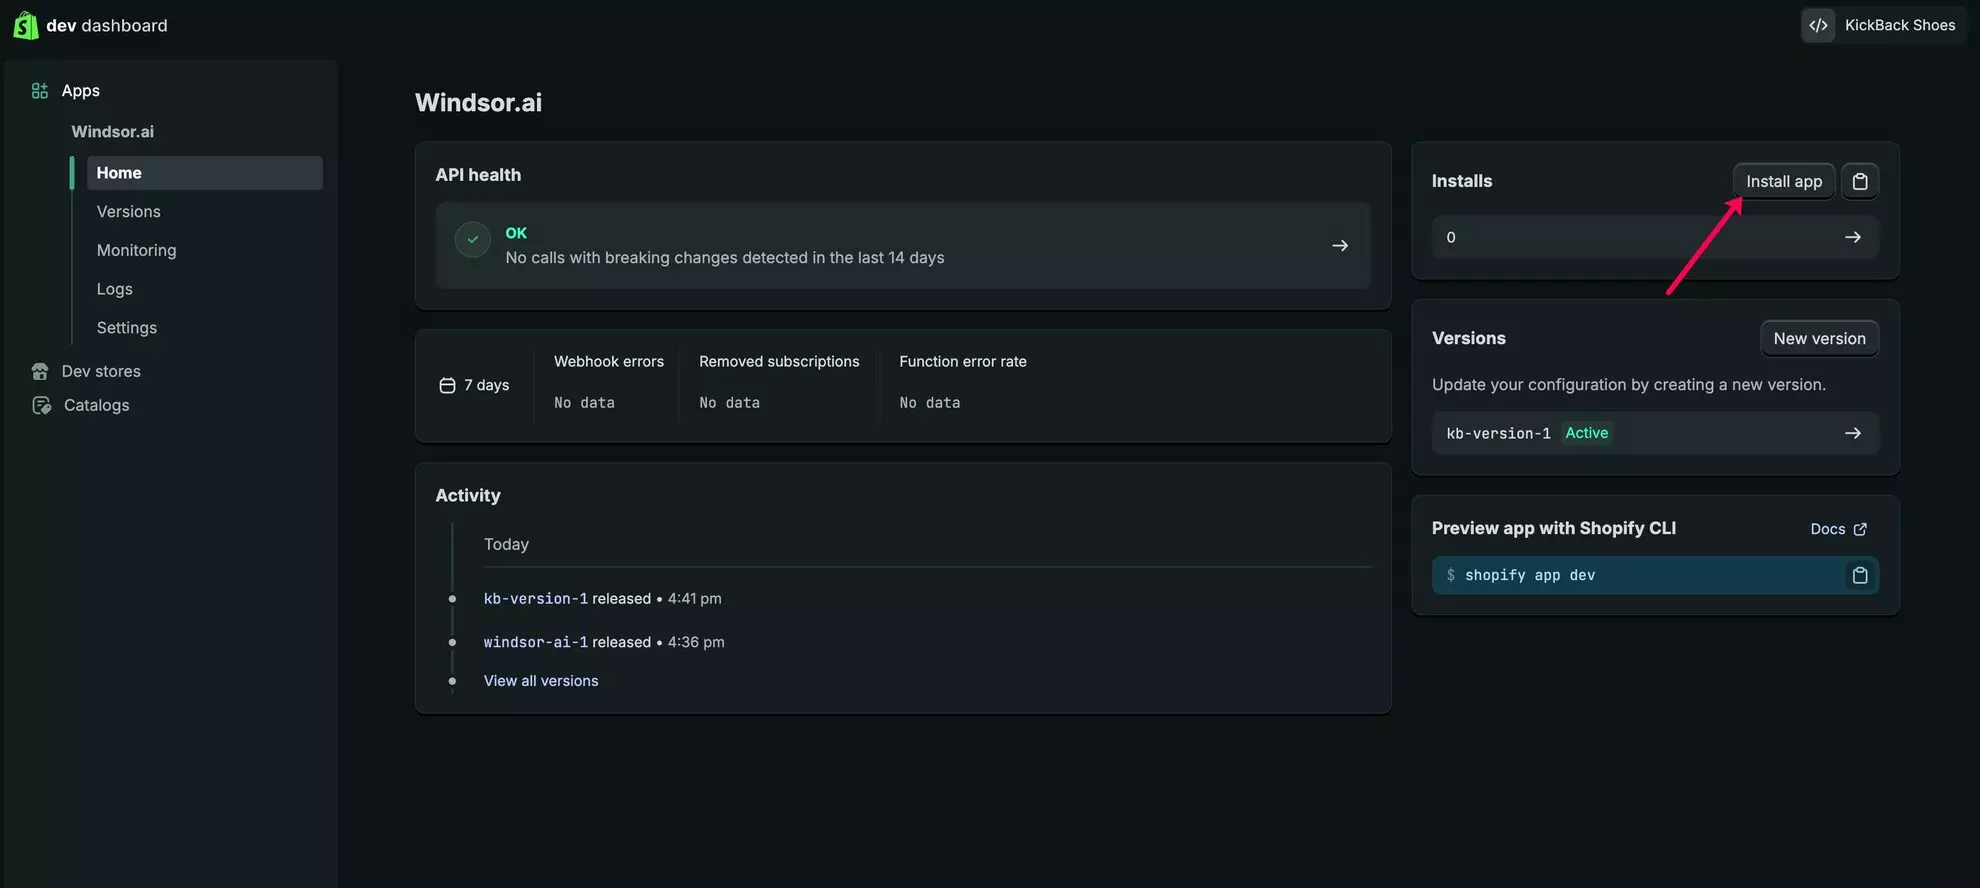
5. Go to Home in Dev Dashboard at https://dev.shopify.com/dashboard/and click “Install App.”
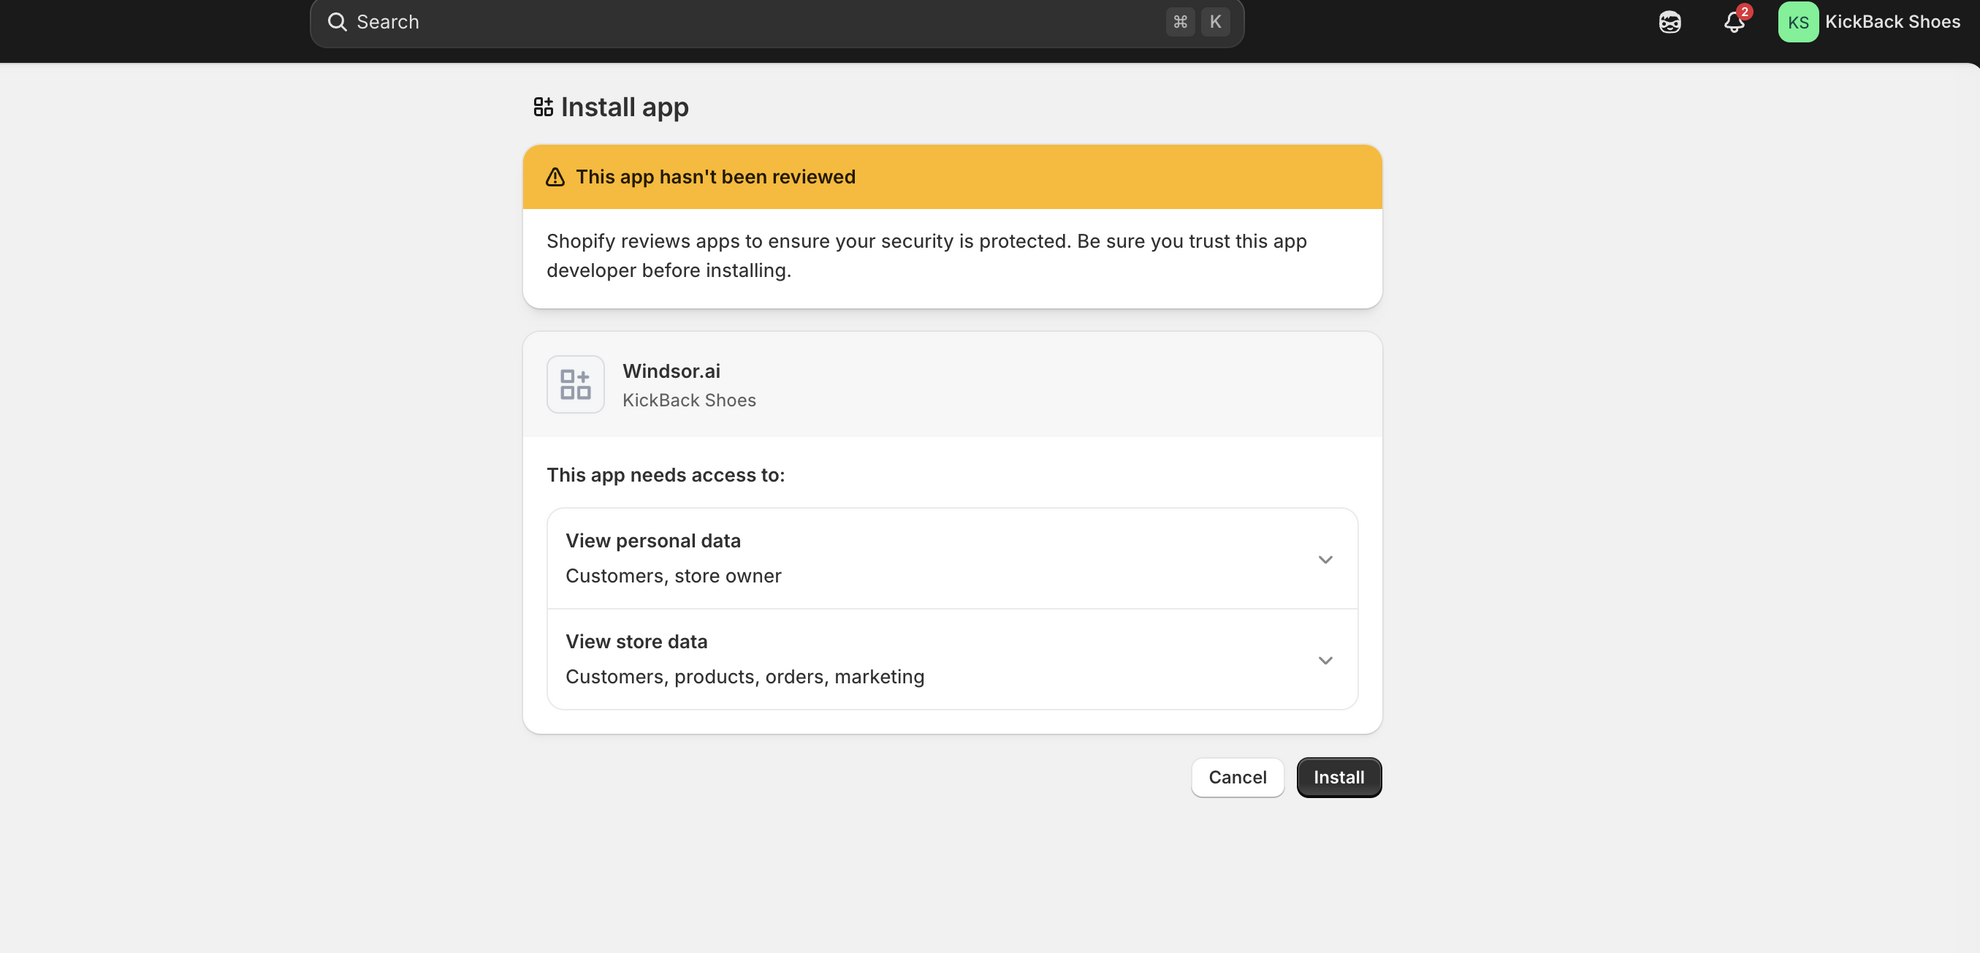
6. Read the requirements and click “Install.”
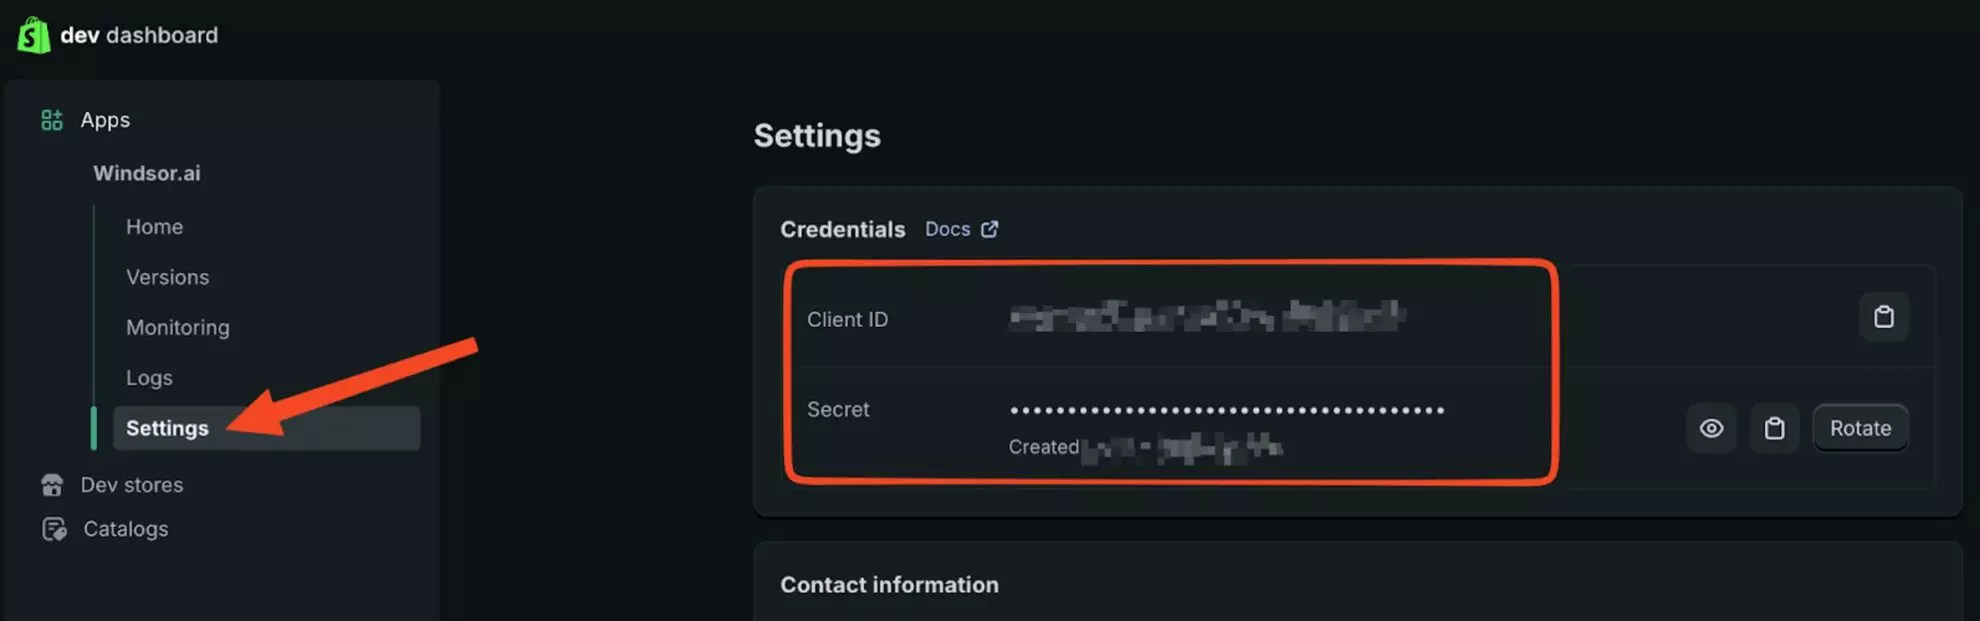
7. Once the app is installed, go to the Settings in the Dev Dashboard and locate the Client ID and Client Secret in Settings.
Step 2. Connecting your Shopify store to Windsor.ai
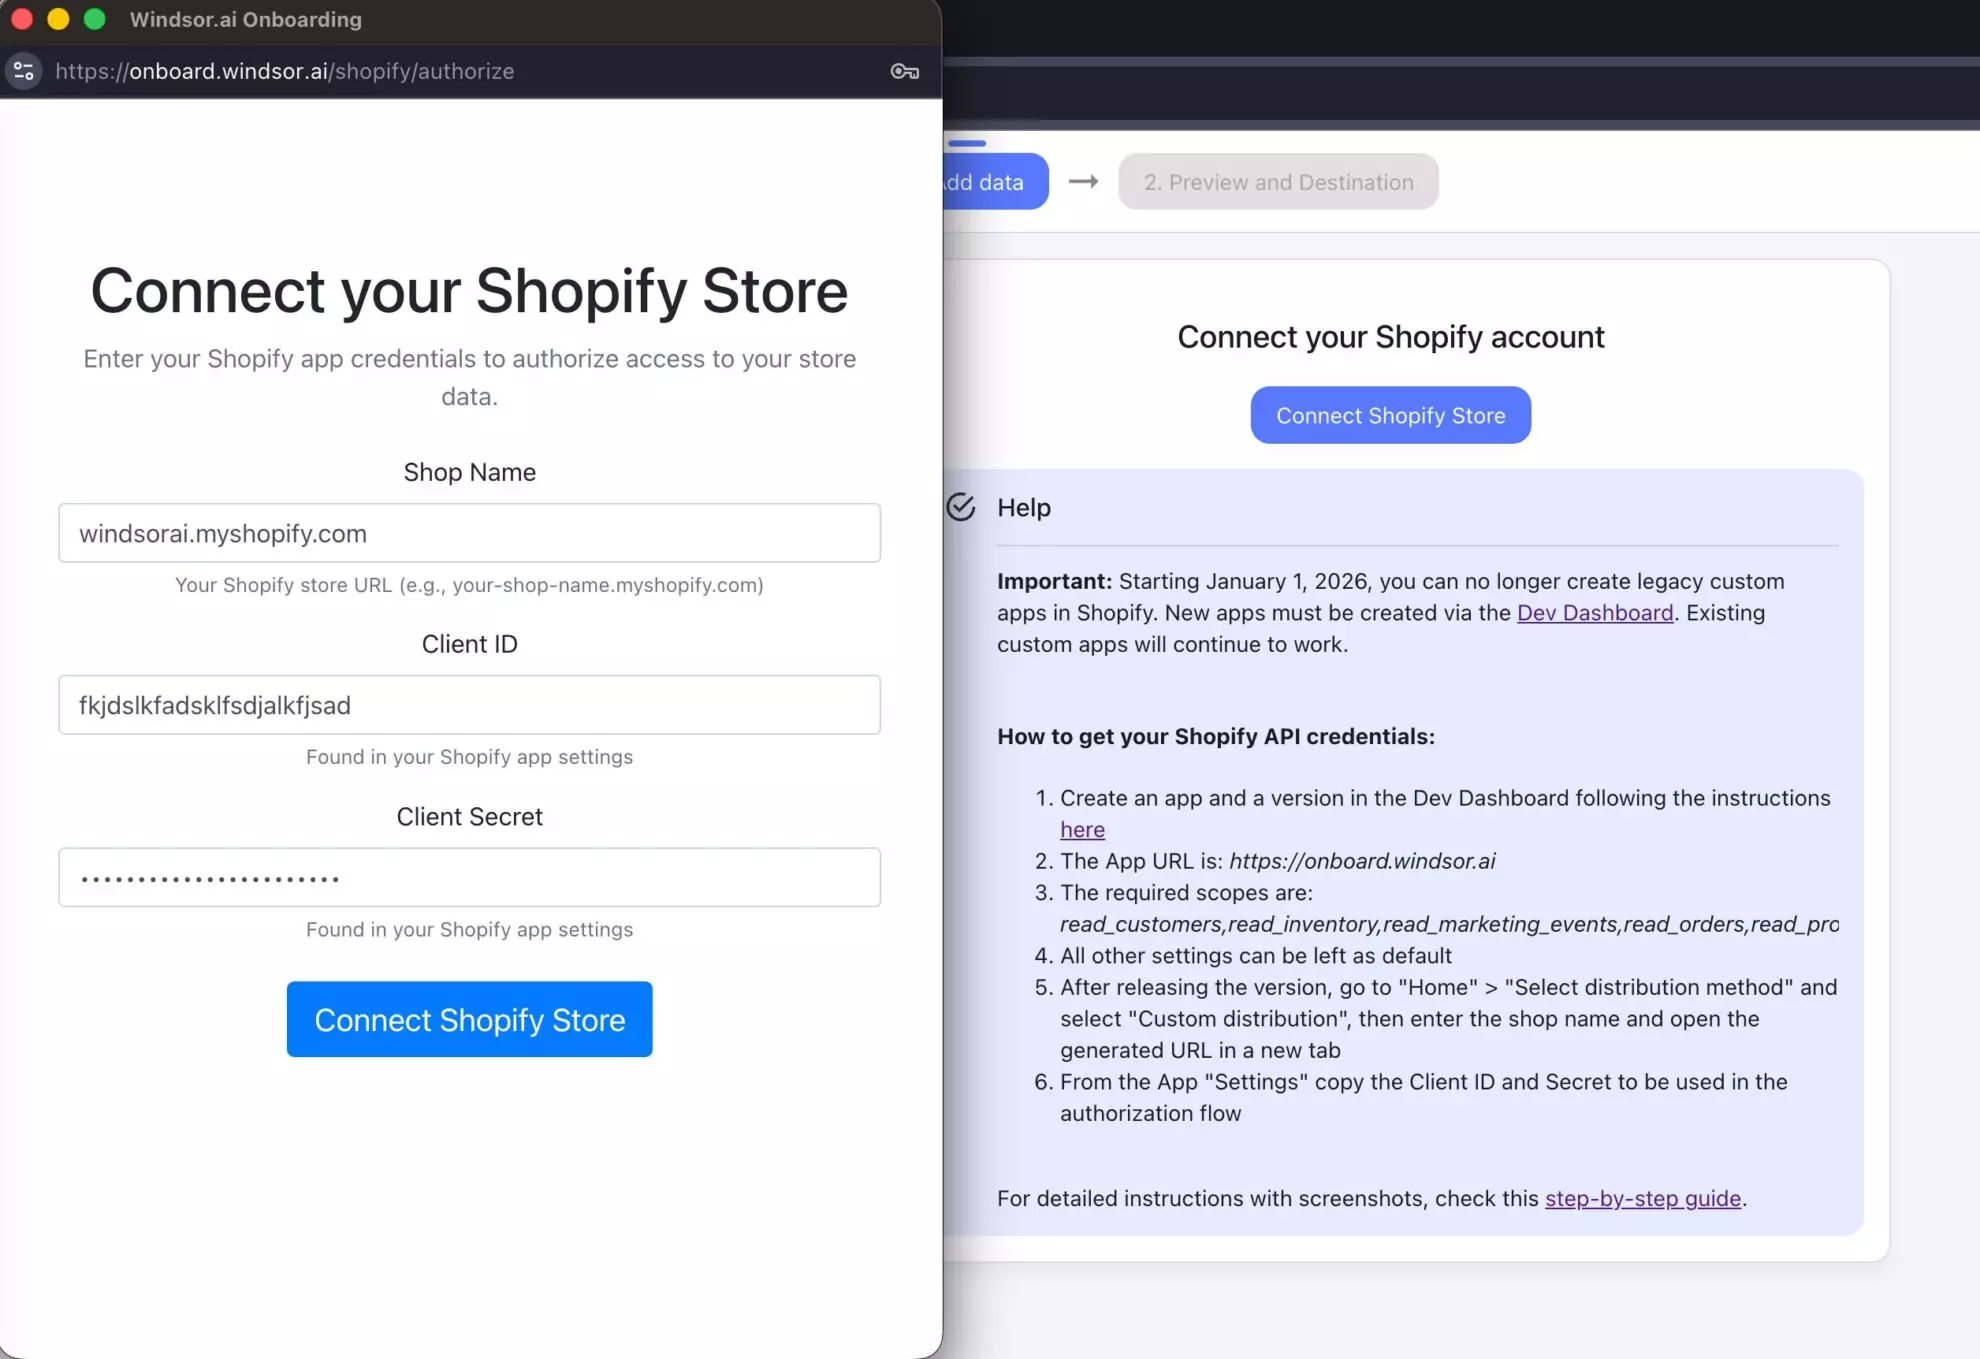
1. Go to the Windsor.ai app. Select the Shopify data source and click ‘Connect Shopify Store.’ In the form that appears, enter your shop name, Client ID, and Client Secret to connect your store.
2. Now you can preview your Shopify data and sent into any of our supported destinations.
That’s the end of this guide, and we hope you enjoy working with our connector.
Should you encounter any issues, please contact us via chat. We’re here and happy to help 👋!

