How to integrate your CRM lead forms with Windsor.ai

When and why the lead forms integration is needed
A lead form is a form that allows a customer to provide his/her contact information to the advertiser. The form contains a few fields that are filled in by the customer, and a button to apply for a product/service, book a follow-up call/email, get a price quote, download a newsletter etc. Data from forms are collected and handled by Customer Relationship Management (CRM) platforms such as Salesforce, Hubspot, Marketo, Pardot, Active Campaign, Microsoft Dynamics, Pipedrive,…

From the attribution modeling perspective, lead forms represent conversions that are deferred in time. The value of the conversion becomes known not when a potential customer clicks on a lead form submission button but later on when he/she becomes (or does not become) an actual client of the advertiser.
Integration process
The task is to link data on customer journey provided by Google Analytics with data on conversion value from a CRM. It can be completed in the following way:
- Create a unique identifier (customer journey ID) for each lead form submission.
- Push the identifier to Google Analytics.
- Create a field in the CRM to store the identifier, add it to the lead form as a hidden field.
- Send it to the CRM (along with lead forms data).
- Get the identifier from Google Analytics to store in conversions data.
- Get a conversion value from the CRM for the ID (when available).
- Insert the value into the conversions data, and recalculate attributions.
Steps 1-3 require inserting JavaScript code onto the web page that contains a lead form. For step 2, Google Analytics and Google Tag Manager have to be configured.
Changes necessary on Web Site
1. Create a Journey ID
<html>
<head>
<!-- Generate unique journey ID every time the page is loaded -->
<!-- The snippet should be placed at the head section of the page -->
<!-- It can be loaded from a file saved on the advertiser's web site -->
<script type="text/javascript">
const lut = Array(256).fill().map((_, i) => (i < 16 ? '0' : '') + (i).toString(16));
const formatUuid = ({d0, d1, d2, d3}) =>
lut[d0 & 0xff] + lut[d0 >> 8 & 0xff] + lut[d0 >> 16 & 0xff] + lut[d0 >> 24 & 0xff] + '-' +
lut[d1 & 0xff] + lut[d1 >> 8 & 0xff] + '-' +
lut[d1 >> 16 & 0x0f | 0x40] + lut[d1 >> 24 & 0xff] + '-' +
lut[d2 & 0x3f | 0x80] + lut[d2 >> 8 & 0xff] + '-' +
lut[d2 >> 16 & 0xff] + lut[d2 >> 24 & 0xff] +
lut[d3 & 0xff] + lut[d3 >> 8 & 0xff] +
lut[d3 >> 16 & 0xff] + lut[d3 >> 24 & 0xff];
const getRandomValuesFunc = window.crypto && window.crypto.getRandomValues ?
() => {
const dvals = new Uint32Array(4);
window.crypto.getRandomValues(dvals);
return {
d0: dvals[0],
d1: dvals[1],
d2: dvals[2],
d3: dvals[3],
};
} :
() => ({
d0: Math.random() * 0x100000000 >>> 0,
d1: Math.random() * 0x100000000 >>> 0,
d2: Math.random() * 0x100000000 >>> 0,
d3: Math.random() * 0x100000000 >>> 0,
});
// new customer journey id
const nc_jid = formatUuid(getRandomValuesFunc());
</script>
</head>
</html>
Push the journey ID to Google Analytics
<html>
<head>
<!-- Push the journey ID to the GTM data layer -->
<!-- The snippet should be placed ABOVE the GTM code -->
<script>
window.dataLayer = window.dataLayer || []
dataLayer.push({
'transactionId': nc_jid,
'transactionTotal': 1
});
</script>
<!-- Google Tag Manager -->
<!-- End Google Tag Manager -->
</head>
</html>
Pass Journey ID to the CRM
3a. Insert journey ID to a lead form as a hidden field: Salesforce lead form
<html>
<body>
<!-- Insert the journey ID into the Salesforce form -->
<!-- The snippet should be placed below the form -->
<!-- HIDDEN_FIELD_ID has to be defined in the CRM -->
<script>
document.getElementById("HIDDEN_FIELD_ID").value = nc_jid;
</script>
</body>
</html>
Changes necessary on Google Analytics
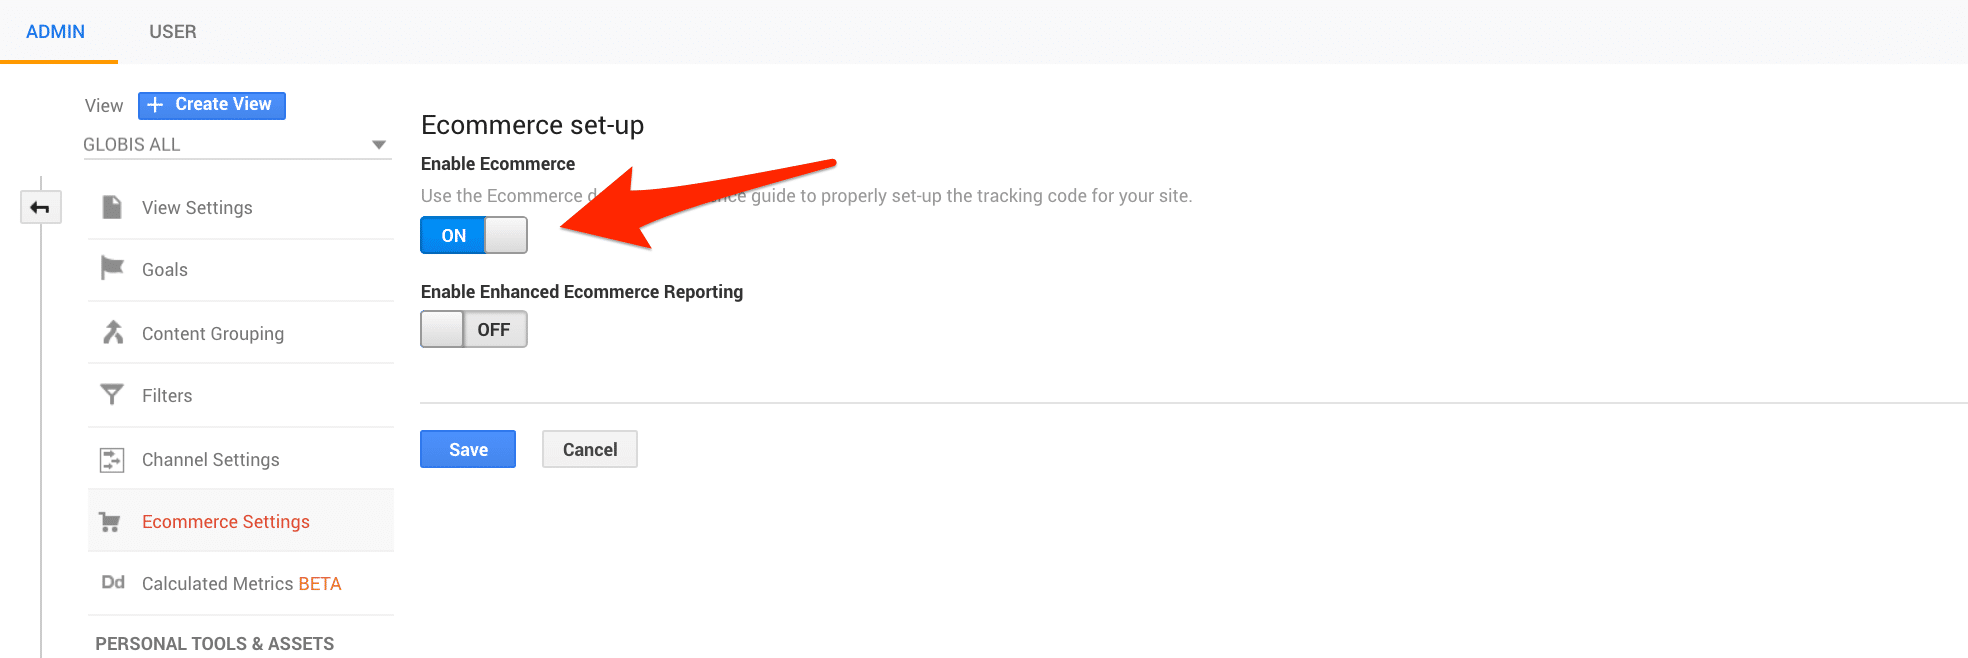
Enable Ecommerce
Changes necessary on Google Tag Manager
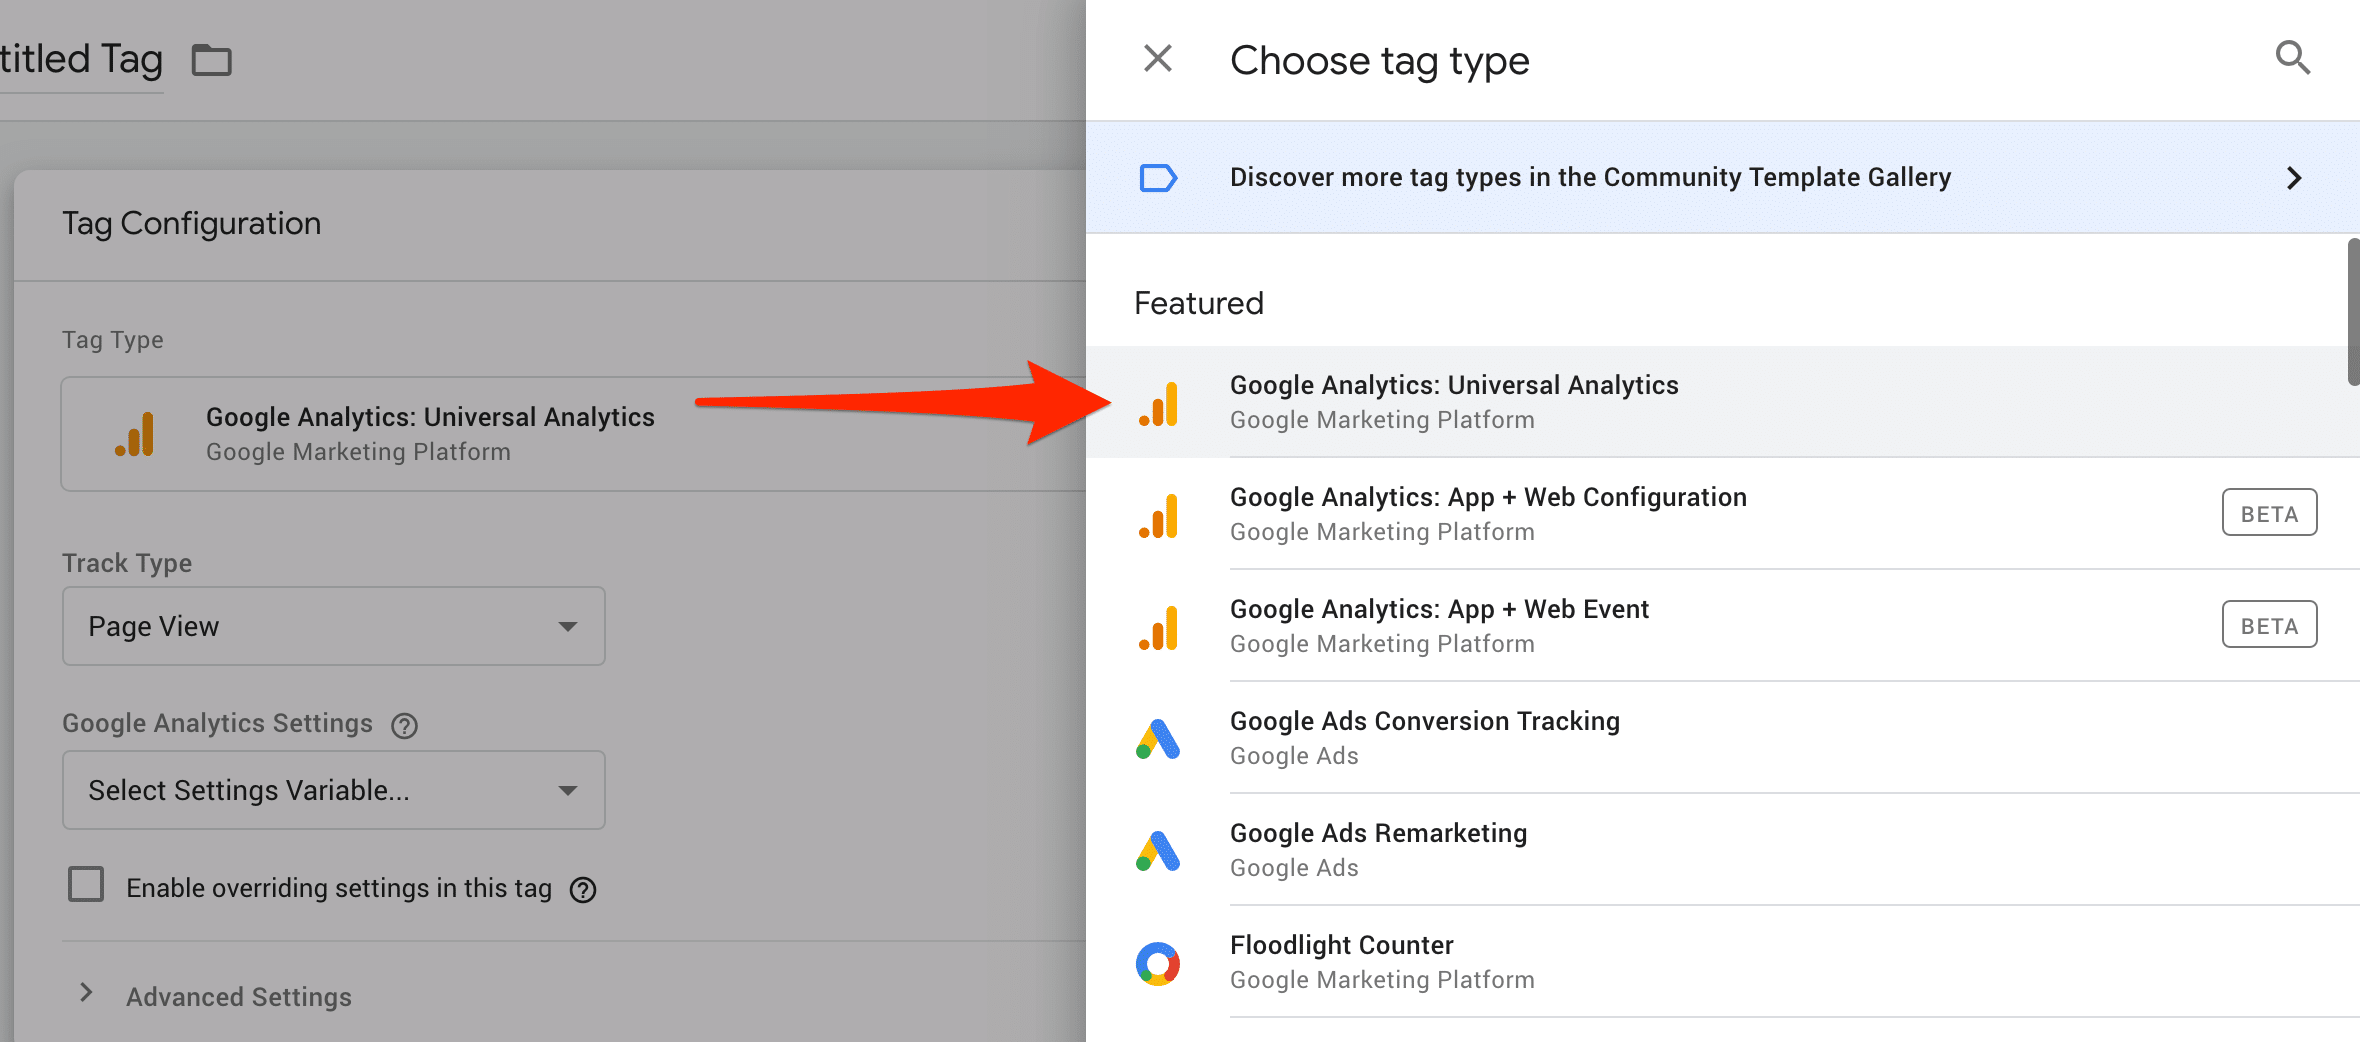
Create a new tag

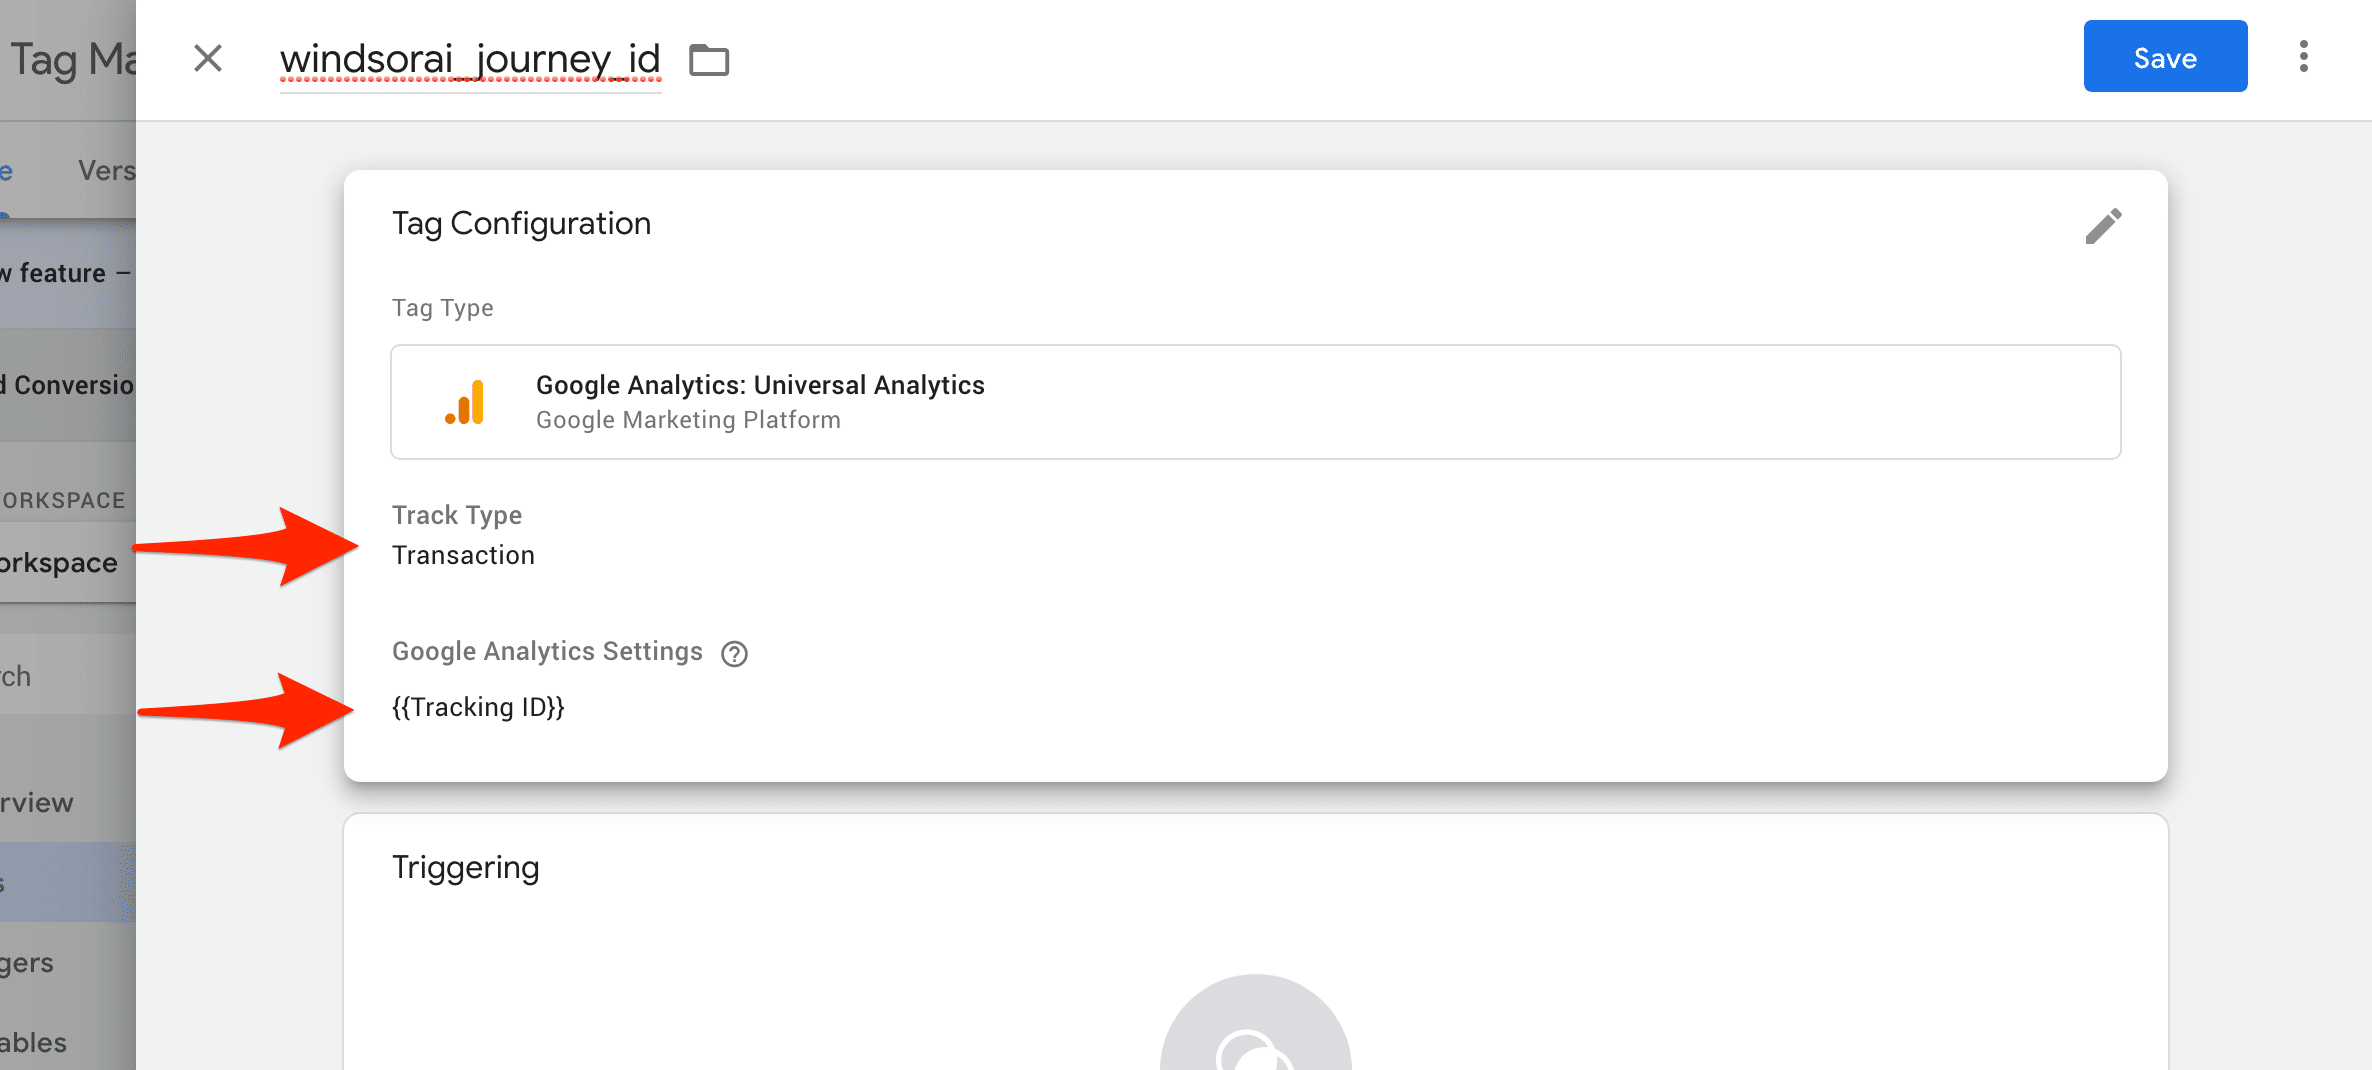
Select Track Type Transaction and Google Analytics Settings {{Tracking}}

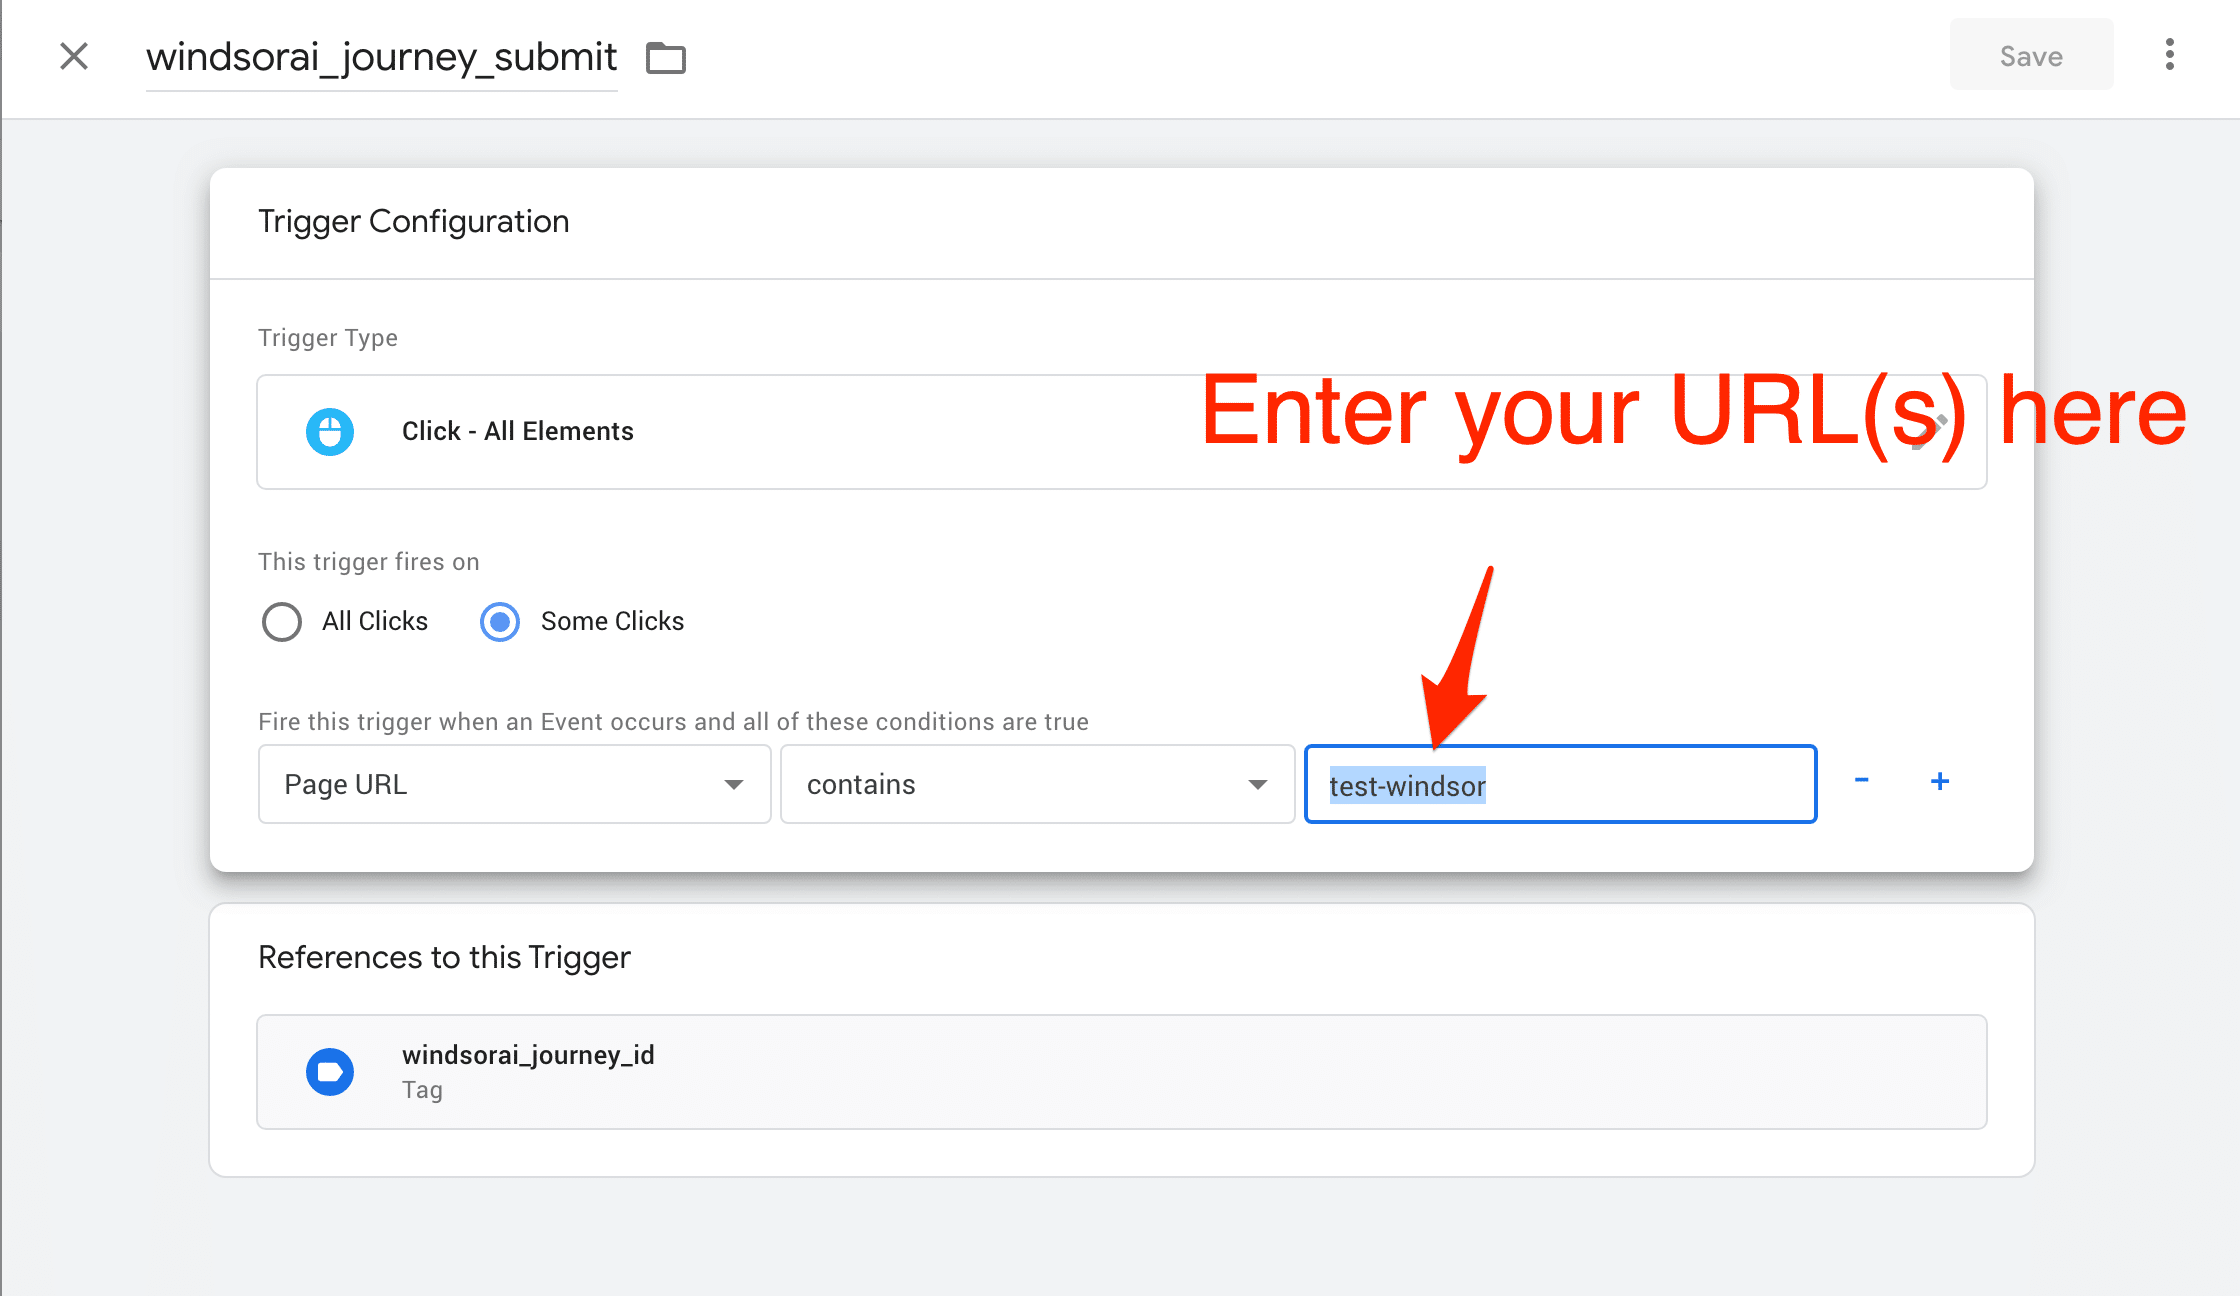
Create a new trigger
Important: Replace the highlighted text below with your lead form page name (or a pattern) for the trigger to be activated whenever a button is clicked on your lead forms

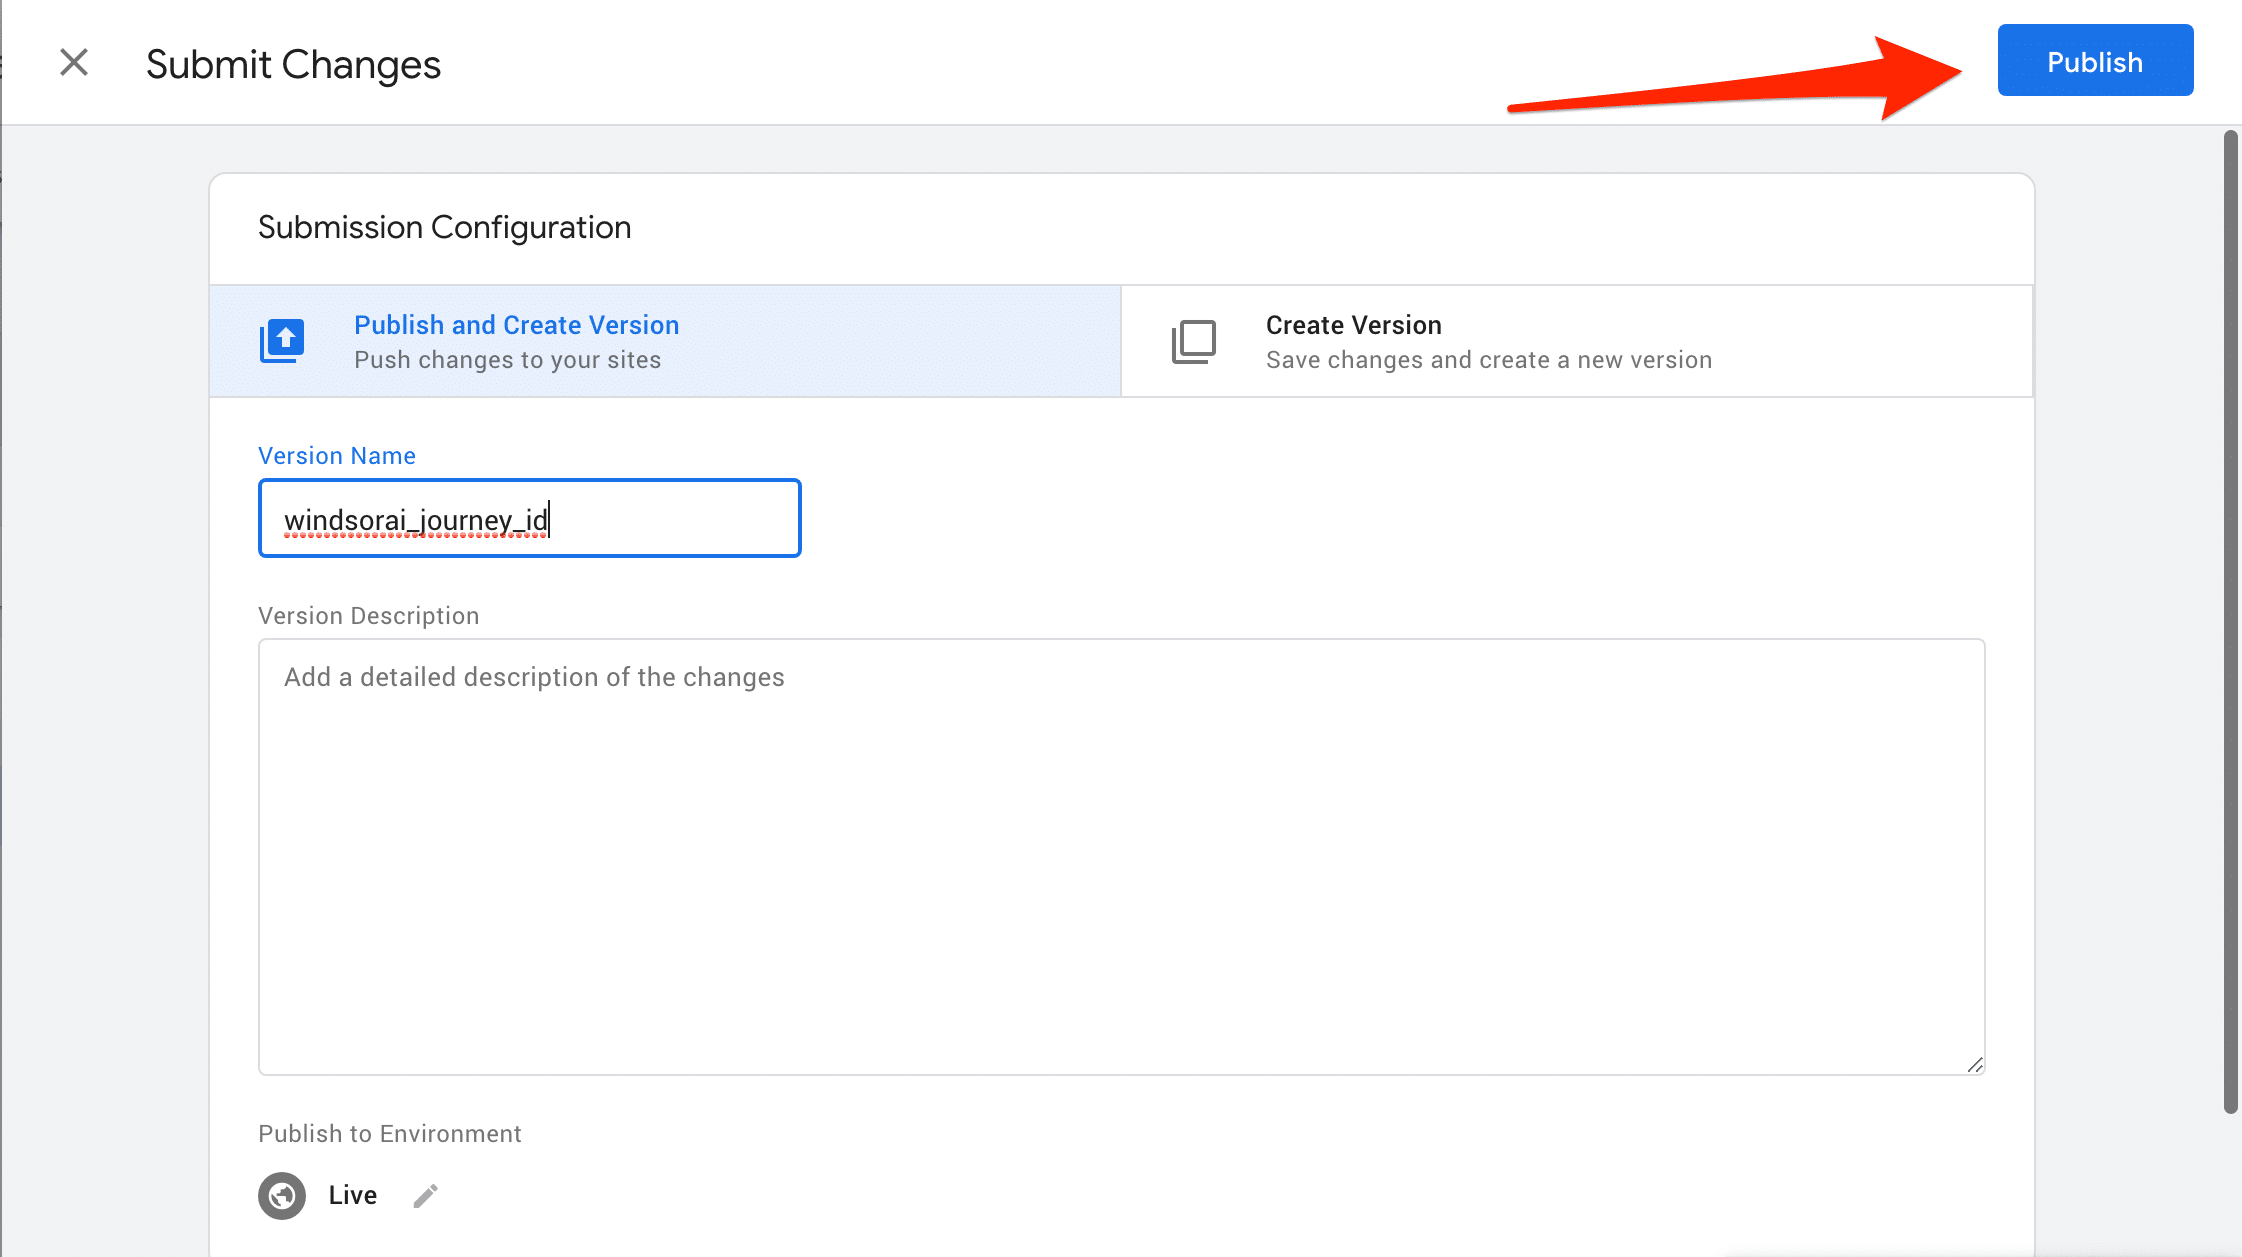
Submit changes

Publish changes


