 AI insights
 About us
 Careers
 Security
 Customer reviews
 Contact us
 Affiliate program
 Solution partners
 Looker Studio templates
 Tableau templates
 Facebook Ads templates
 Google Ads templates
 Data fields & Metrics
 AI prompt library & Guides
 Product documentation
 API documentation
 Case studies
 Blog
Blog Data models
 Windsor vs Supermetrics
 Windsor vs Fivetran
 Windsor vs Portermetrics
How to integrate data into Databricks with Windsor.ai
What is Databricks?
Databricks is a cloud-based data analytics platform built on the Apache Spark engine, designed to process large-scale data efficiently. It provides a collaborative environment for data engineers, scientists, and analysts to build complex machine learning models and perform real-time analytics with a fully managed infrastructure.
Databricks’ key advantages include seamless handling of large datasets, cloud scalability, and integration with AWS, Azure, and Google Cloud services. Windsor.ai supports them all as well. The platform enhances data processing with Delta Lake for reliability and performance, supports multiple programming languages, and offers built-in AI and ML tools. By bringing automated cluster management, cost optimization, and strong security, Databricks levels up data analysis workflows.
By integrating Datarbicks with the Windsor.ai data movement platform, you can:
- Automatically extract data from multiple sources and connect it to Databricks, enabling advanced big data processing and AI-driven insights.
- Streamline data ingestion, transformation, and analysis, reducing manual work and ensuring real-time updates for informed decision-making.
- Leverage Databricks’ cloud scalability to efficiently process large volumes of data while optimizing costs with automated resource management.
Explore our step-by-step guide to seamlessly integrate your data into Databricks with the Windsor.ai ELT connector.
Connecting data in Windsor.ai
1. Create a Windsor.ai account and log in.
2. Select the data source from which you want to stream data, e.g., Google Analytics 4 (GA4). Sign in with your associated Google account and select the next step, “Data preview.”
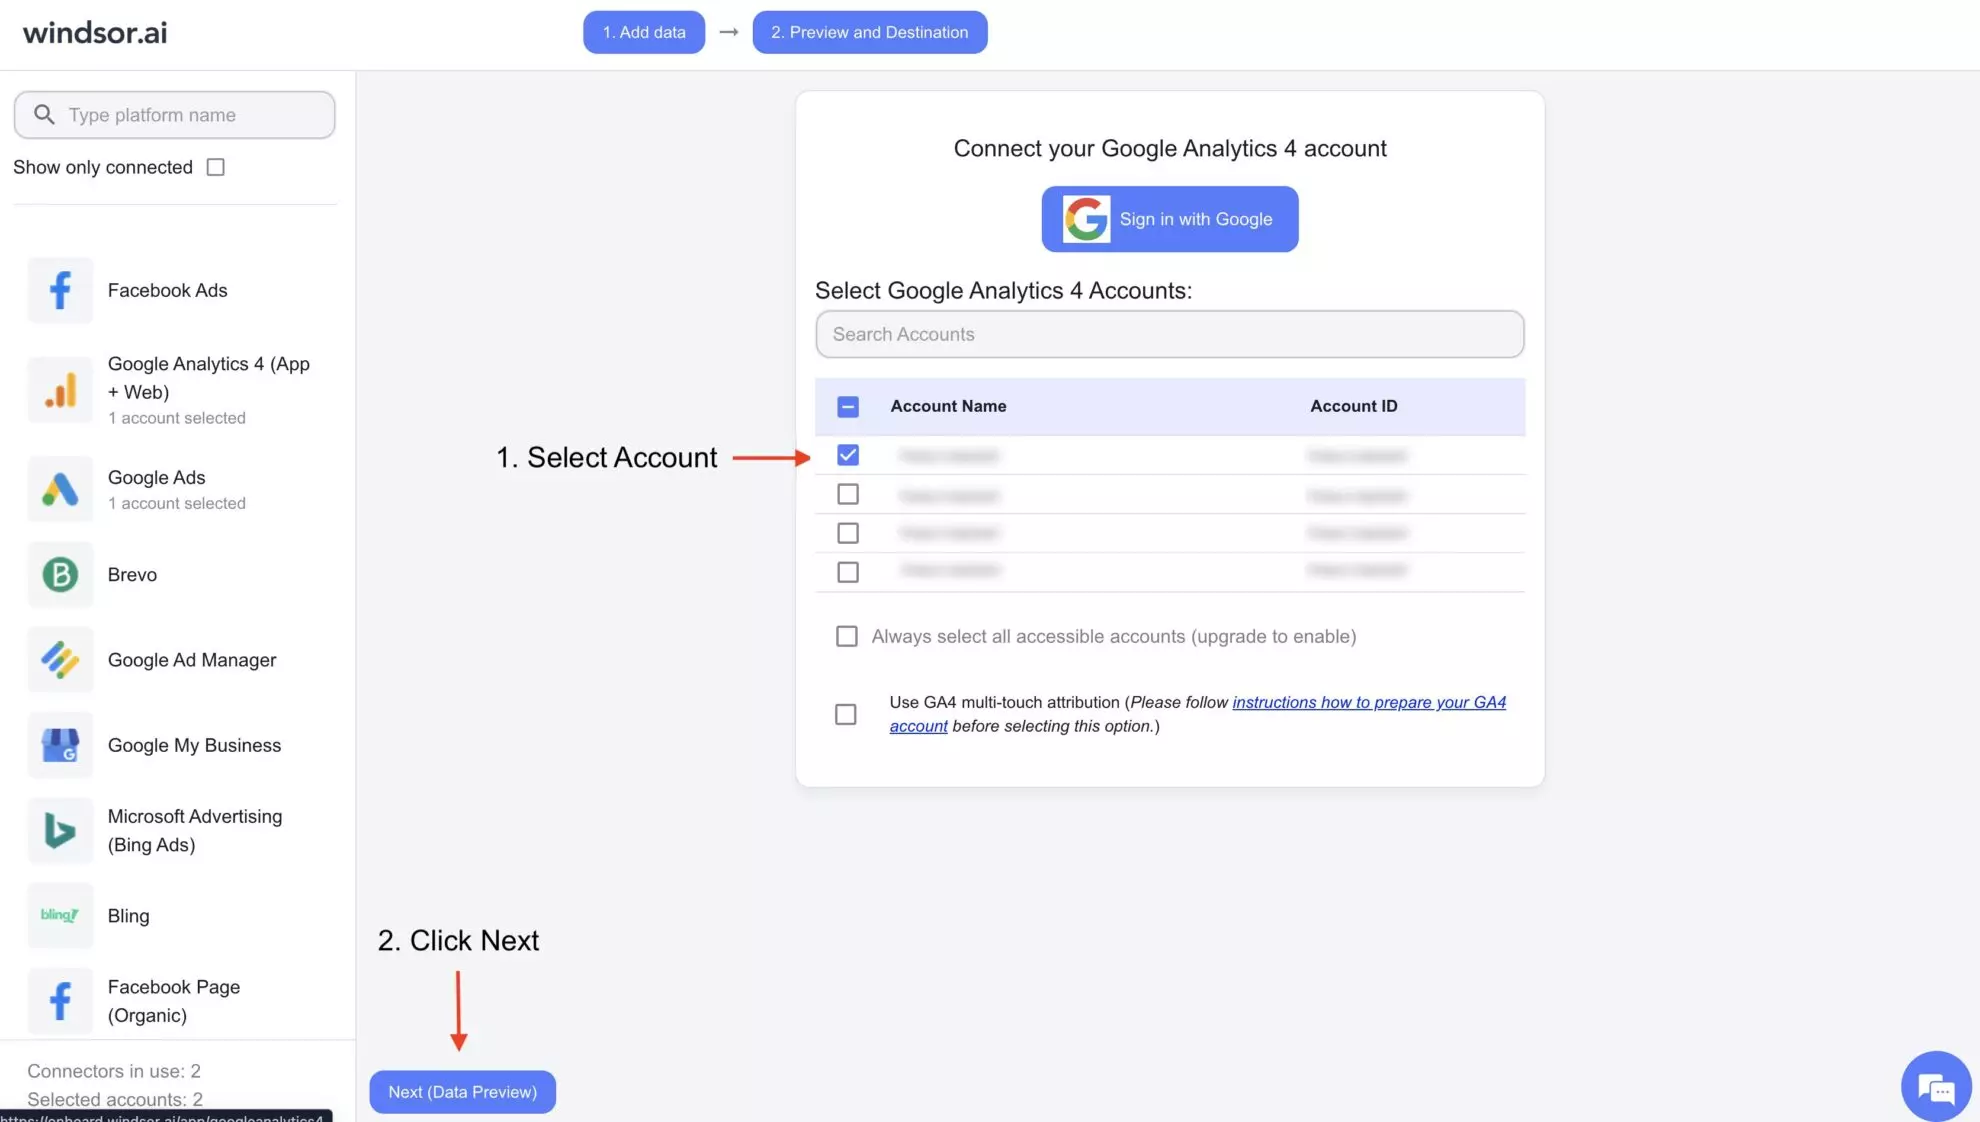
3. You’ll see your Google Analytics 4 data displayed in your Windsor.ai account.
Now, let’s proceed with setting up the Databricks environment for data integration.
Configuring Databricks
1. First of all, make sure you have an active Databricks Developer account. Go to Databricks and log in to your developer account.
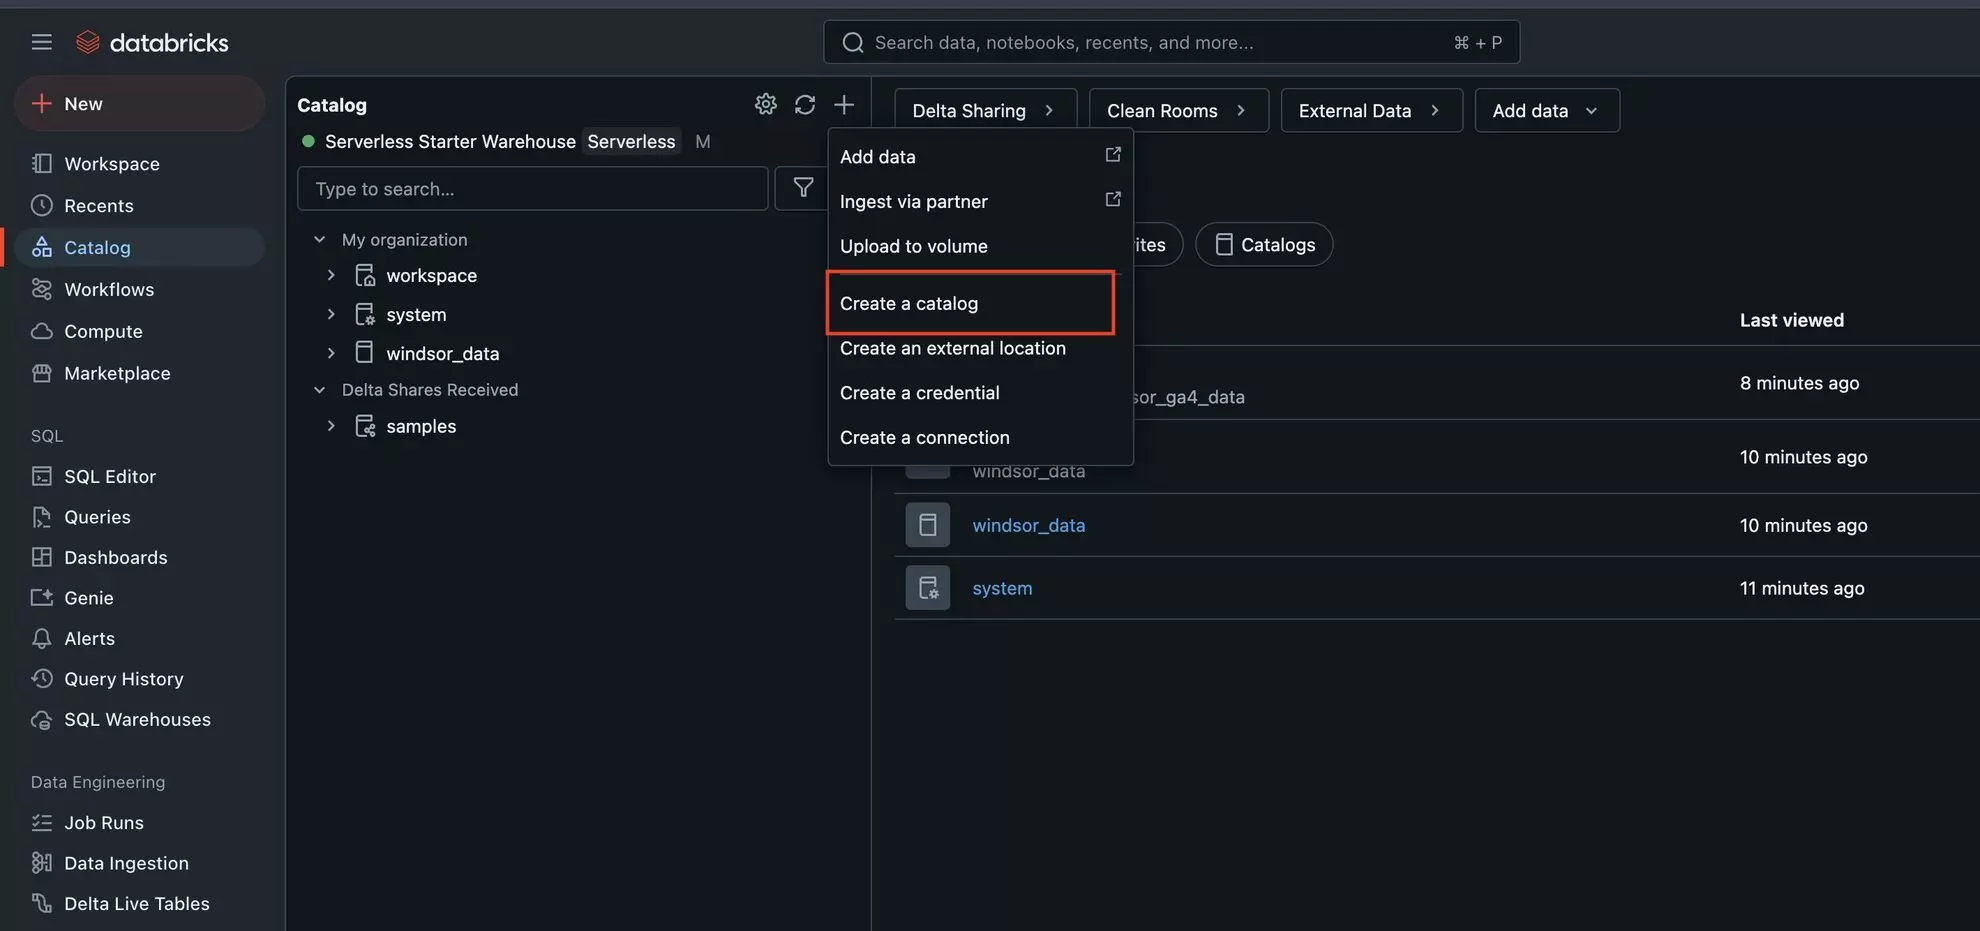
2. In the sidebar, select Catalog, then click the “+” icon and choose “Create Catalog.”
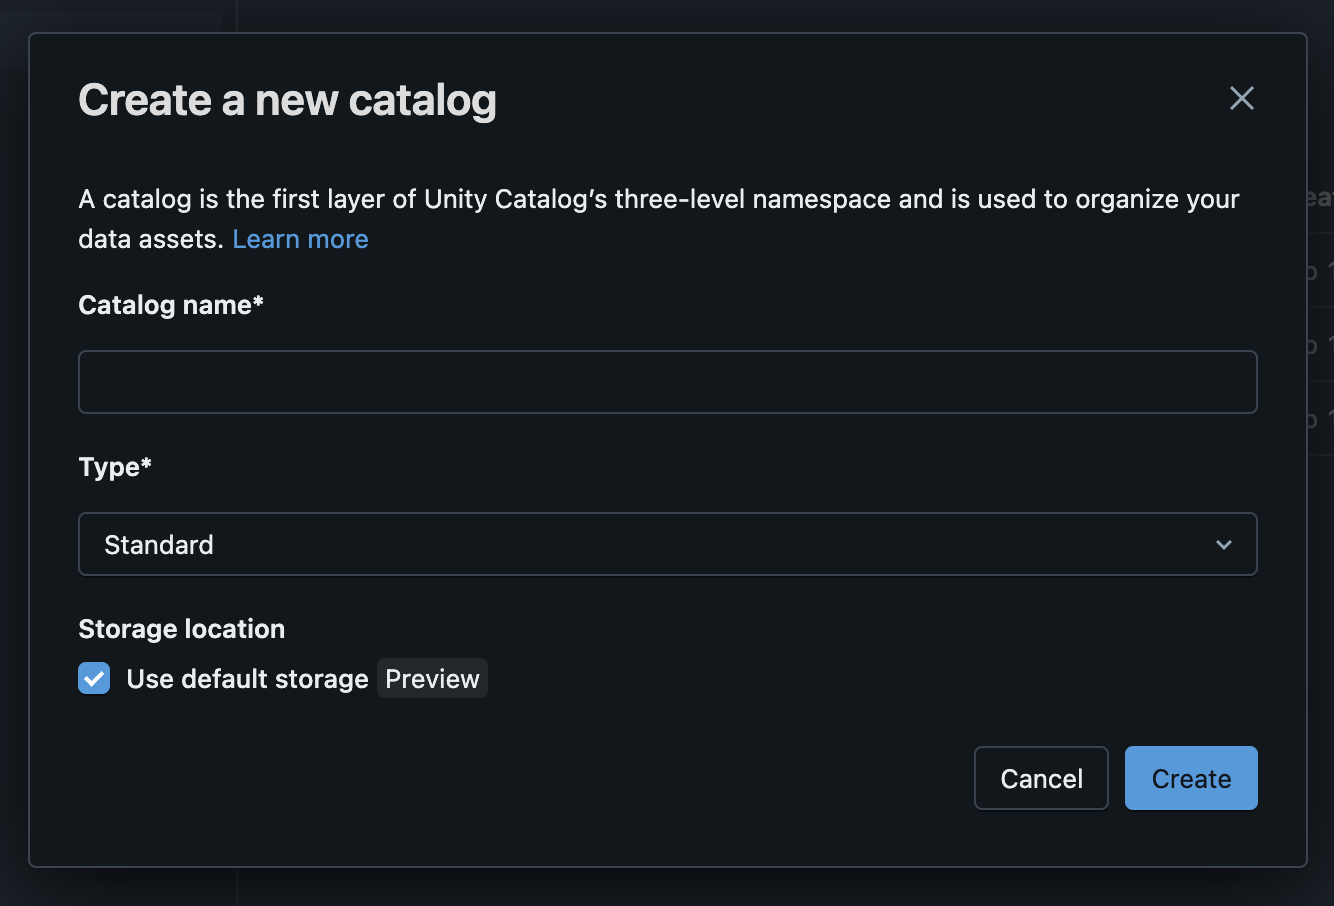
3. Enter the Catalog name (it can be anything you wish, but it should contain only ASCII letters (‘a’ – ‘z ‘, ‘A’ – ‘Z’), digits (‘0’ – ‘9’), and underbar (‘_’)) and click “Create.”
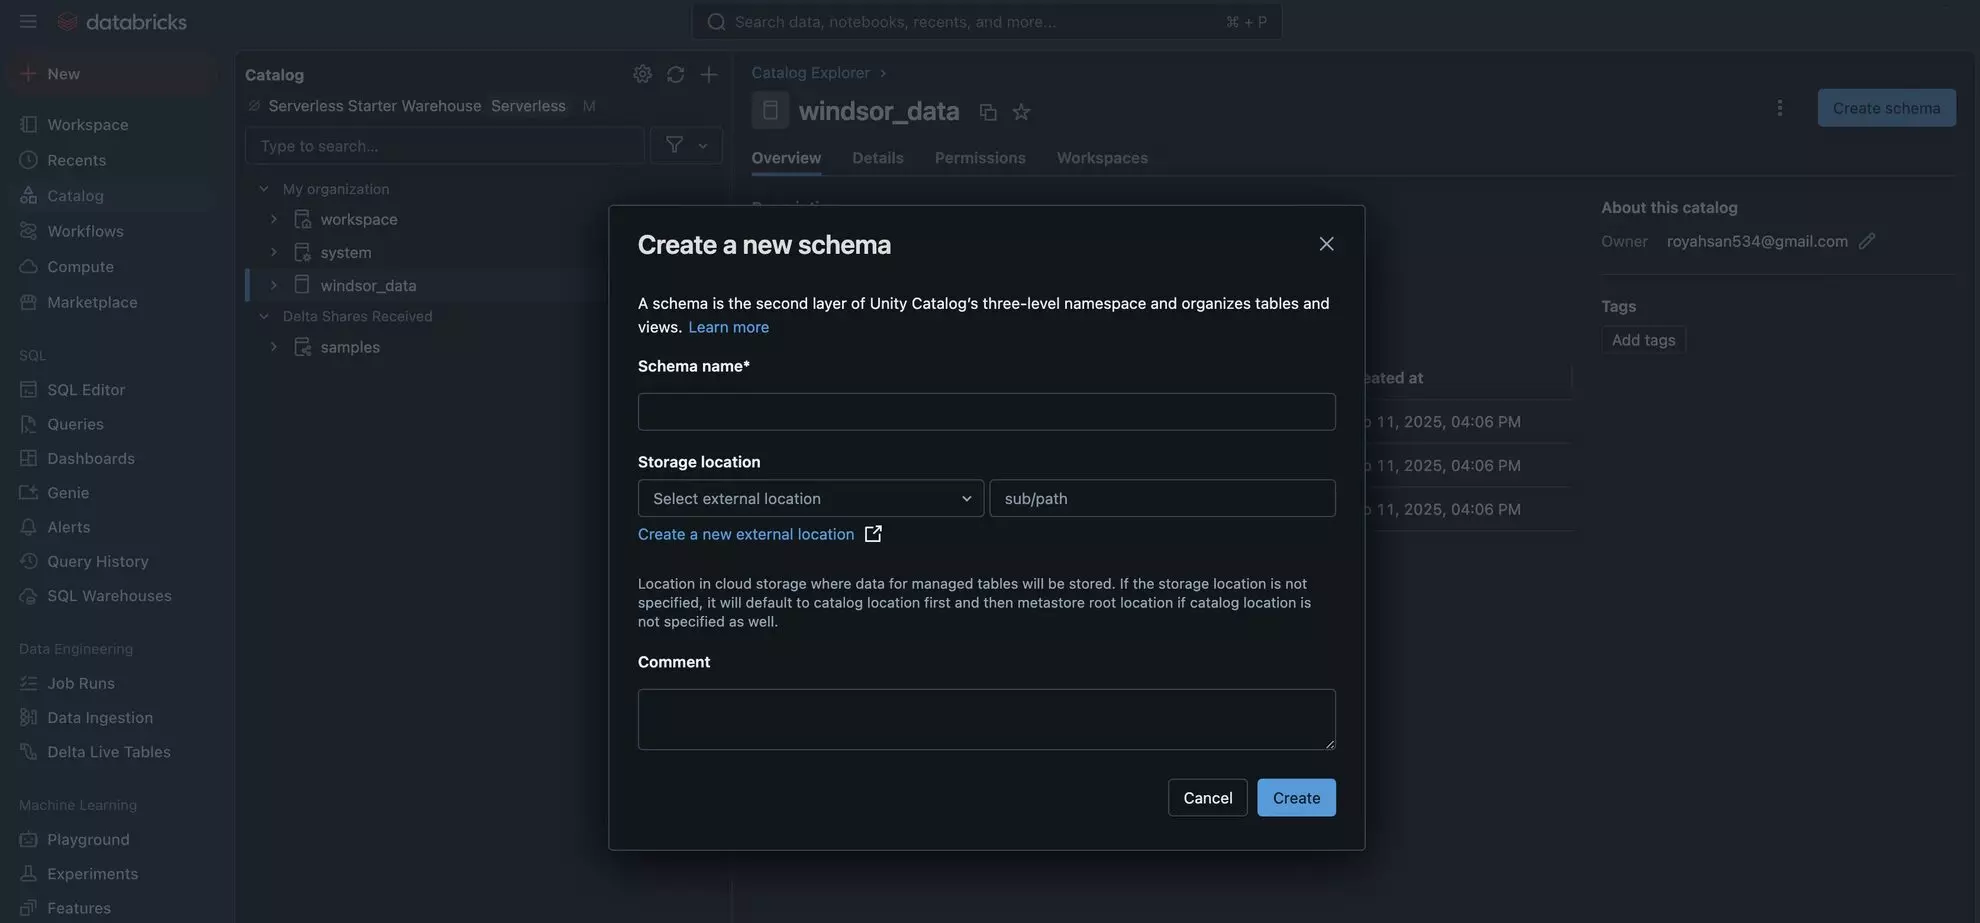
4. Go to your newly created catalog and click “Create Schema.” Enter the Schema Name (anything you want) and click “Create.”
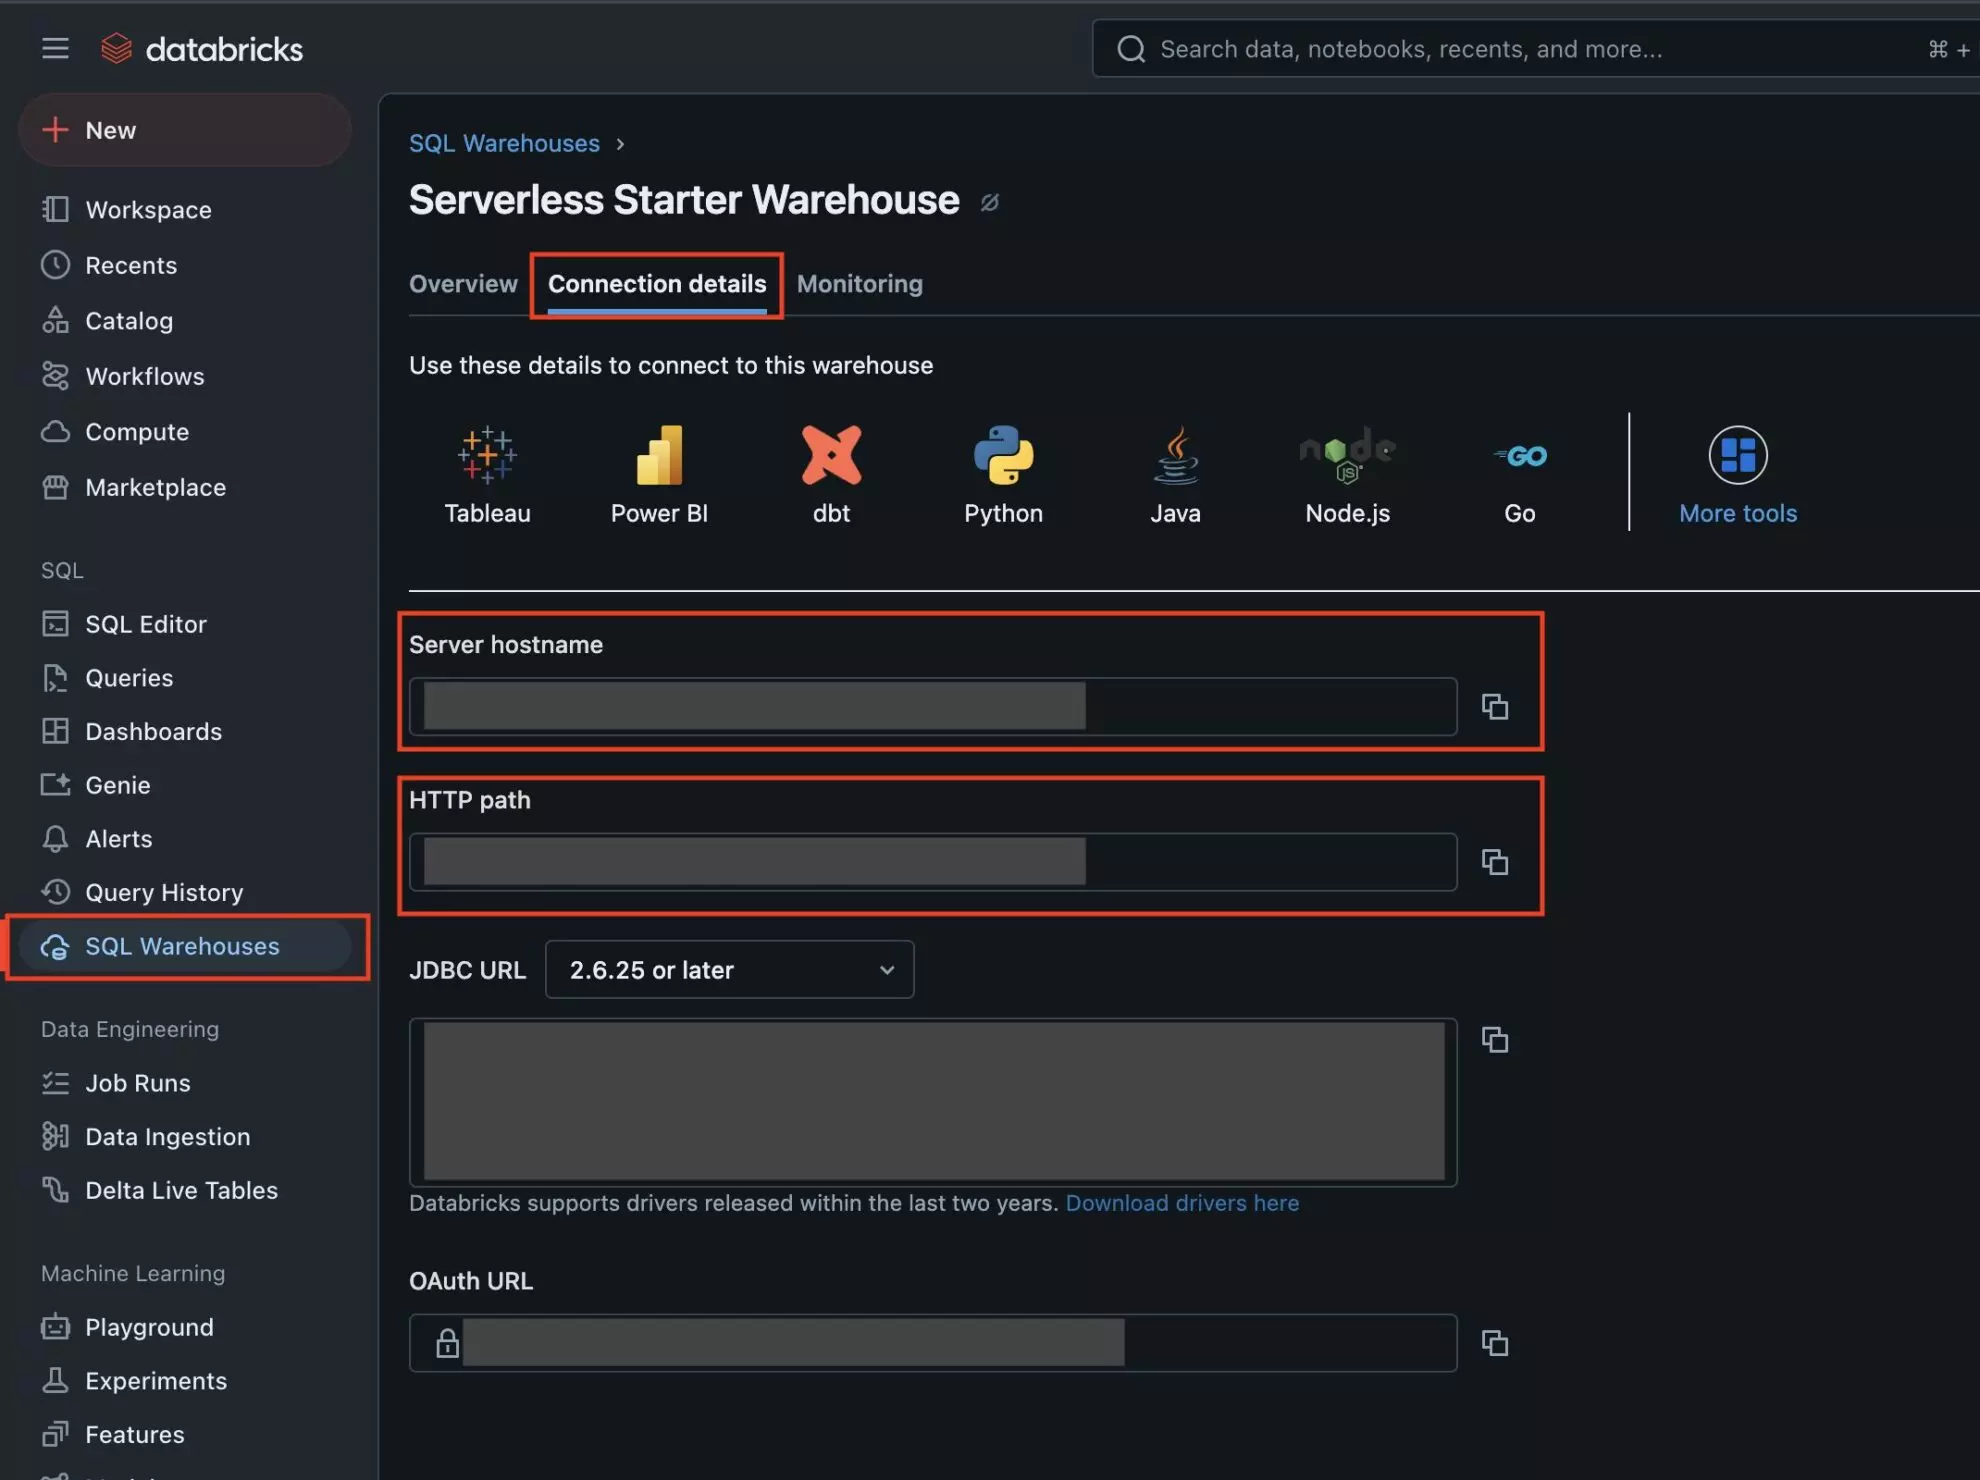
5. Now get the Server Hostname and HTTP Path.
Find SQL Warehouses in the sidebar, select the Connection Details tab, and copy the Server Hostname and HTTP Path.
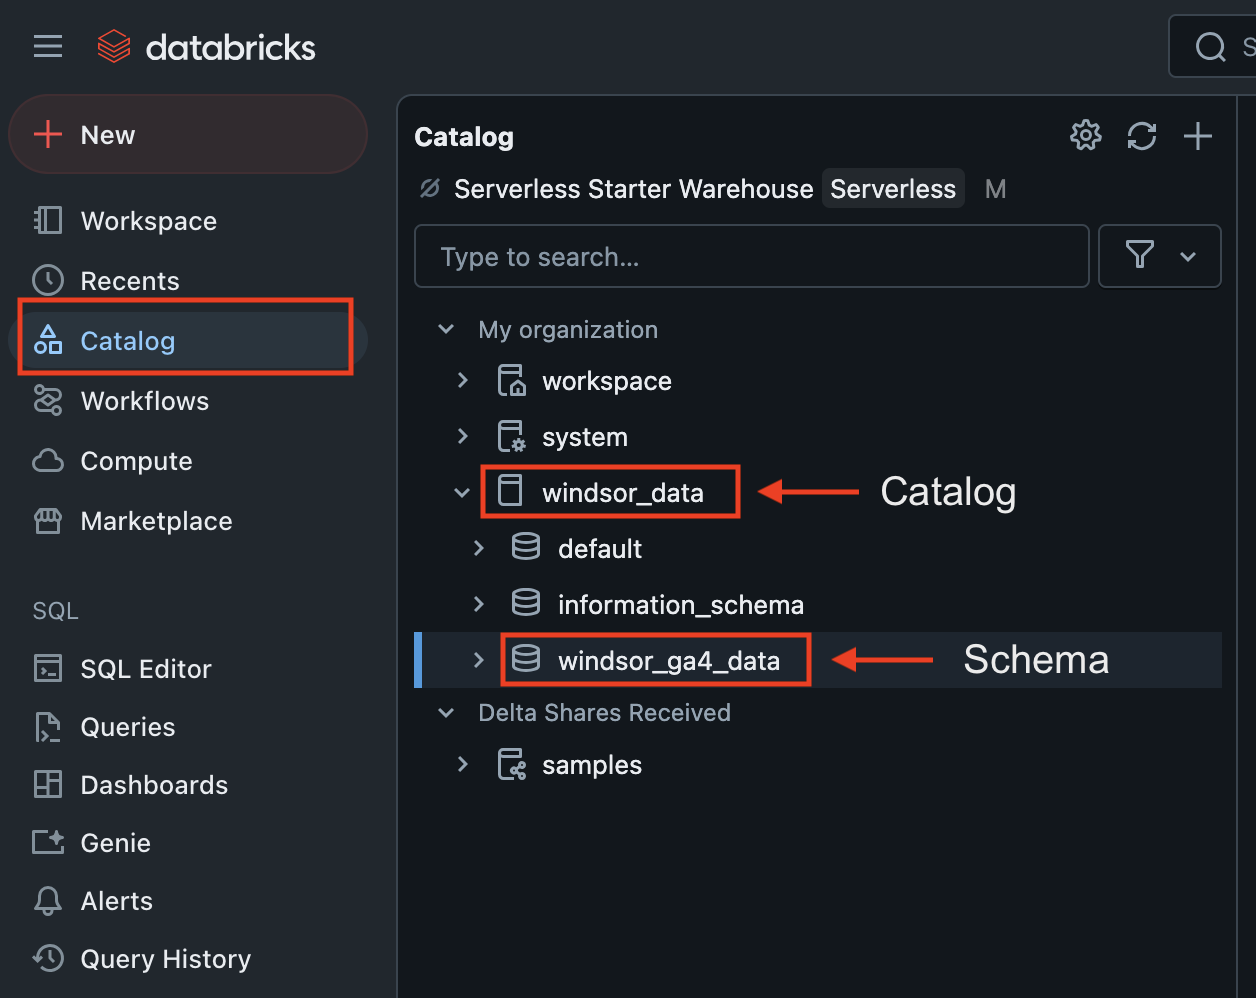
6. You also need to get the Catalog and Schema.
Find Catalog in the sidebar and copy Catalog and Schema names.
Here we go, you’ve set up the Databricks catalog and schema on the Databricks console; it’s time to gather the required credentials to authorize the connection between Databricks and Windsor.ai.
Define and set your authentication method
To connect Databricks with Windsor.ai, you can choose between two authentication methods: a Personal Access Token or OAuth 2.0.
💡 Use Personal Access Token if you’re in a dev/test environment. Use OAuth 2.0 if your organization enforces secure login.
The authorization flow will vary depending on which method you select.
Method 1. Via a Personal Access Token
To get the Personal Access Token in Databricks:
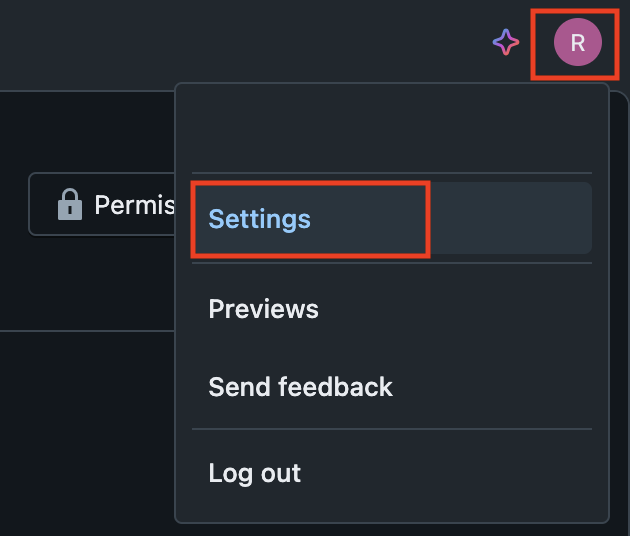
1. In the top right corner, click on your account and select Settings.
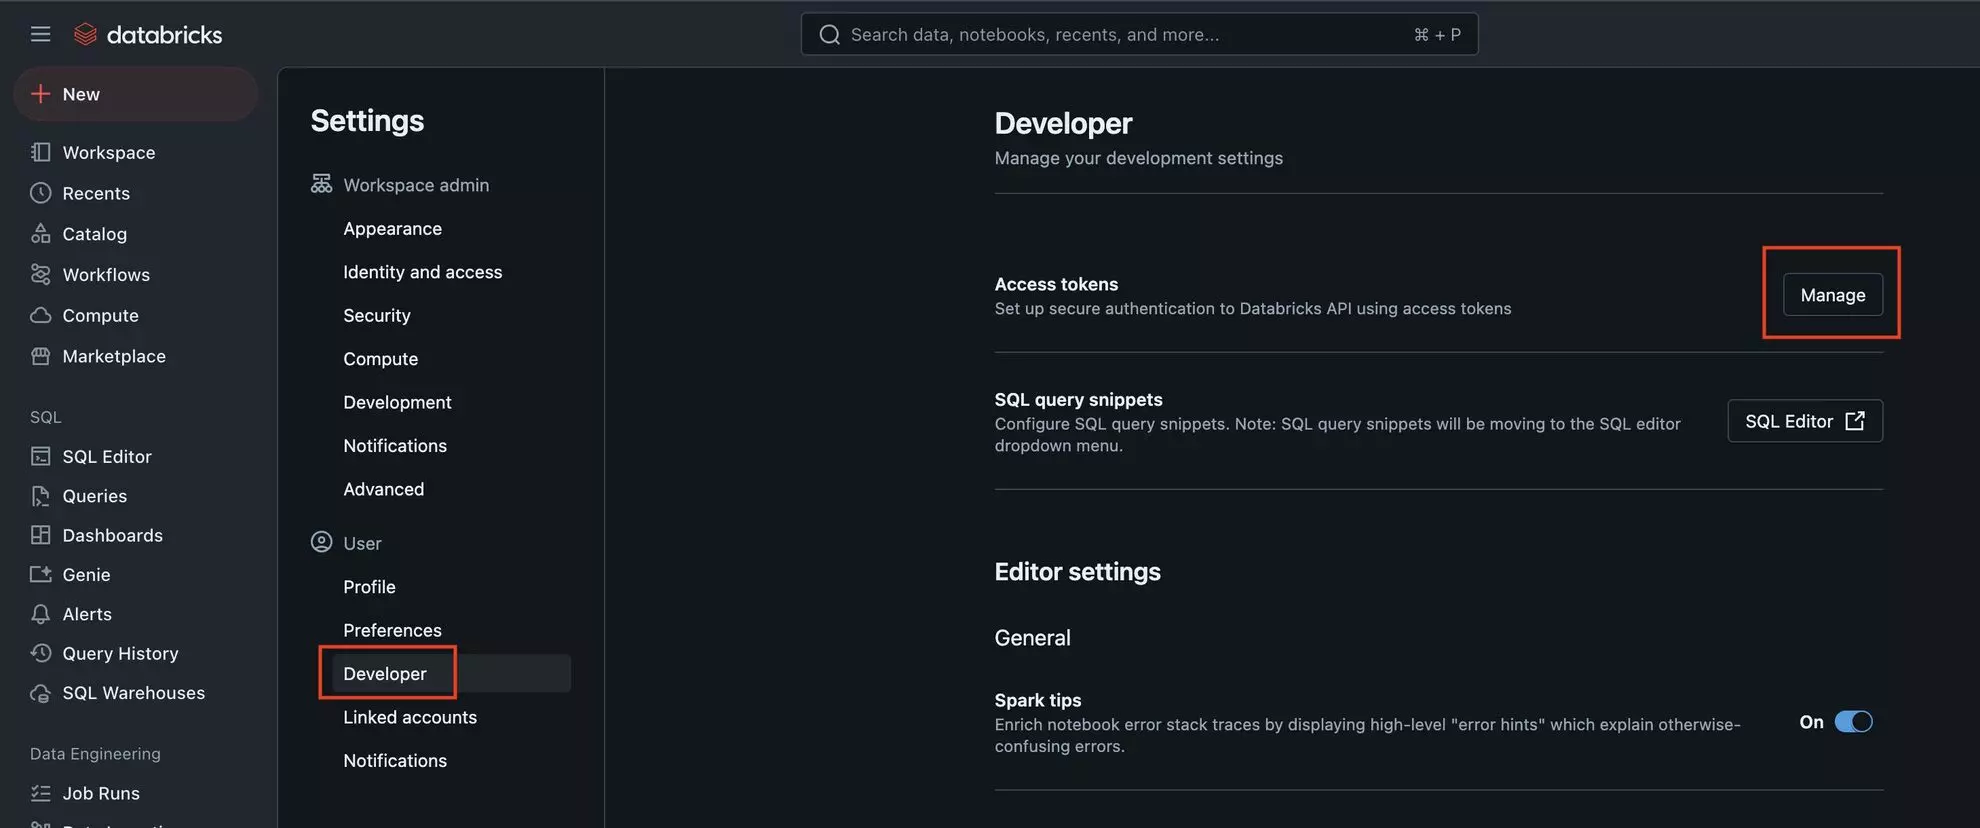
2. Find the Developer section in the sidebar and click “Manage” in the Access Tokens row.
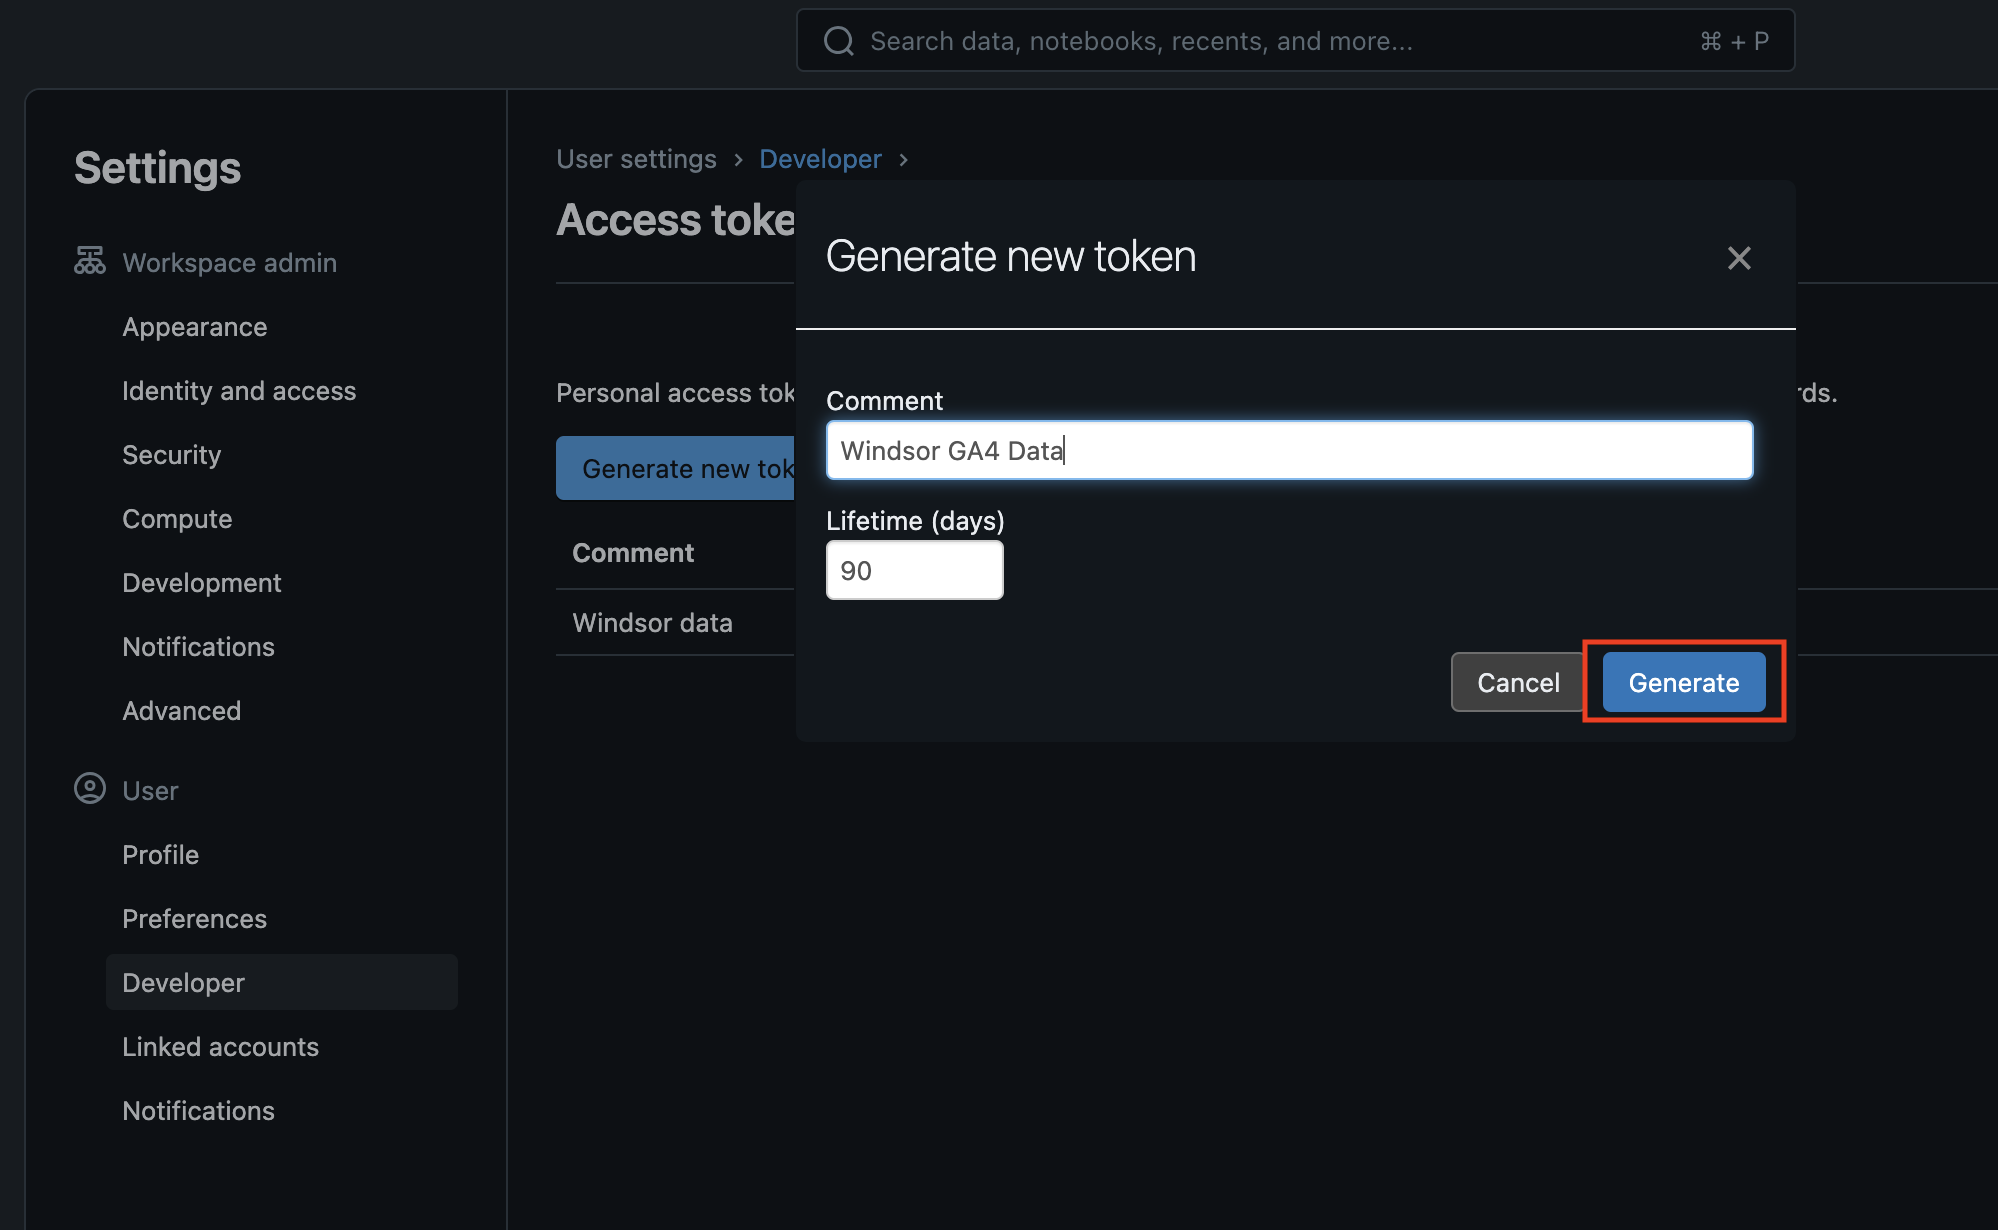
3. Click “Generate New Token,” enter a Comment (anything you wish) for your token, and finish with the “Generate” button.
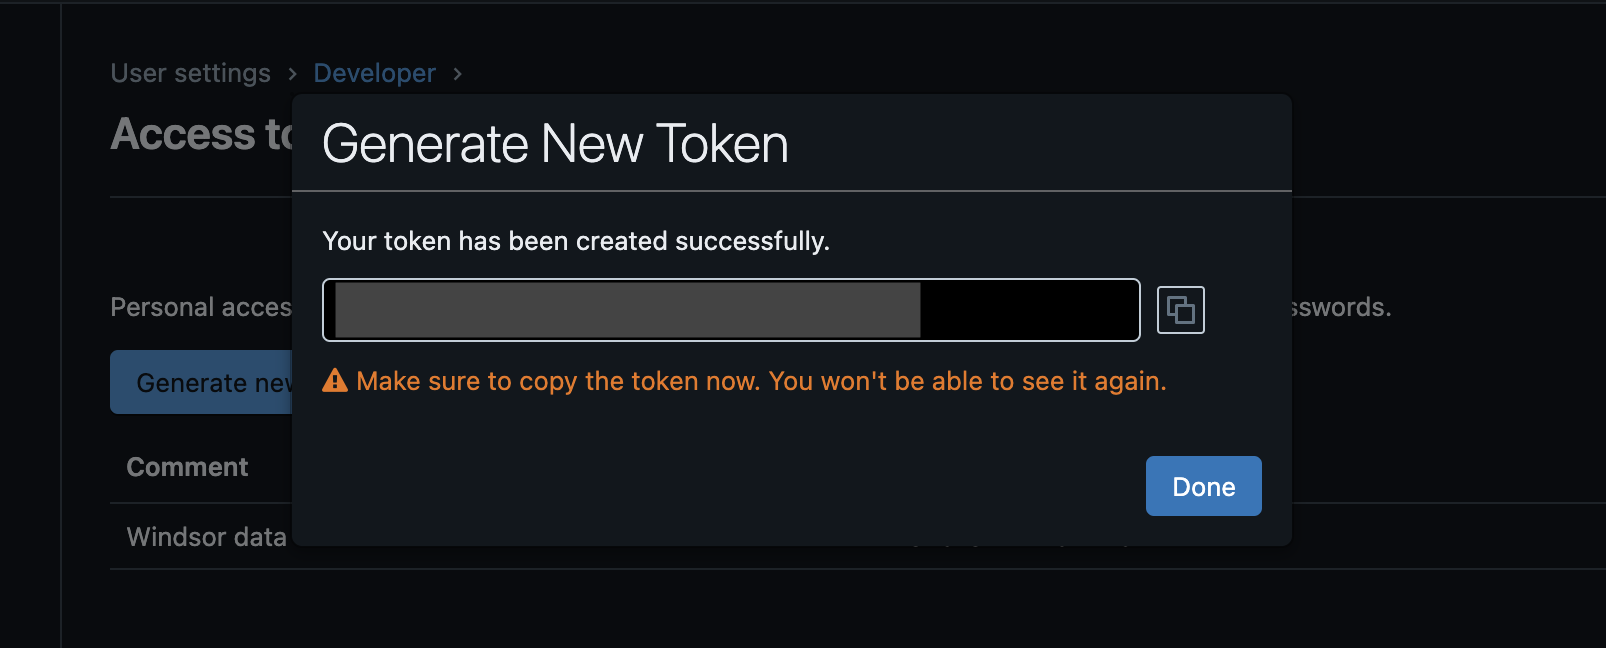
4. Copy the created access token for future use in Windsor.ai.
Method 2. Via OAuth 2.0
Use this method if your Databricks workspace is configured with OAuth 2.0 authentication (available only for paid accounts).
1. Go here and click on the “Add connection” button.
2. Add https://onboard.windsor.ai/integrations/databricks/callback to “

3. Save “” and “Client Secret” values.

4. You can find the “Workspace Host” value in the Workspace section here.

Now, let’s import your data from Windsor.ai into the created Databricks catalog table using the preferred auth method.
Sending Windsor.ai data to Databricks
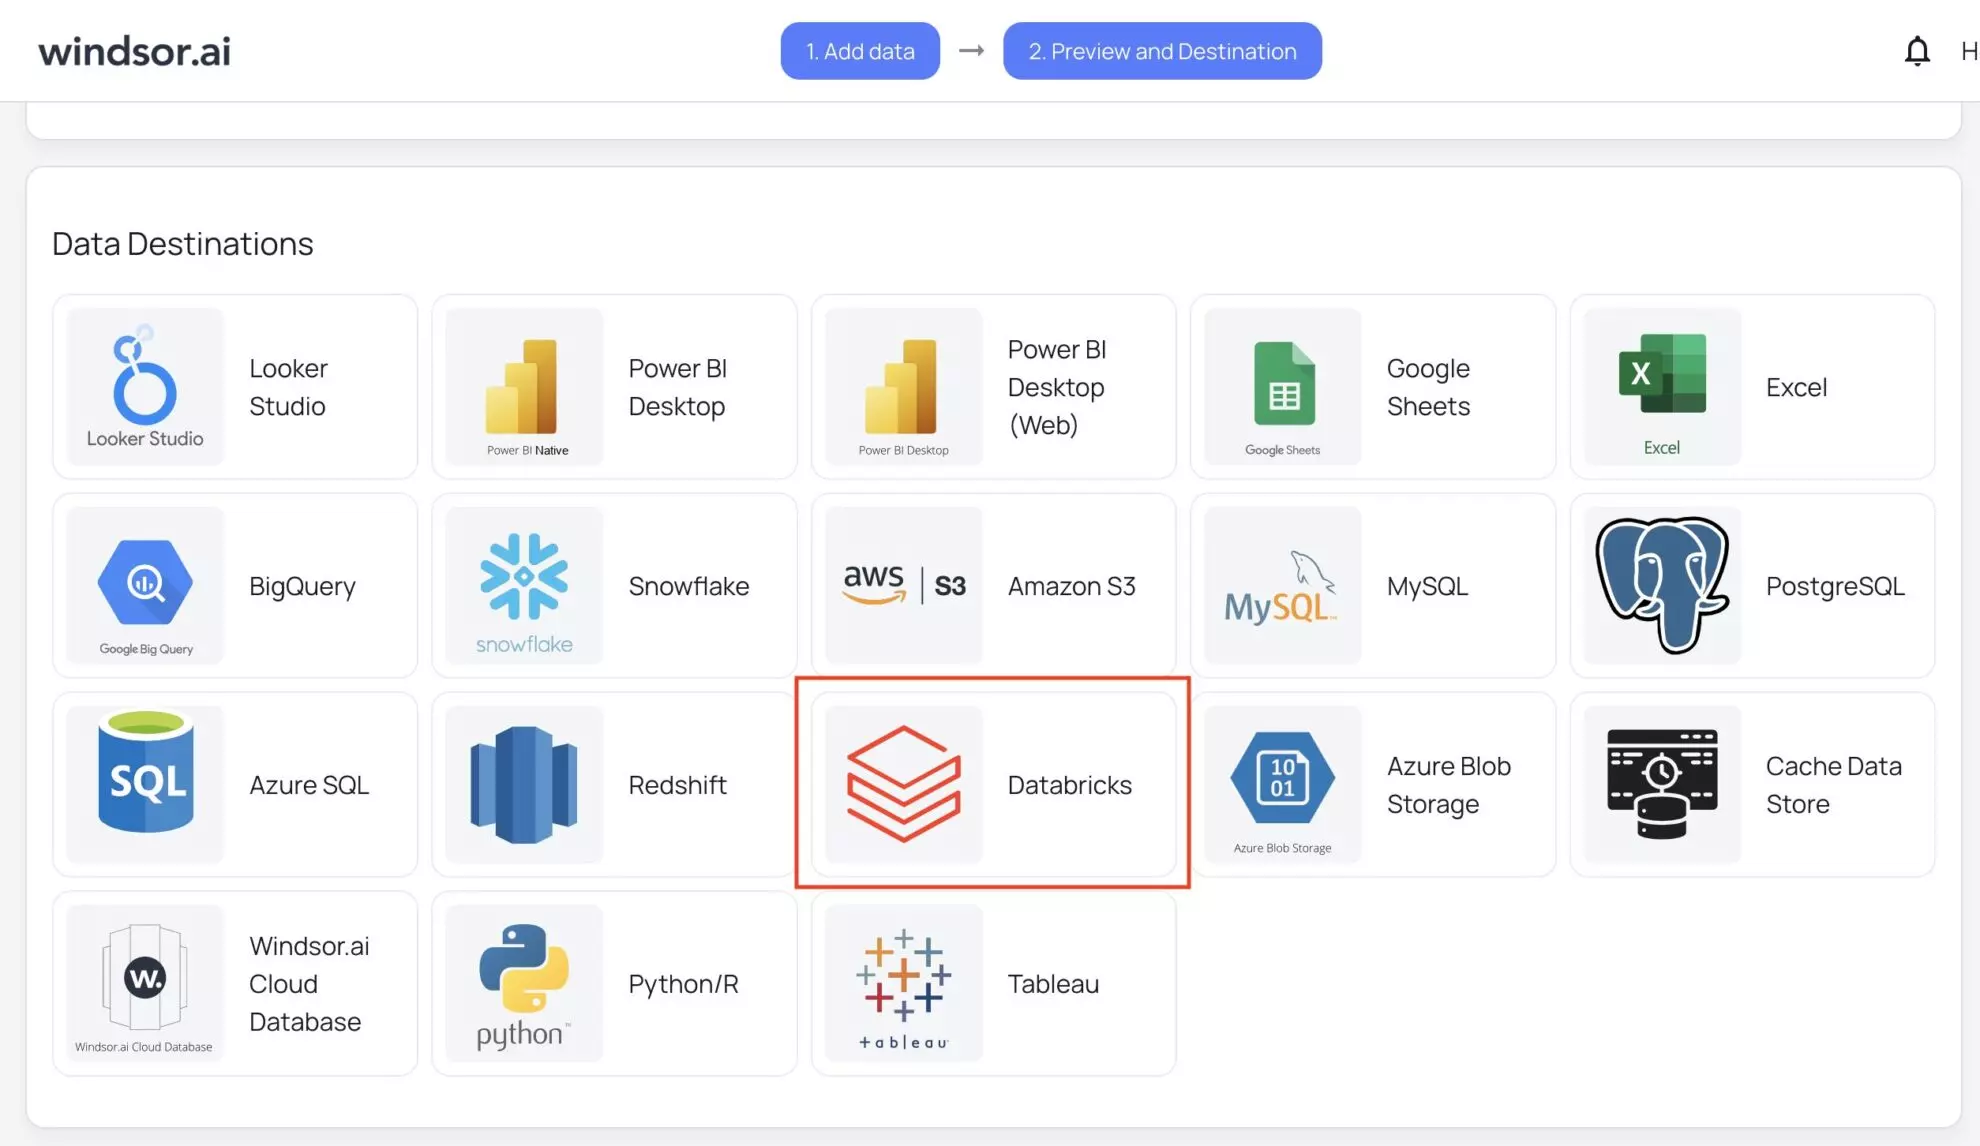
1. Return to your Windsor.ai account and move to the data preview page. Scroll down to data destinations, select Databricks, and click “Add Destination Task.”
2. Enter all the required credentials:
- Task name (you can provide any based on the data integration purpose).
- Authentication type: via personal access token or OAuth 2.0 (make sure to provide the appropriate credentials based on the chosen method—these should be retrieved from your Databricks account beforehand.)
- Server hostname, HTTP path, catalog, table, and schema you got from your Databricks developer console.

Click “Test Connection.”
If the connection is set properly, you’ll see a success message at the bottom; otherwise, an error message will appear. When successful, click “Save.” The data stream to the Databricks table has started.
3. You can now see the task running in the selected data destination section. The green ‘upload’ button with the status ‘ok’ indicates that the task is active and running successfully.

4. Verify that your data is being added to the Databricks table. Go to your Databricks catalog and select the relevant table.
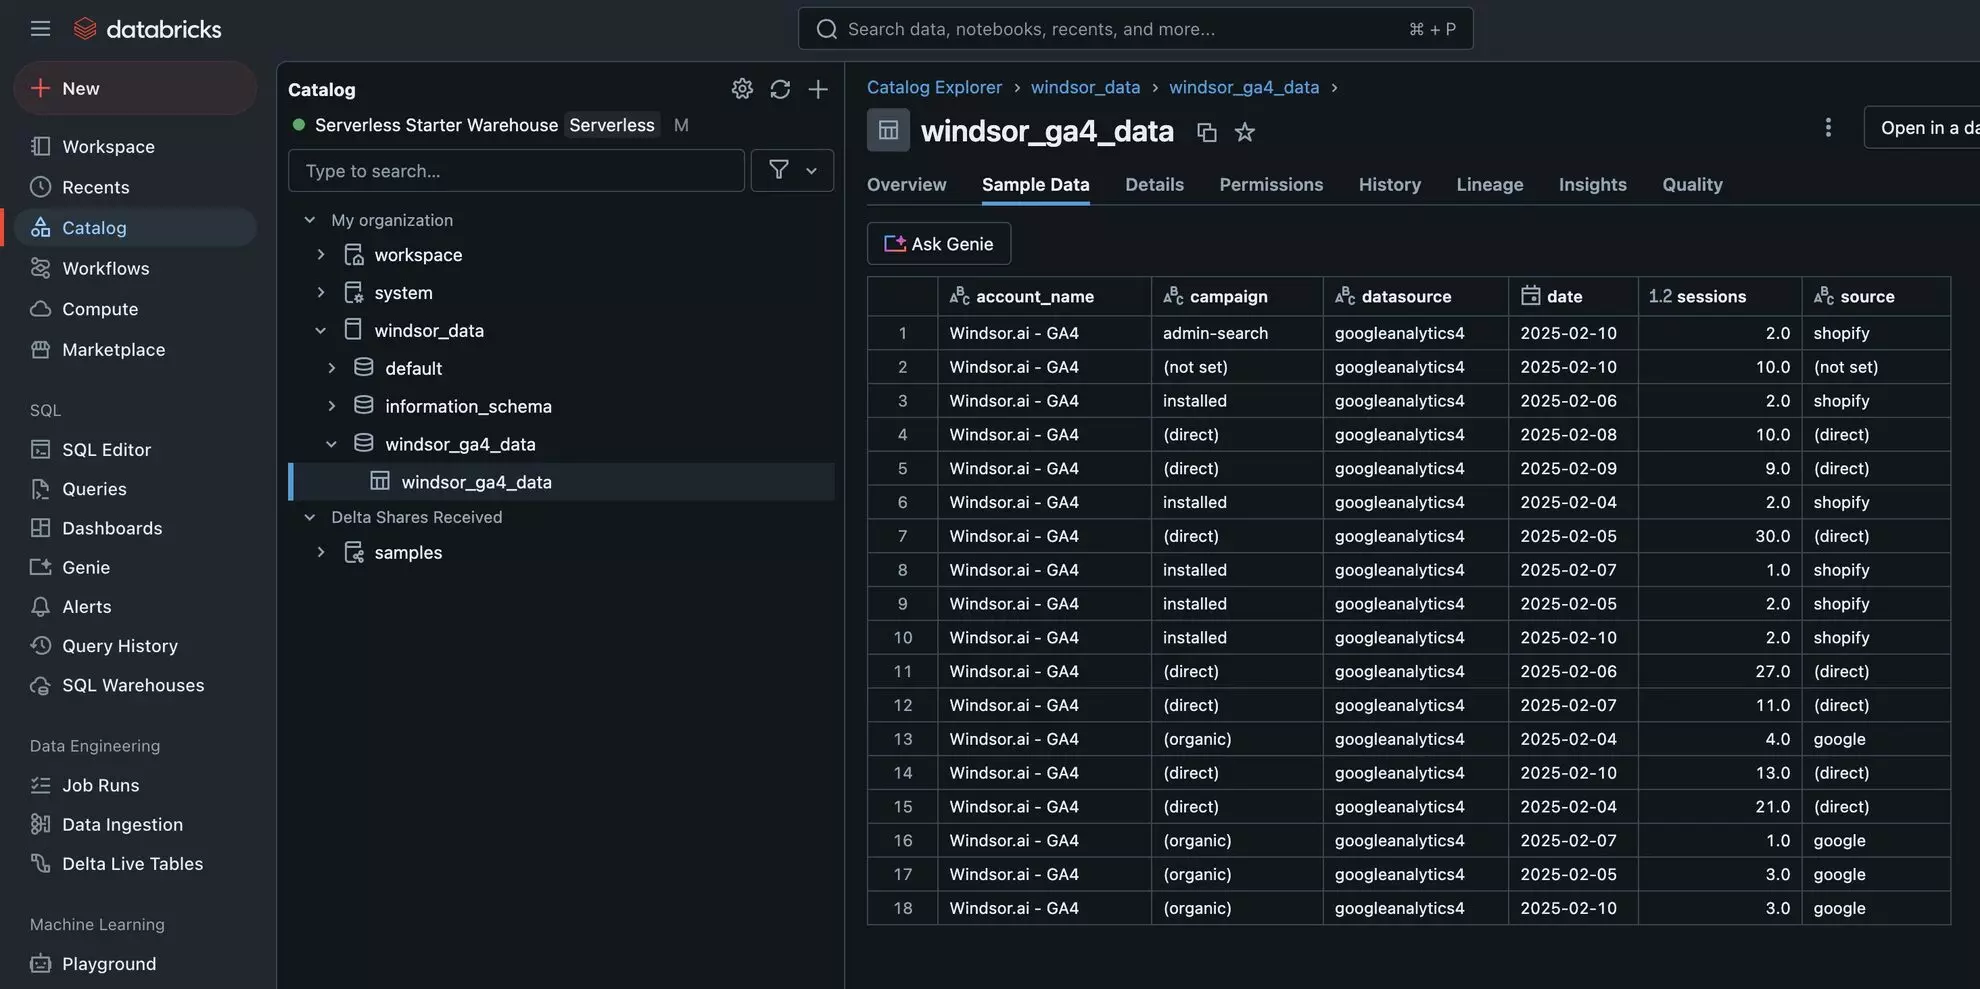
Cheers! Your data is now integrated into Databricks and ready for detailed analysis.
FAQs
What are the prerequisites for connecting Windsor.ai to Databricks?
You need an active Databricks Developer account and Windsor.ai account and the necessary access credentials from Databricks, such as an Access Token, Server Hostname, HTTP Path, Catalog, and Schema.
What is the correct way to name a Databricks catalog or schema?
The names should contain only ASCII letters (a-z, A-Z), digits (0-9), or underbars (_) and should not start with a digit.
Can I schedule automated reports from Windsor.ai to Databricks?
Yes, while connecting Windsor.ai to Databricks, you can schedule automated data streams by specifying the schedule type and time.
Where can I see my imported data in Databricks?
Navigate to your Databricks Catalog → Schema → Table, where you can preview the data imported from Windsor.ai.
What credentials do I need to connect Databricks with Windsor.ai?
You’ll need to provide the information about the catalog, schema, hostname, access token, and HTTP path.
What should I do if the connection test between Windsor.ai and Databricks fails?
Make sure you have the following things in place:
- The correct server hostname, access token, and HTTP path are provided.
- The catalog and schema are already present.
- windsor.ai doesn’t show any errors while running the task.
How can I ensure the security of my data when using Windsor.ai?
Windsor.ai uses secure OAuth authentication and encrypted data transfer protocols. To limit access to sensitive data, configure your Databricks user roles and privileges.
Can I integrate additional data sources with Databricks via Windsor.ai?
Yes, Windsor.ai supports 315+ data sources, including Facebook Ads, Google Analytics, Salesforce, and other popular platforms. You can connect any data source to Databricks by following a similar procedure for effective cross-channel analysis.
Tired of manually transferring data to Databricks? Try Windsor.ai today to automate the process

