 AI insights
 About us
 Careers
 Security
 Customer reviews
 Contact us
 Affiliate program
 Solution partners
 Looker Studio templates
 Tableau templates
 Facebook Ads templates
 Google Ads templates
 Data fields & Metrics
 AI prompt library & Guides
 Product documentation
 API documentation
 Case studies
 Blog
Blog Data models
 Windsor vs Supermetrics
 Windsor vs Fivetran
 Windsor vs Portermetrics
How to integrate data into Perplexity with Windsor MCP
Windsor MCP automatically links data from 350+ sources to Perplexity, turning your raw business metrics into a structured dataset that you can converse with and analyze using AI. You can also enable or pause Google Ads and Facebook Ads campaigns with Perplexity.
Follow this quick step-by-step guide to plug your data into Perplexity through Windsor MCP in minutes.
Prerequisites
To use Windsor MCP with Perplexity, make sure you have the following:
- An active Windsor.ai account with at least one connected data source
- A Perplexity account with access to Connectors
🚀 Get started with Windsor MCP today with a forever-free trial: https://onboard.windsor.ai/ and experience the power of AI-driven analytics.
Steps to configure Windsor MCP for Perplexity
1. Connect your data sources.
Connect the data sources you want to analyse in Perplexity at https://onboard.windsor.ai/. You don’t need to manually select fields. All available data is automatically accessible through MCP.
2. Open the Perplexity connectors page.
Go directly to https://www.perplexity.ai/computer/connectors and click + Custom connector in the top-right corner.

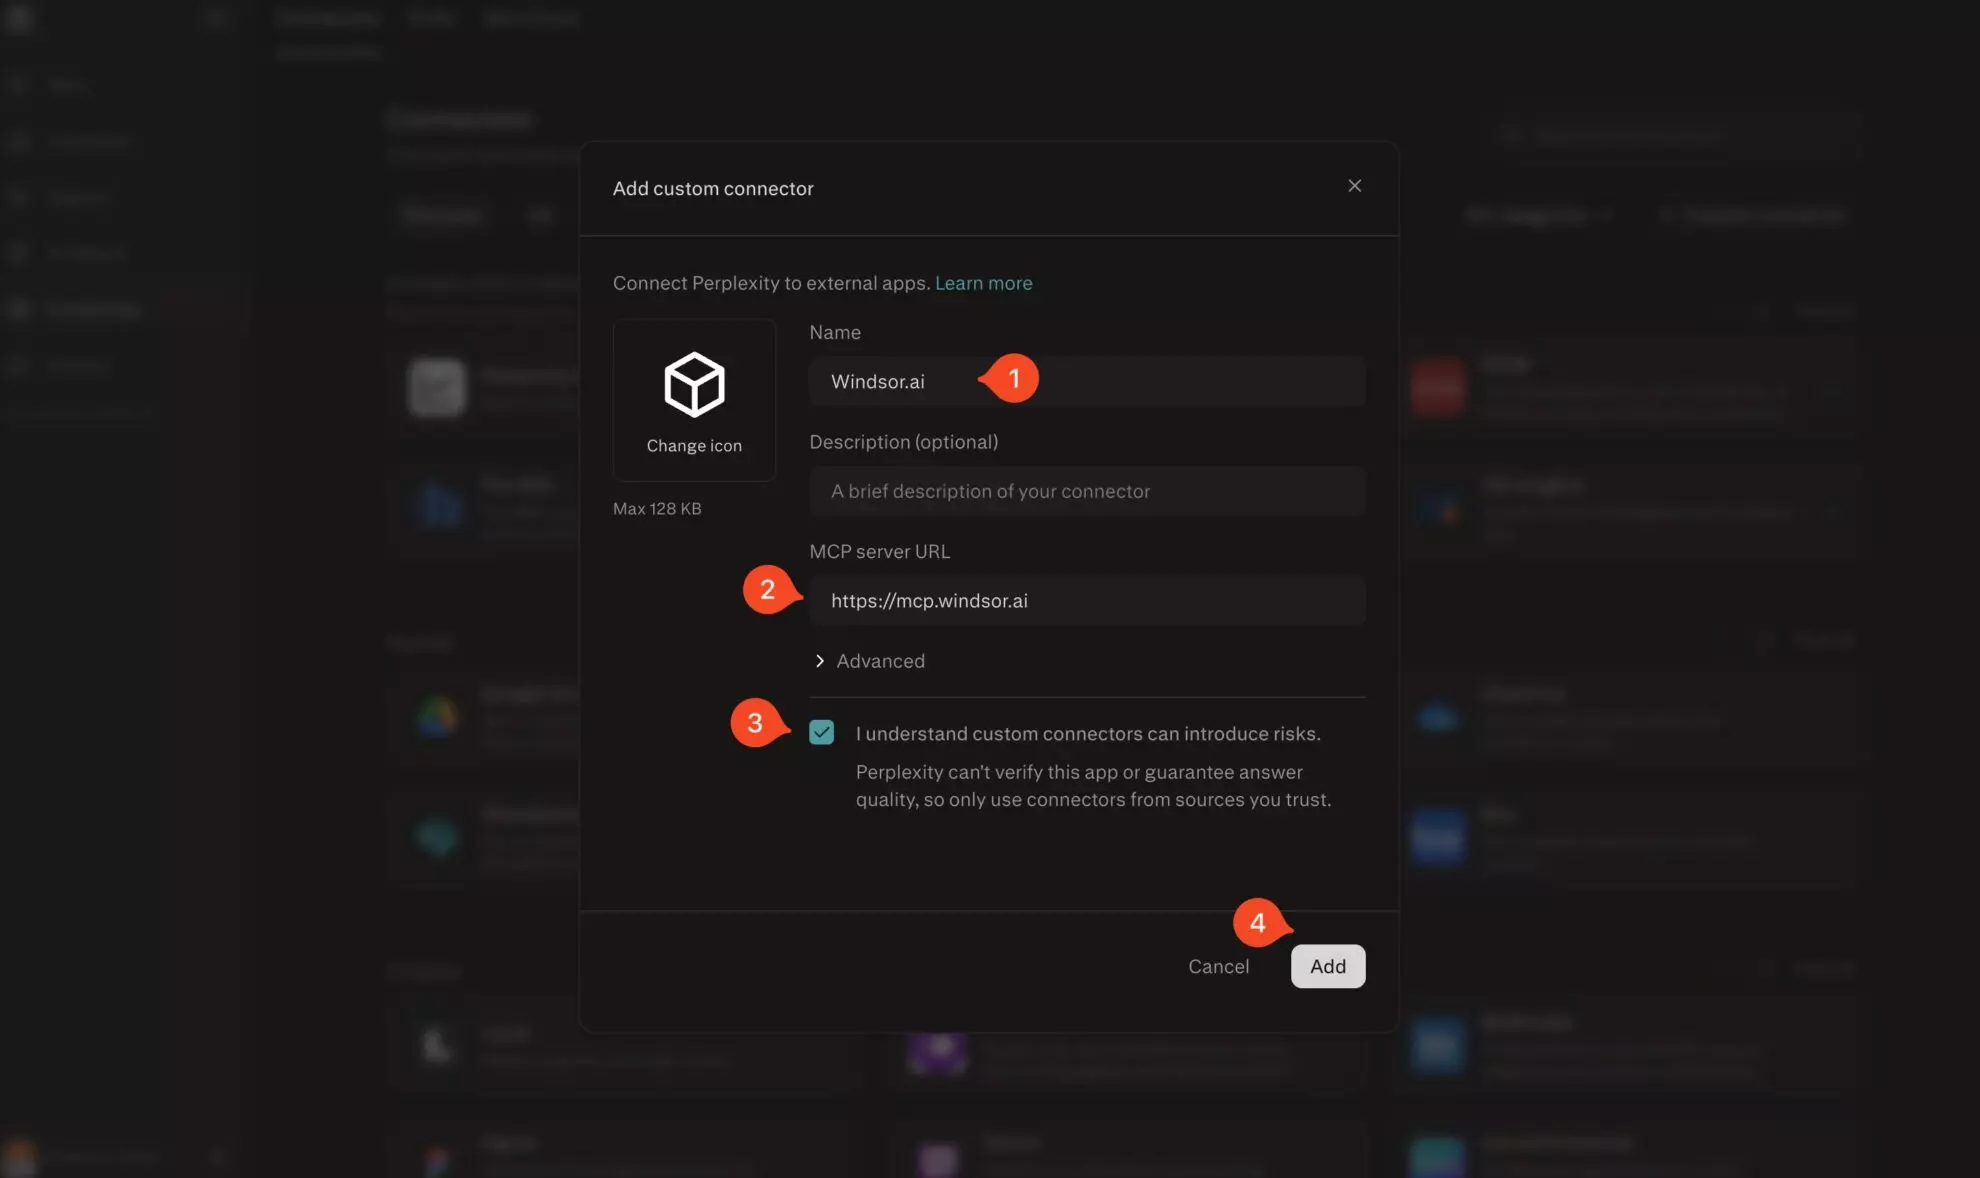
3. Fill in the connector details.
In the Add custom connector dialog, enter the following:
-
Name:
Windsor.ai -
MCP server URL:
https://mcp.windsor.ai - Tick ‘I understand custom connectors can introduce risks.’
- Click Add
This creates the connector in your connectors list, but it is not installed yet.
4. Find and open the Windsor.ai connector.
In the connectors search bar, type windsor.ai. Click the Windsor.ai card that appears in the results.
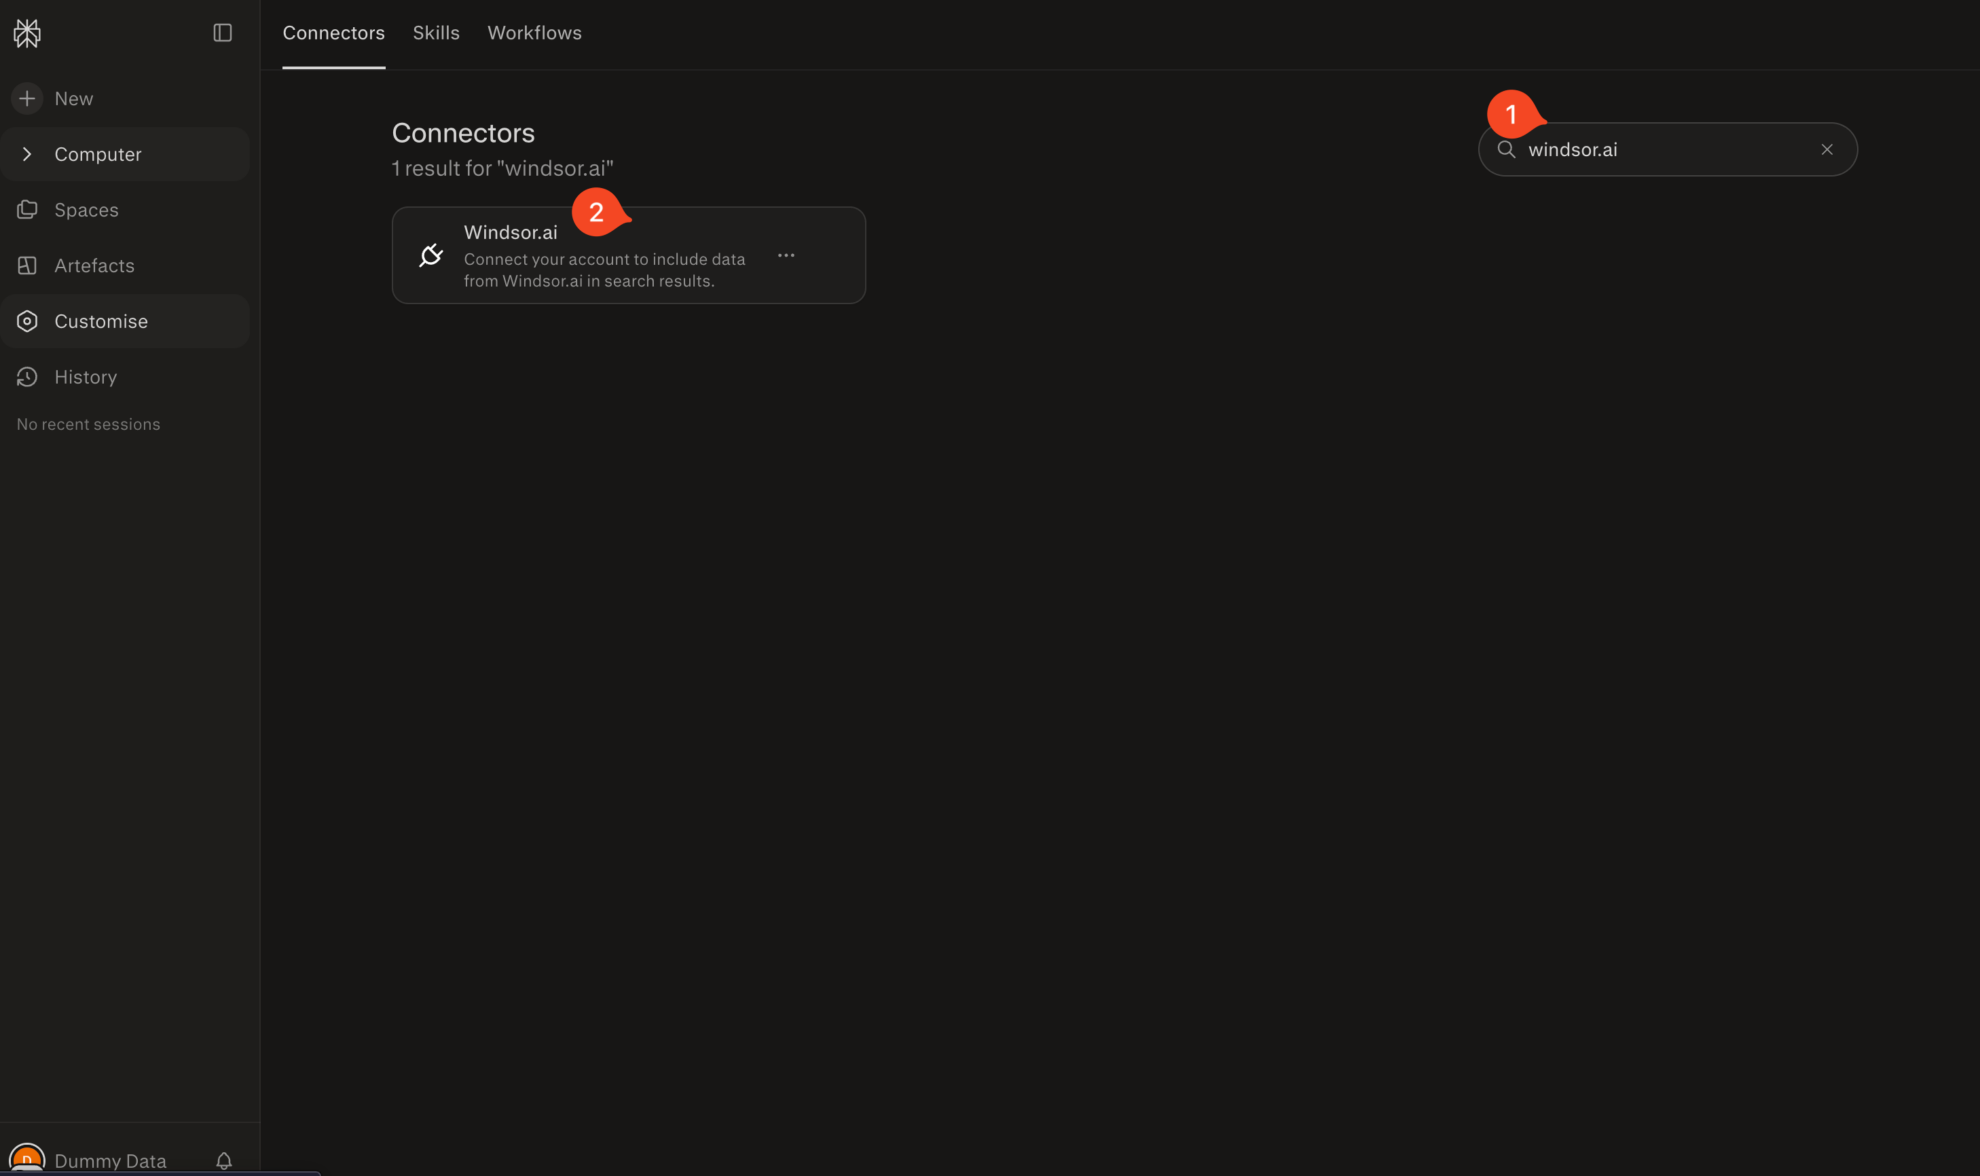
5. Install the connector.
In the Windsor.ai connector panel, click Add connector in the top-right corner.

6. Allow access.
An Application Access Request pop-up opens. Confirm the callback address shown is https://www.perplexity.ai/rest/connections/oauth_callback, then click Allow Access.

7. Select your data sources and finish.
The Windsor.ai data source selection screen opens. Review the connected sources (Facebook Ads, Google Ads, Google Analytics 4, etc.) and click Finish.
You can connect additional data sources here at any time.

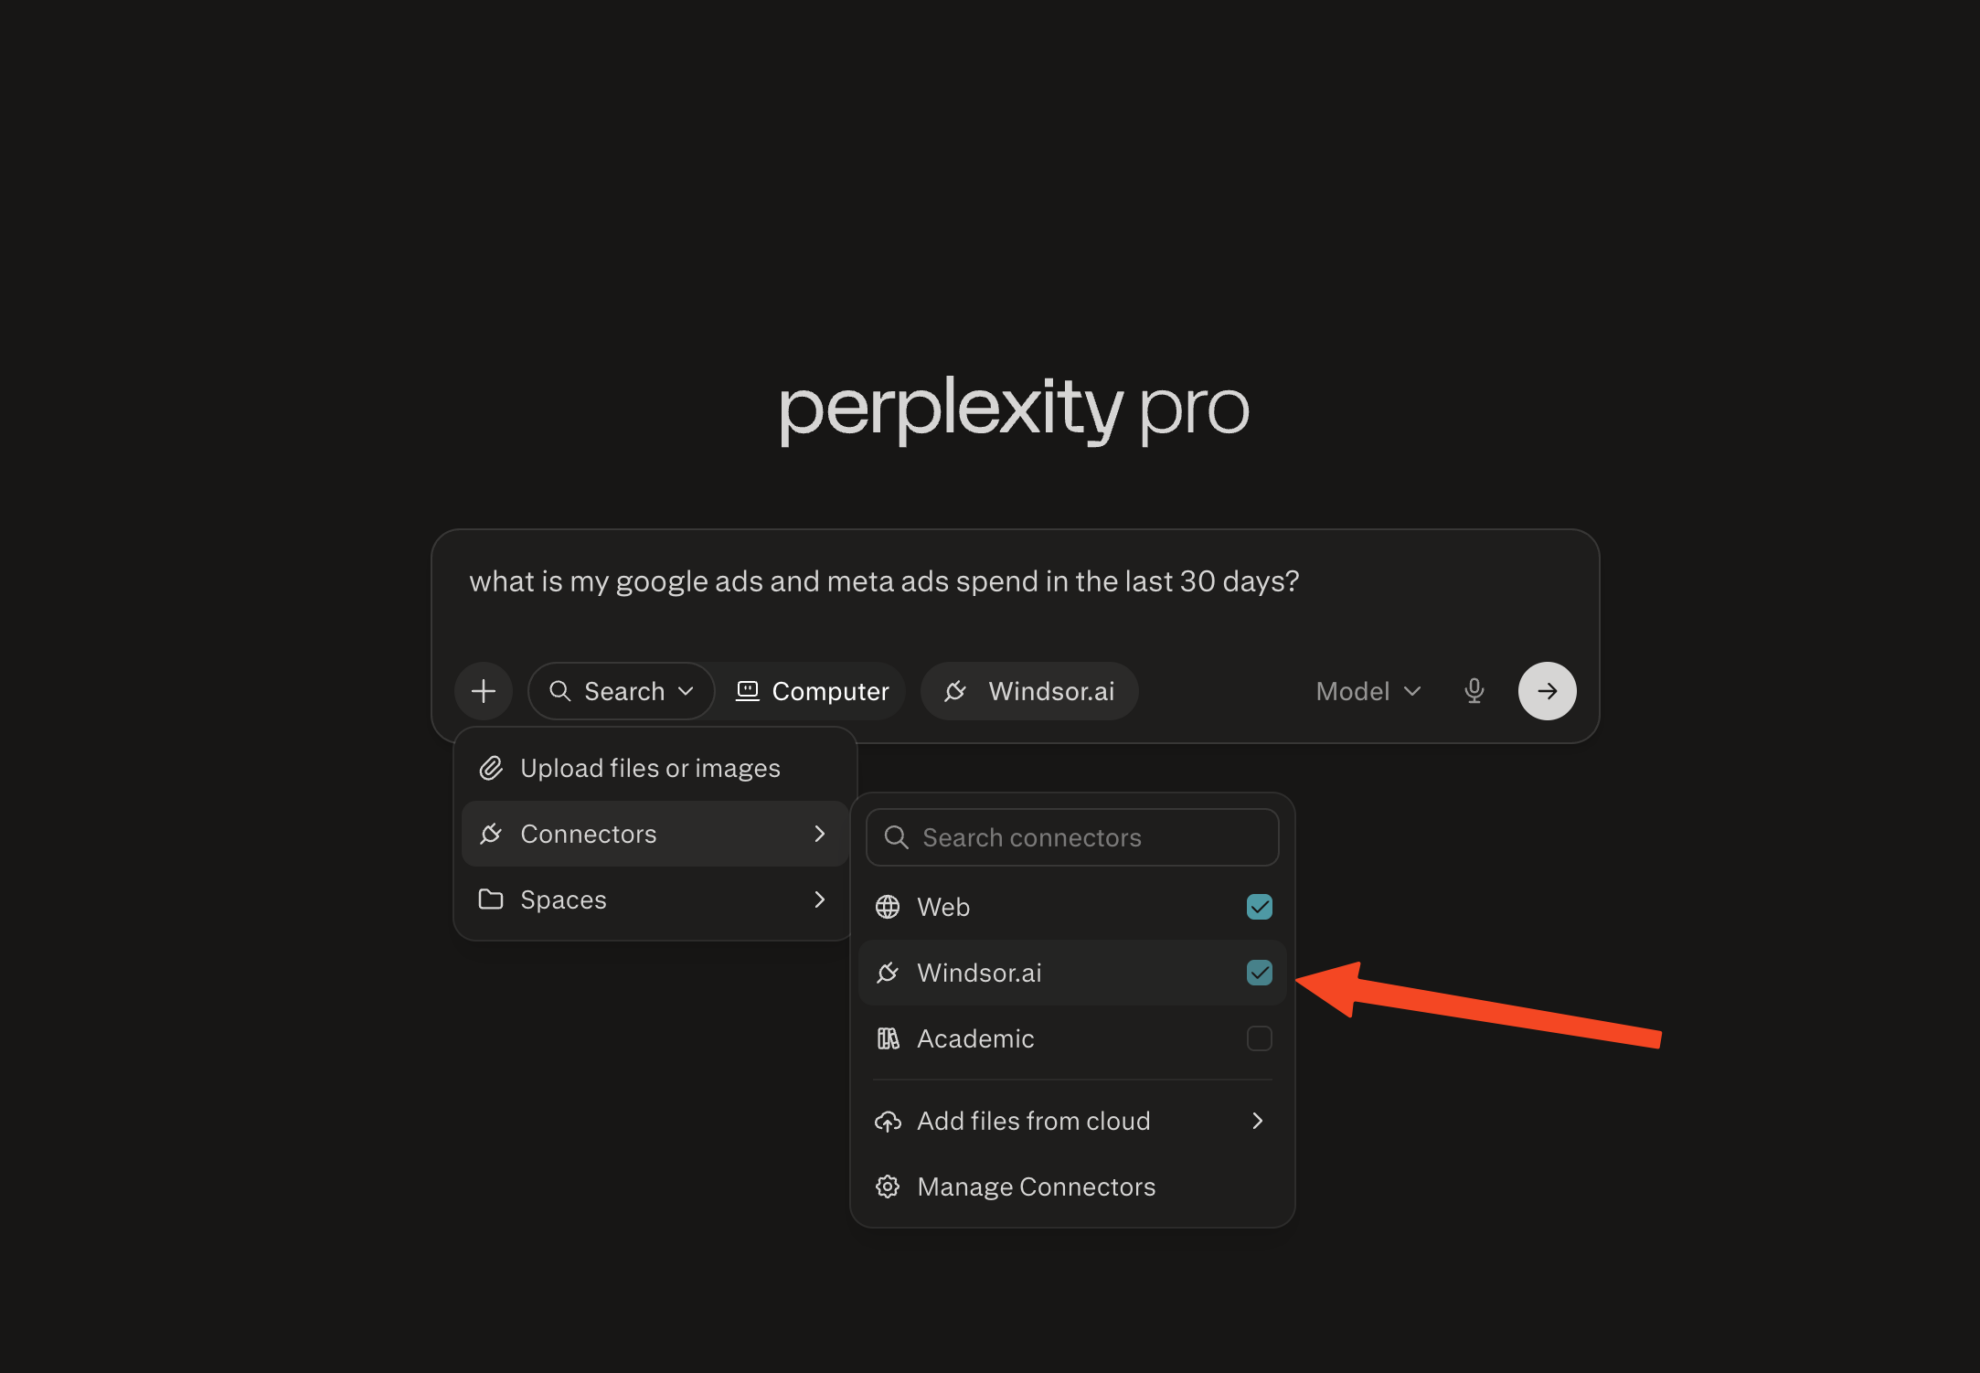
8. Enable Windsor.ai in your chat.
In a new Perplexity thread, click the + button, select Connectors, and check Windsor.ai. Then ask a question about your data, for example:
“What is my Google Ads and Meta Ads spend in the last 30 days?”
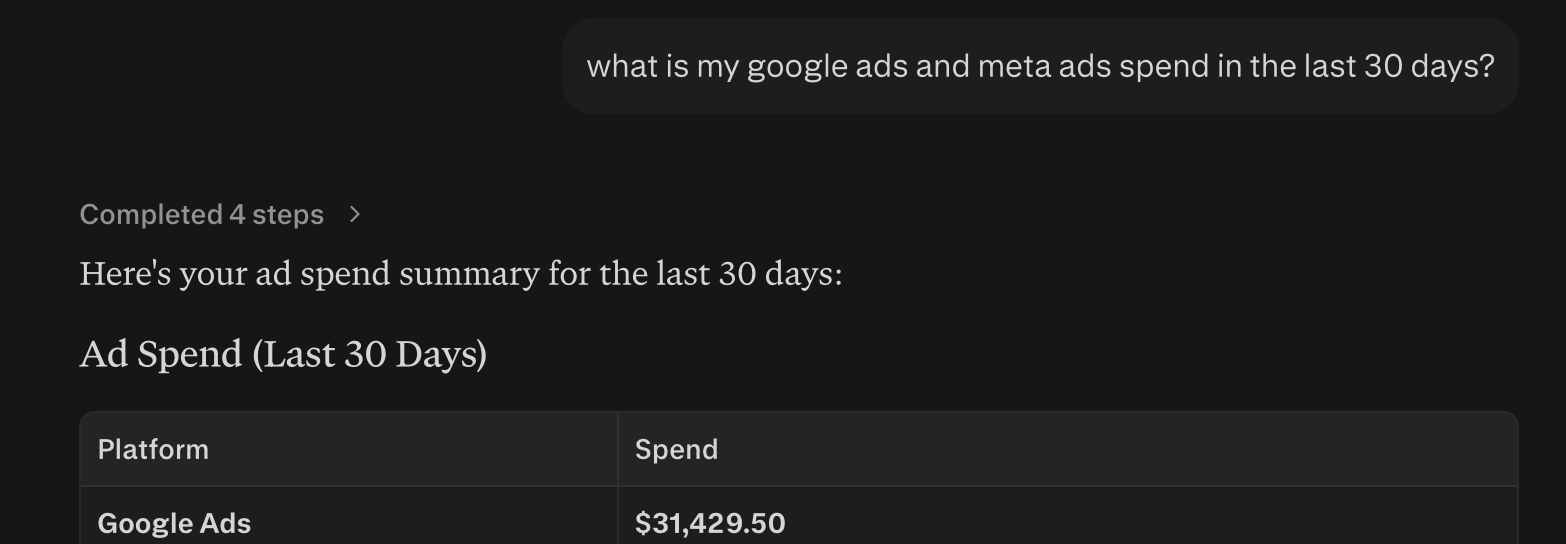
Final result.
Perplexity fetches your data through Windsor MCP and answers with your real numbers. For the example prompt above, it returns an ad spend summary table per platform for the last 30 days.
The connector stays available in every new thread. Enable it from the + menu whenever you want answers grounded in your connected data.
Helpful links
- AI analytics learning hub – Your AI analytics playbook: 200+ prompts & real use cases with platform-specific tutorials.
- About Windsor MCP – Explore general info about Windsor MCP: supported data sources and LLMs, benefits, use cases, etc.
- Windsor MCP use cases & examples (30+ prompts inside) – If you don’t know what to ask or are looking for advanced Windsor MCP use cases, read this guide for a batch of practical examples and useful prompts to make your data analysis with Perplexity even more effective and deeper.
Tired of manual data reporting and analysis? Start free with Windsor MCP today to unlock instant AI insights, no credit card required

