 AI insights
 About us
 Careers
 Security
 Customer reviews
 Contact us
 Affiliate program
 Solution partners
 Looker Studio templates
 Tableau templates
 Facebook Ads templates
 Google Ads templates
 Data fields & Metrics
 AI prompt library & Guides
 Product documentation
 API documentation
 Case studies
 Blog
Blog Data models
 Windsor vs Supermetrics
 Windsor vs Fivetran
 Windsor vs Portermetrics
How to integrate data into ChatGPT with Windsor.ai
Connect all your business apps to ChatGPT in under a minute with the Windsor.ai native app.
The Windsor.ai direct connector for ChatGPT automatically streams data from 325+ sources into your AI environment, so you can analyze, report, and get insights in real time, with no code or manual syncing.
Follow the step-by-step guide below to integrate your data into ChatGPT and start querying it instantly.
Prerequisites
To use Windsor.ai with ChatGPT, make sure you have the following:
- An active Windsor.ai account (free or paid plan) with at least one connected data source
- An active ChatGPT account
🚀 Get started with Windsor MCP today with a 30-day free trial: https://onboard.windsor.ai/ and experience the power of AI-driven analytics.
Steps to configure the Windsor.ai app for ChatGPT
1. Connect your data sources to Windsor.ai at https://onboard.windsor.ai.
❗ You don’t need to manually select data fields in Windsor.ai — all available fields are automatically passed to ChatGPT.
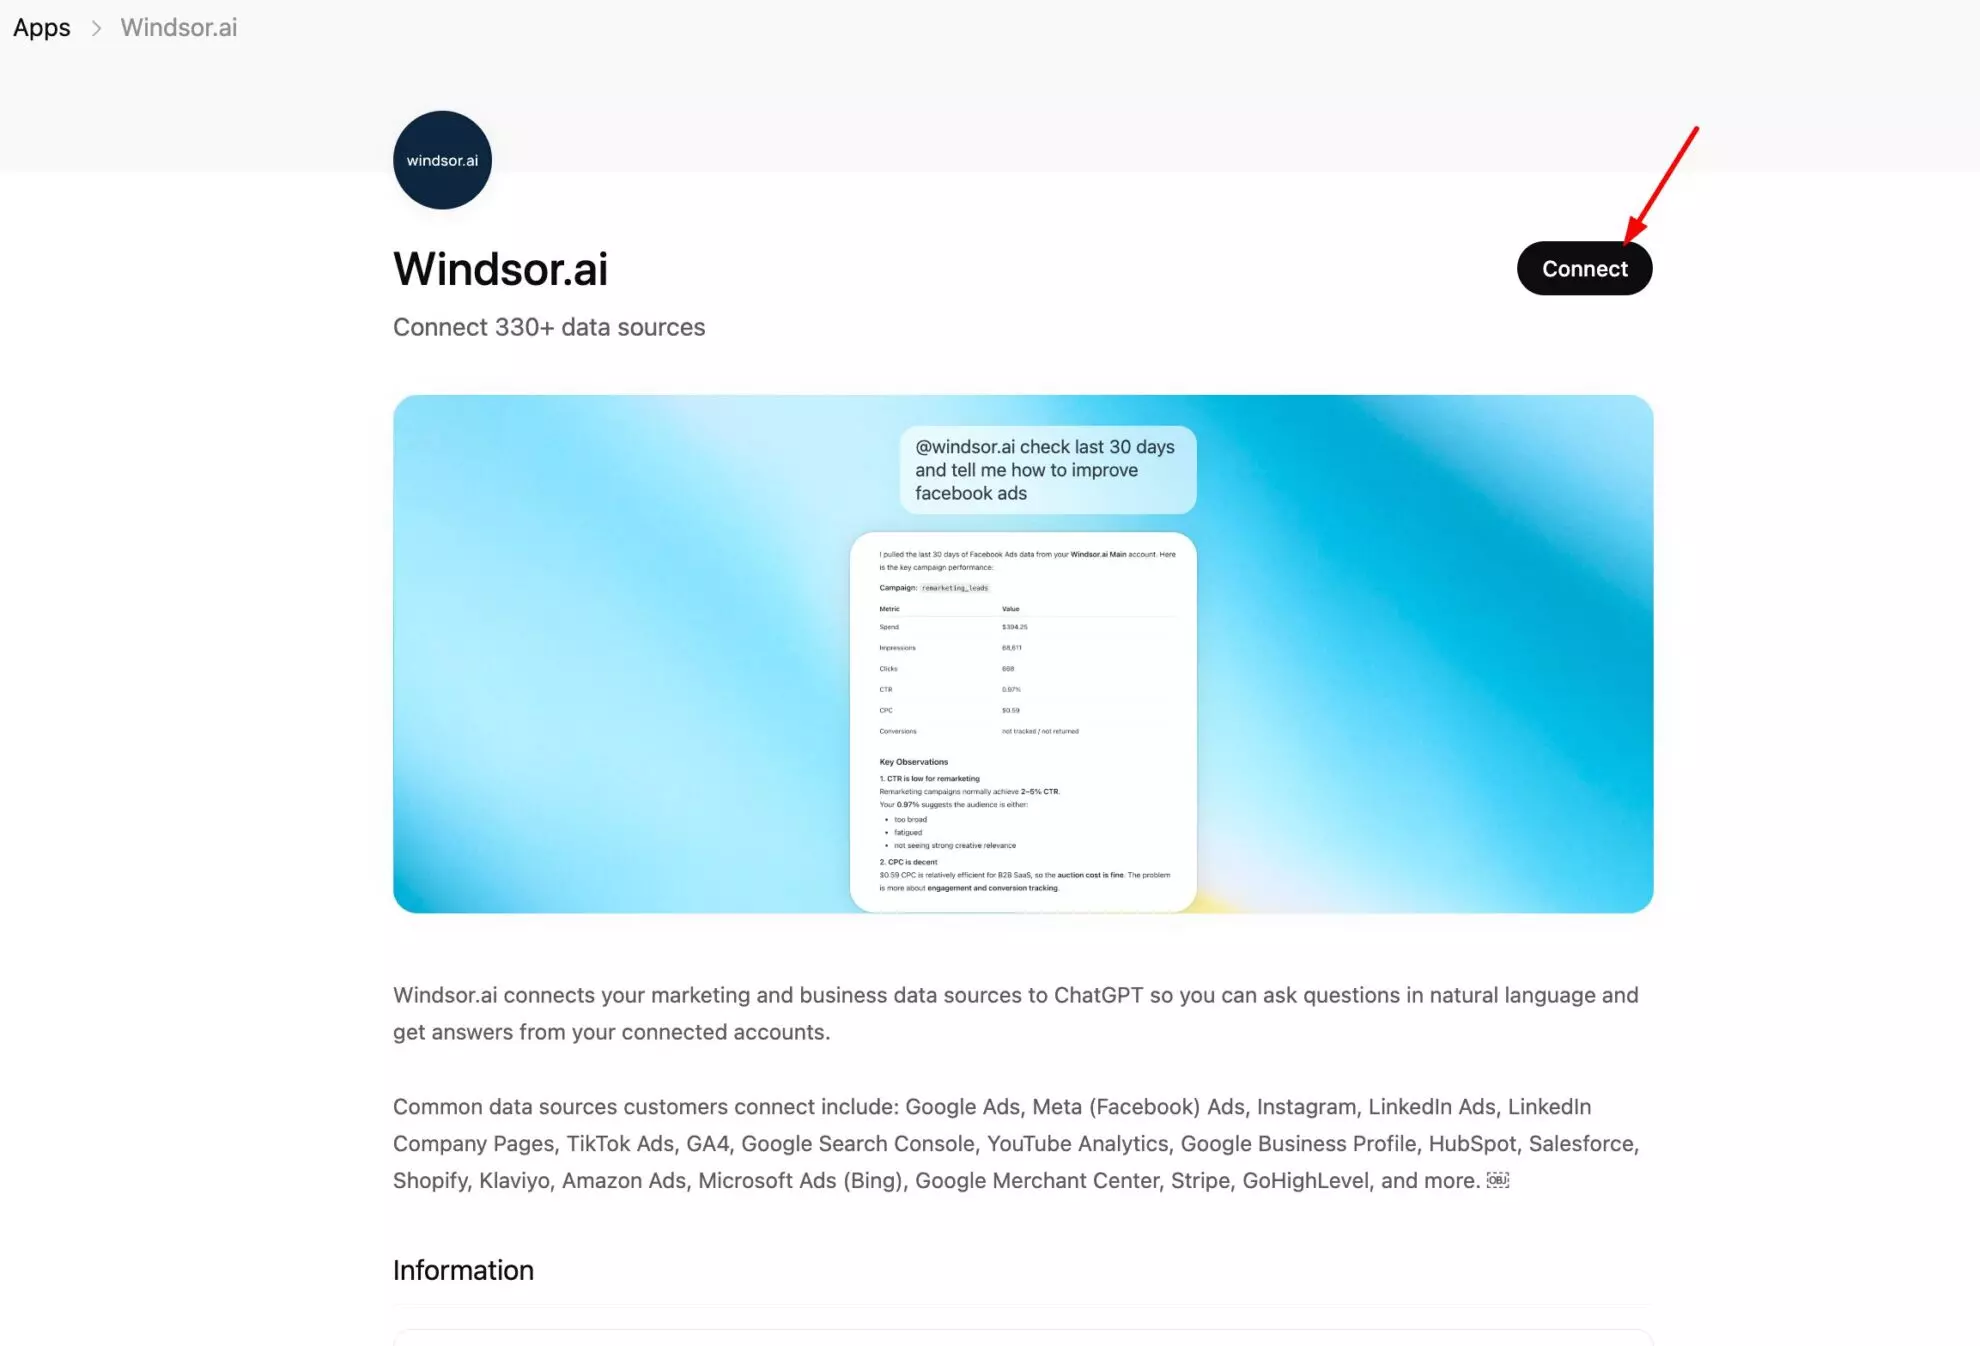
2. Log in to your ChatGPT account, open the Windsor.ai app page, and click Connect.
3. Authorize the connection between ChatGPT and Windsor.ai by clicking Allow Access.
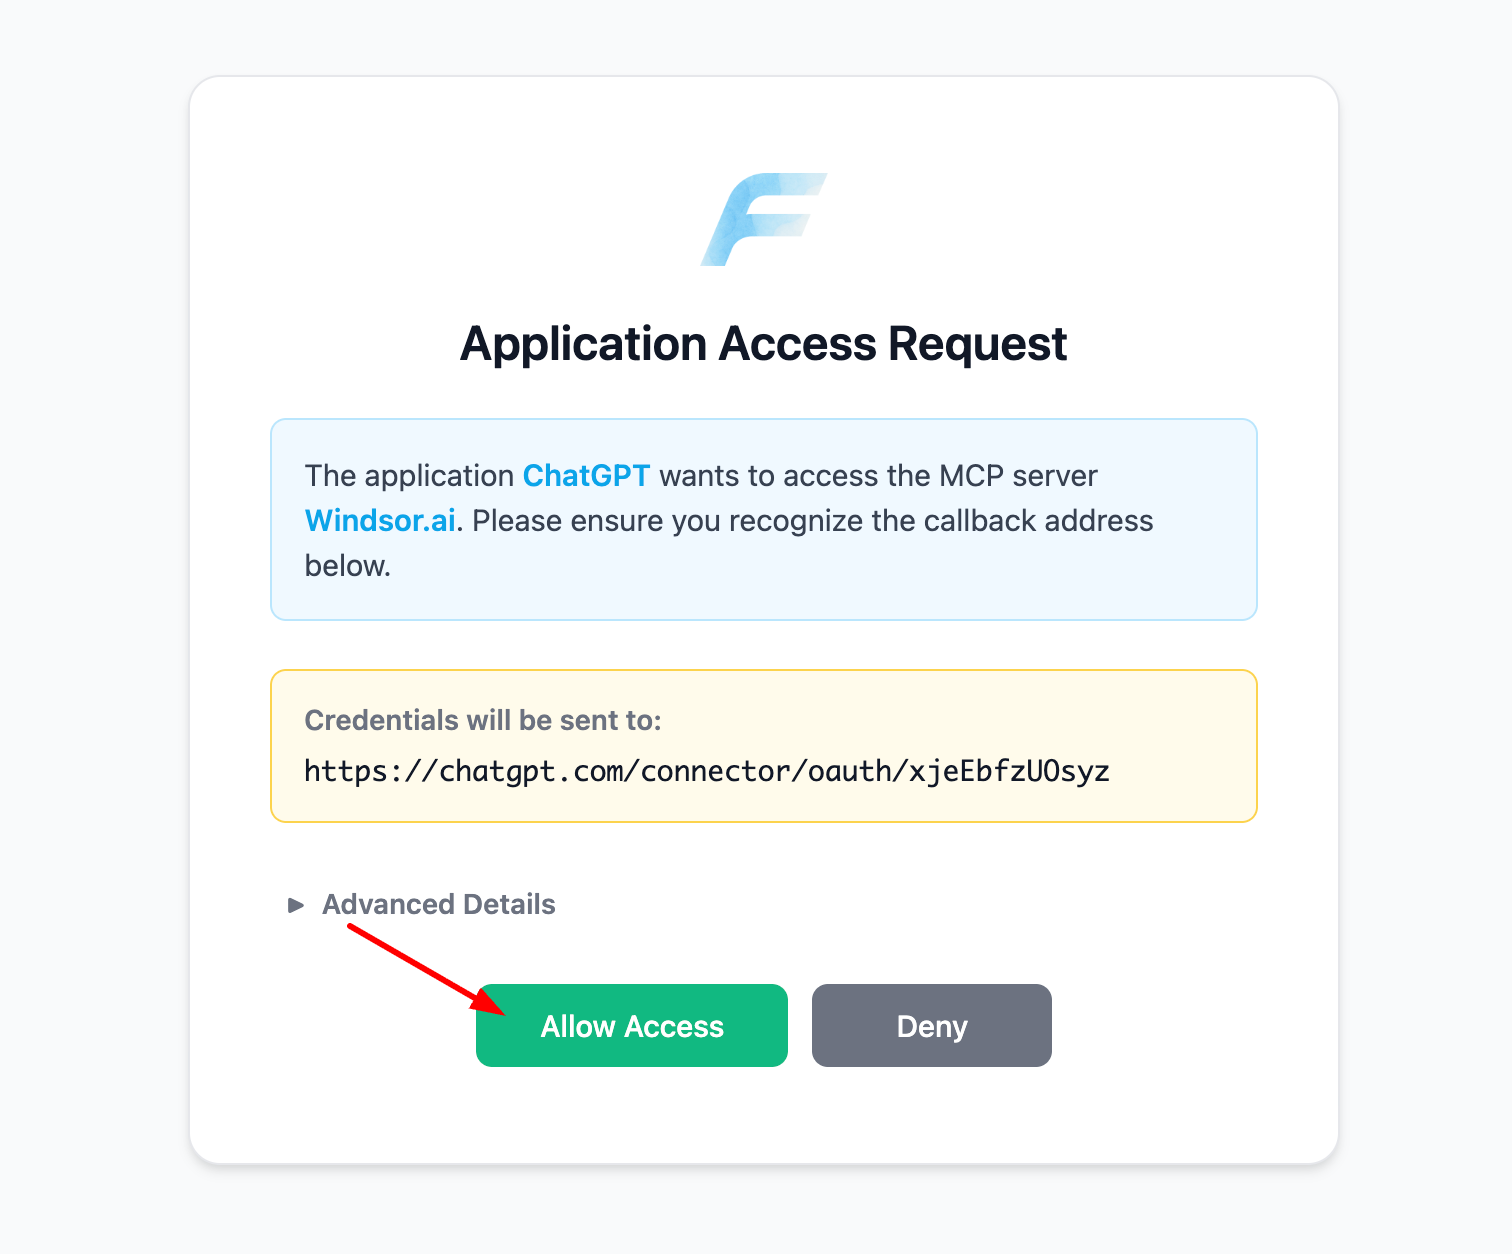
❗ Important: The Windsor.ai connector for ChatGPT accesses your data in read-only mode and does not modify any data in your connected platforms (e.g., Facebook Ads).
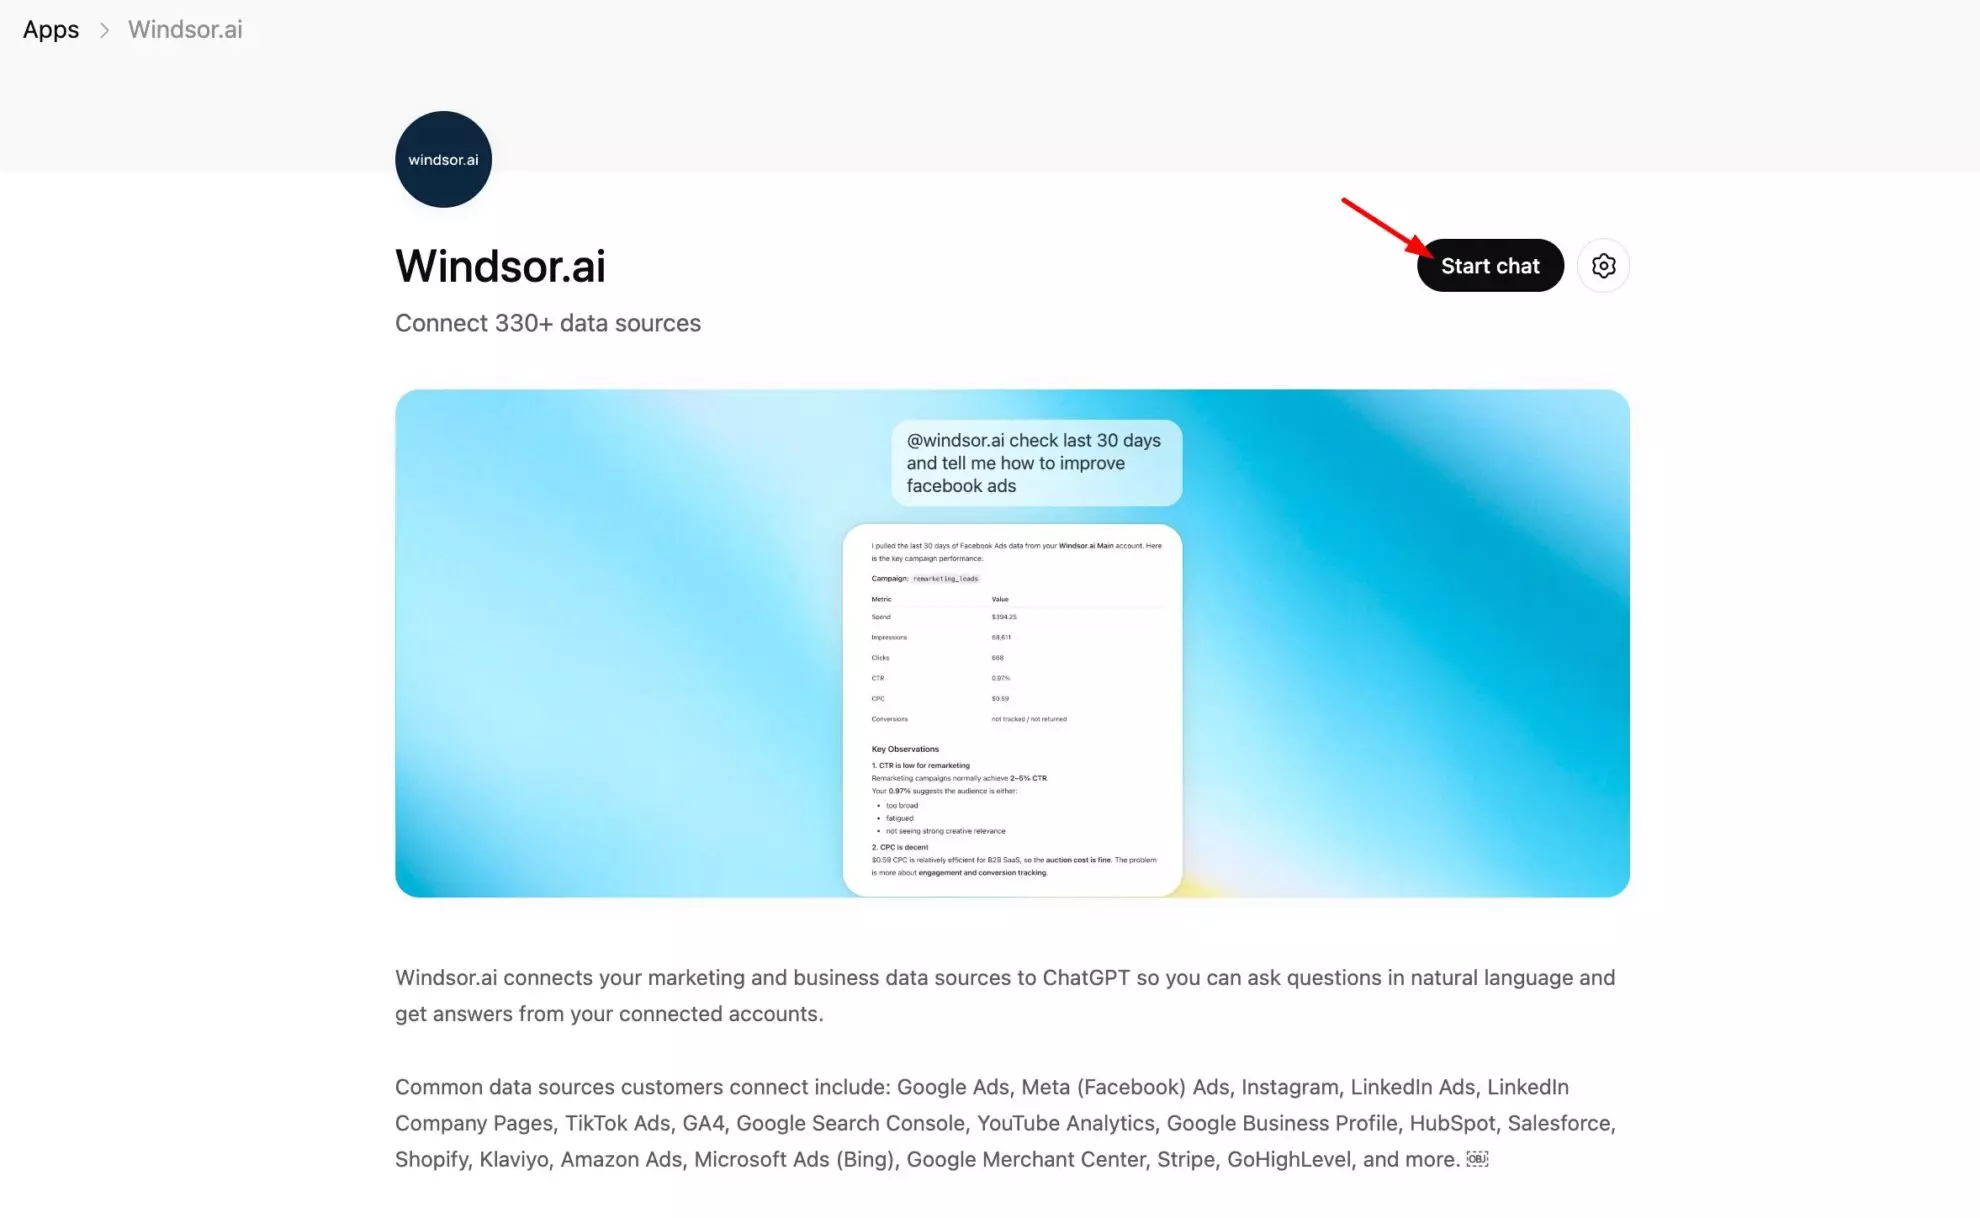
4. Once connected, you’ll be redirected to the Windsor.ai connector page. Click Start chat.
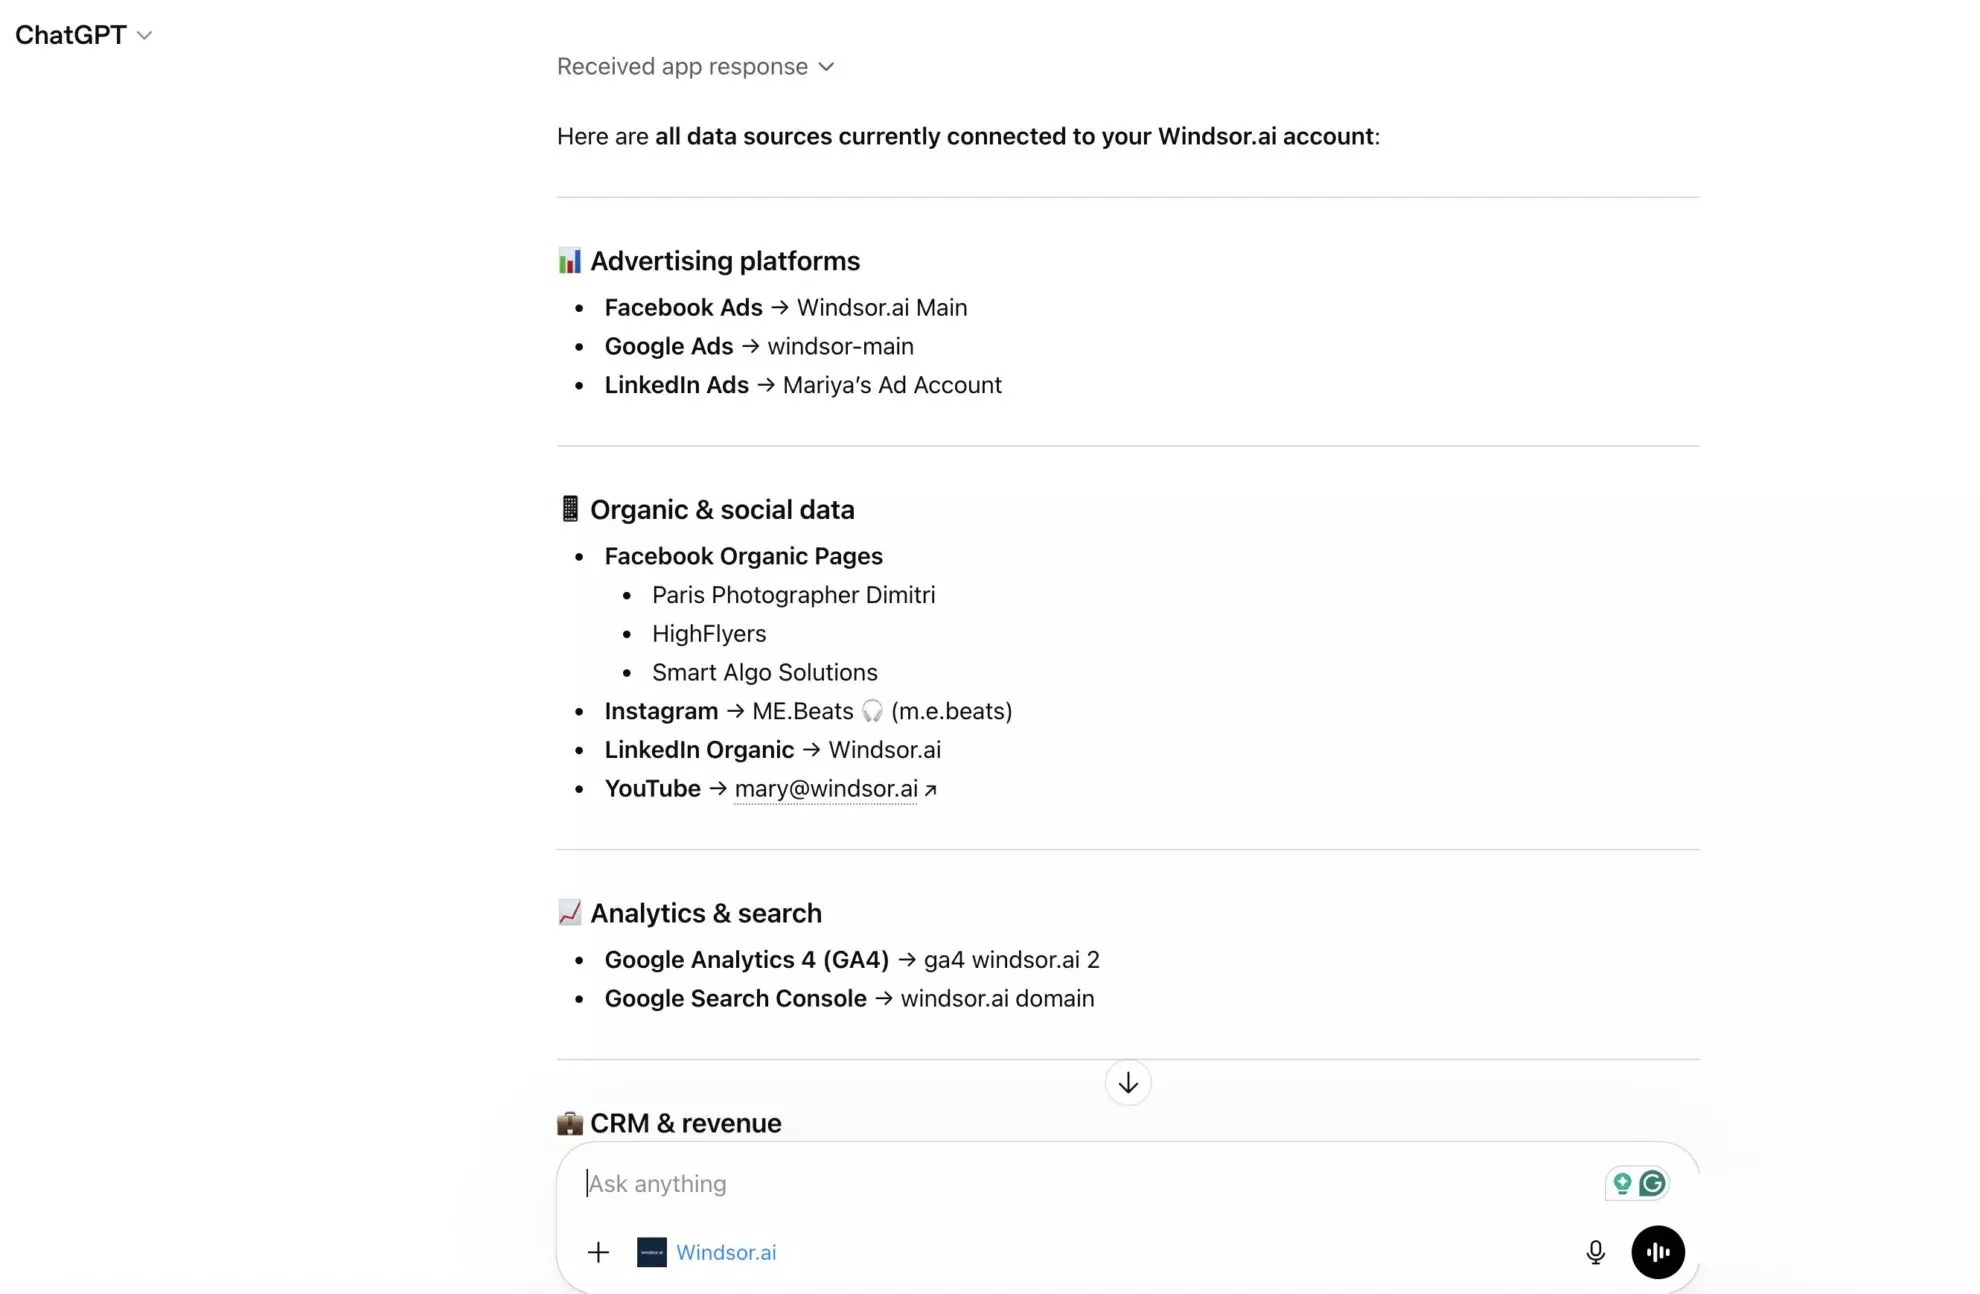
5. A new chat will open with the Windsor connector enabled. You can optionally run a connection test to ensure that ChatGPT can access your Windsor-integrated data.
Try a prompt like this:
List the data sources connected to my Windsor account.
Continue to query your connected data with deeper prompts. Just make sure that the Windsor.ai connector is enabled in your chat.
📚 For more prompt ideas: AI Prompt Library by Windsor.ai.
Helpful links
- About Windsor MCP – Explore general info about Windsor MCP: supported data sources and LLMs, benefits, use cases, etc.
- Windsor MCP use cases & examples (30+ prompts inside) – If you don’t know what to ask or are looking for advanced Windsor MCP use cases, read this guide for a batch of practical examples and useful prompts to make your ChatGPT data analysis even more effective and deeper.
Tired of manual data reporting and analysis? Get started with Windsor MCP today to unlock instant AI insights

