 AI insights
 About us
 Careers
 Security
 Customer reviews
 Contact us
 Affiliate program
 Solution partners
 Looker Studio templates
 Tableau templates
 Facebook Ads templates
 Google Ads templates
 Data fields & Metrics
 AI prompt library & Guides
 Product documentation
 API documentation
 Case studies
 Blog
Blog Data models
 Windsor vs Supermetrics
 Windsor vs Fivetran
 Windsor vs Portermetrics
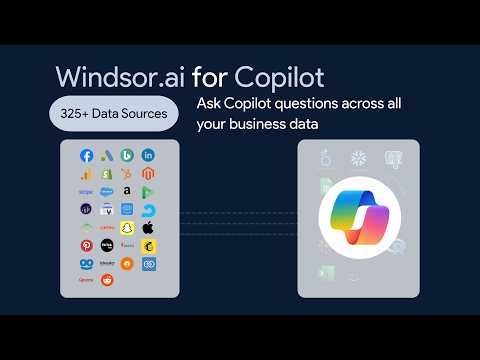
How to integrate data into Copilot Agent with Windsor MCP
Windsor MCP automatically links your data from 350+ sources to Copilot Agent, so you can talk to your business data, ask questions in natural language, and get AI-powered answers. No code, no manual imports.
Follow this guided setup to integrate your data with Copilot Agent in just a few minutes.
Prerequisites
To use Windsor MCP with Copilot Agent, make sure you have the following:
- An active Windsor.ai account (free or paid plan) with at least one connected data source
- An active Copilot Studio account
🚀 Get started with Windsor MCP today with a 30-day free trial: https://onboard.windsor.ai/ and experience the power of AI-driven analytics.
Steps to configure Windsor MCP for Copilot Agent
There are two ways to connect Windsor MCP to your agent:
- Use the native Windsor.ai connector for the fastest setup
- Configure the MCP server manually if you prefer more control
Method 1. Native connector installation
Windsor.ai provides a native MCP connector for Copilot, which can be automatically installed with just a few clicks.
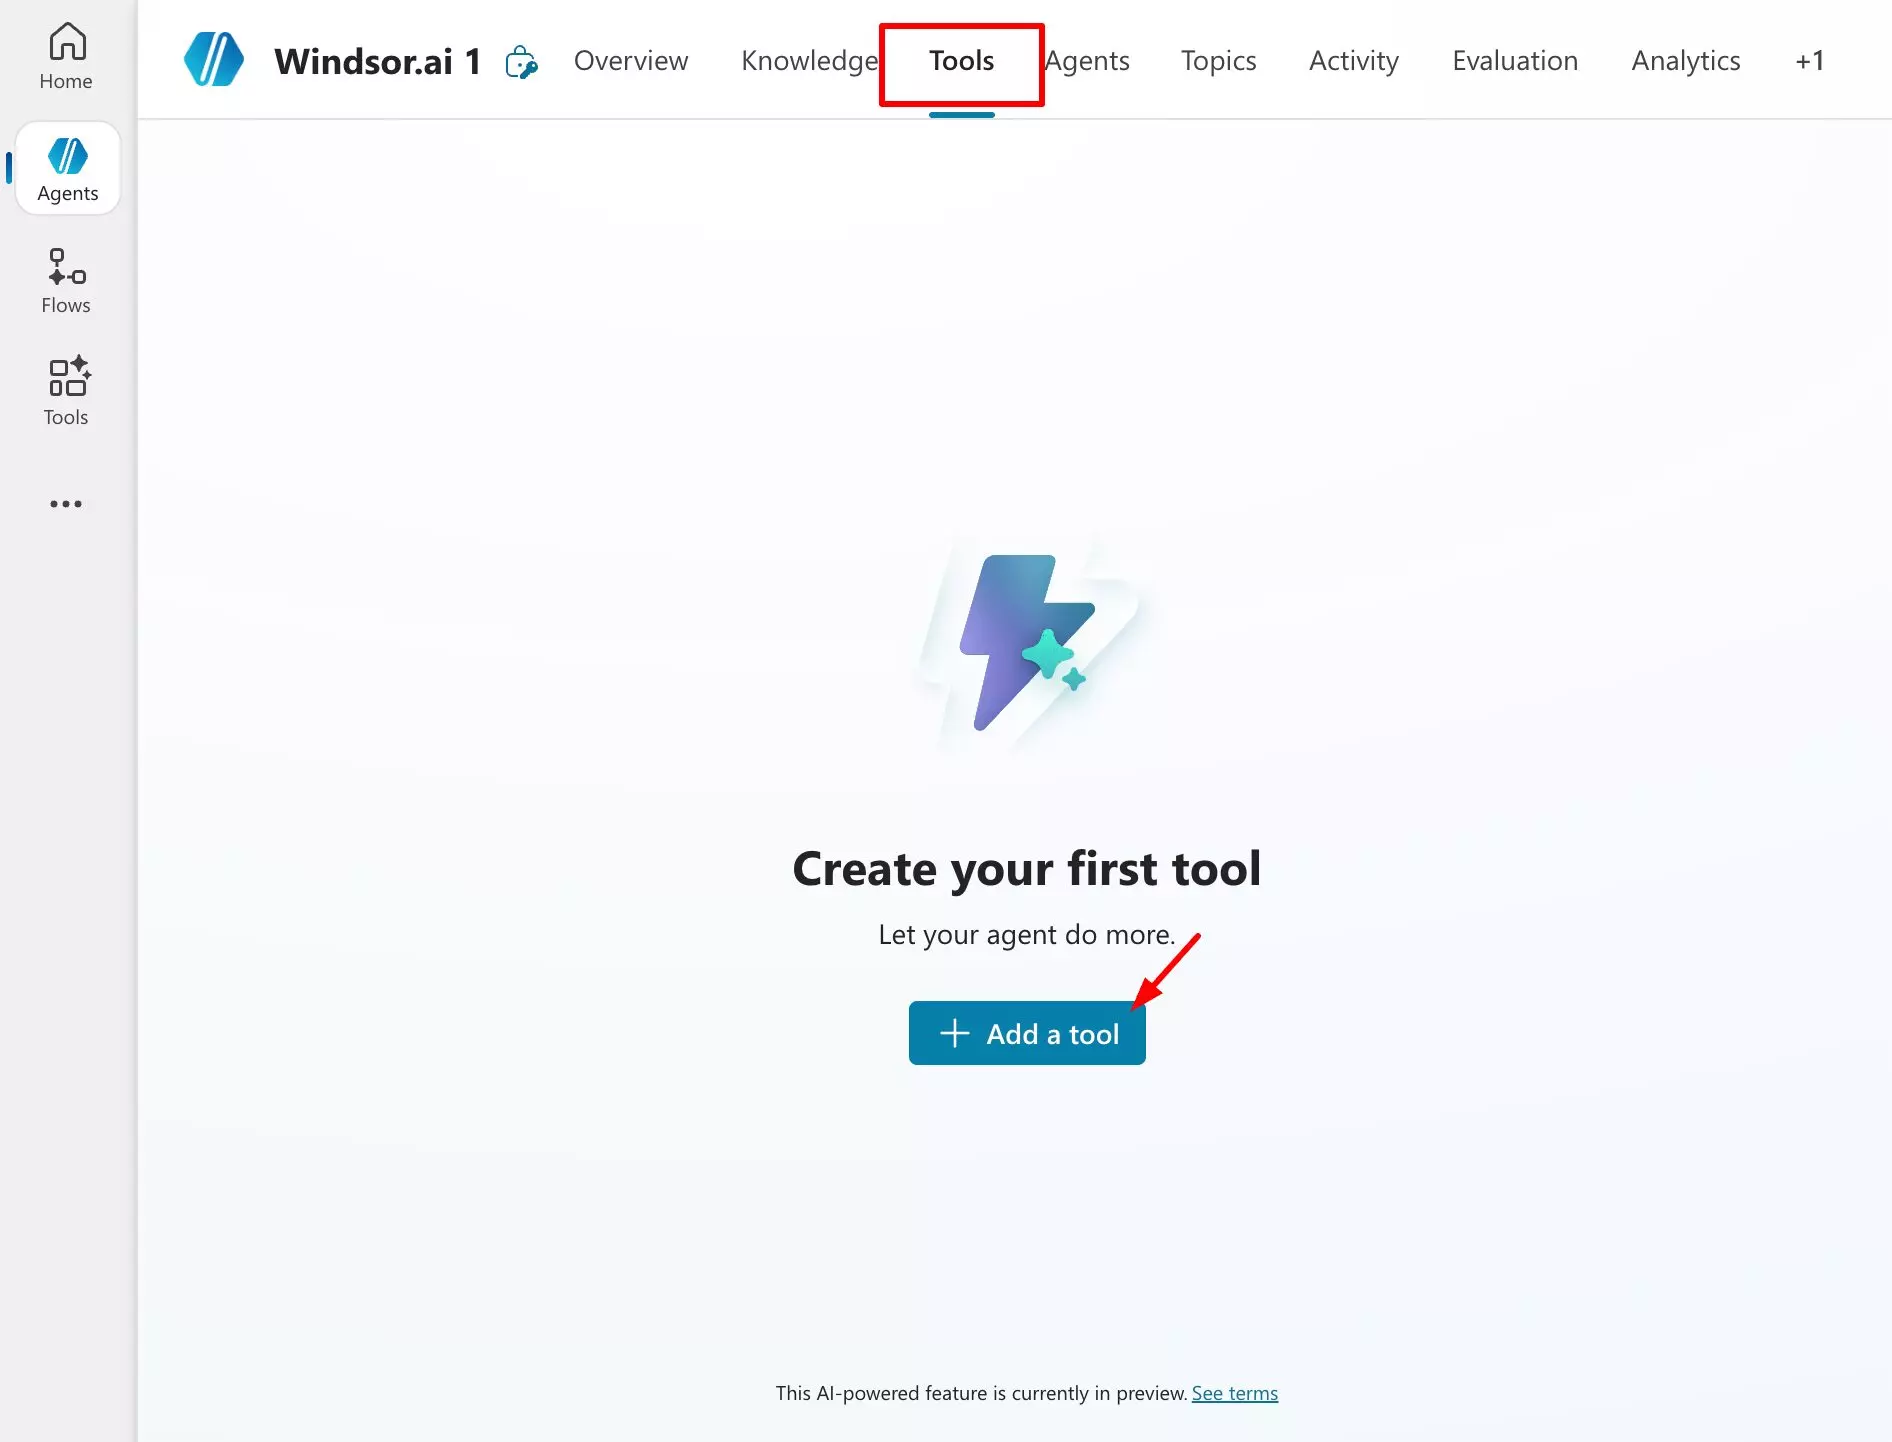
1. Log in to your Copilot Studio account and select your agent. If you don’t have an existing agent, you need to create one first.


2. Go to the Tools tab and click + Add a tool.
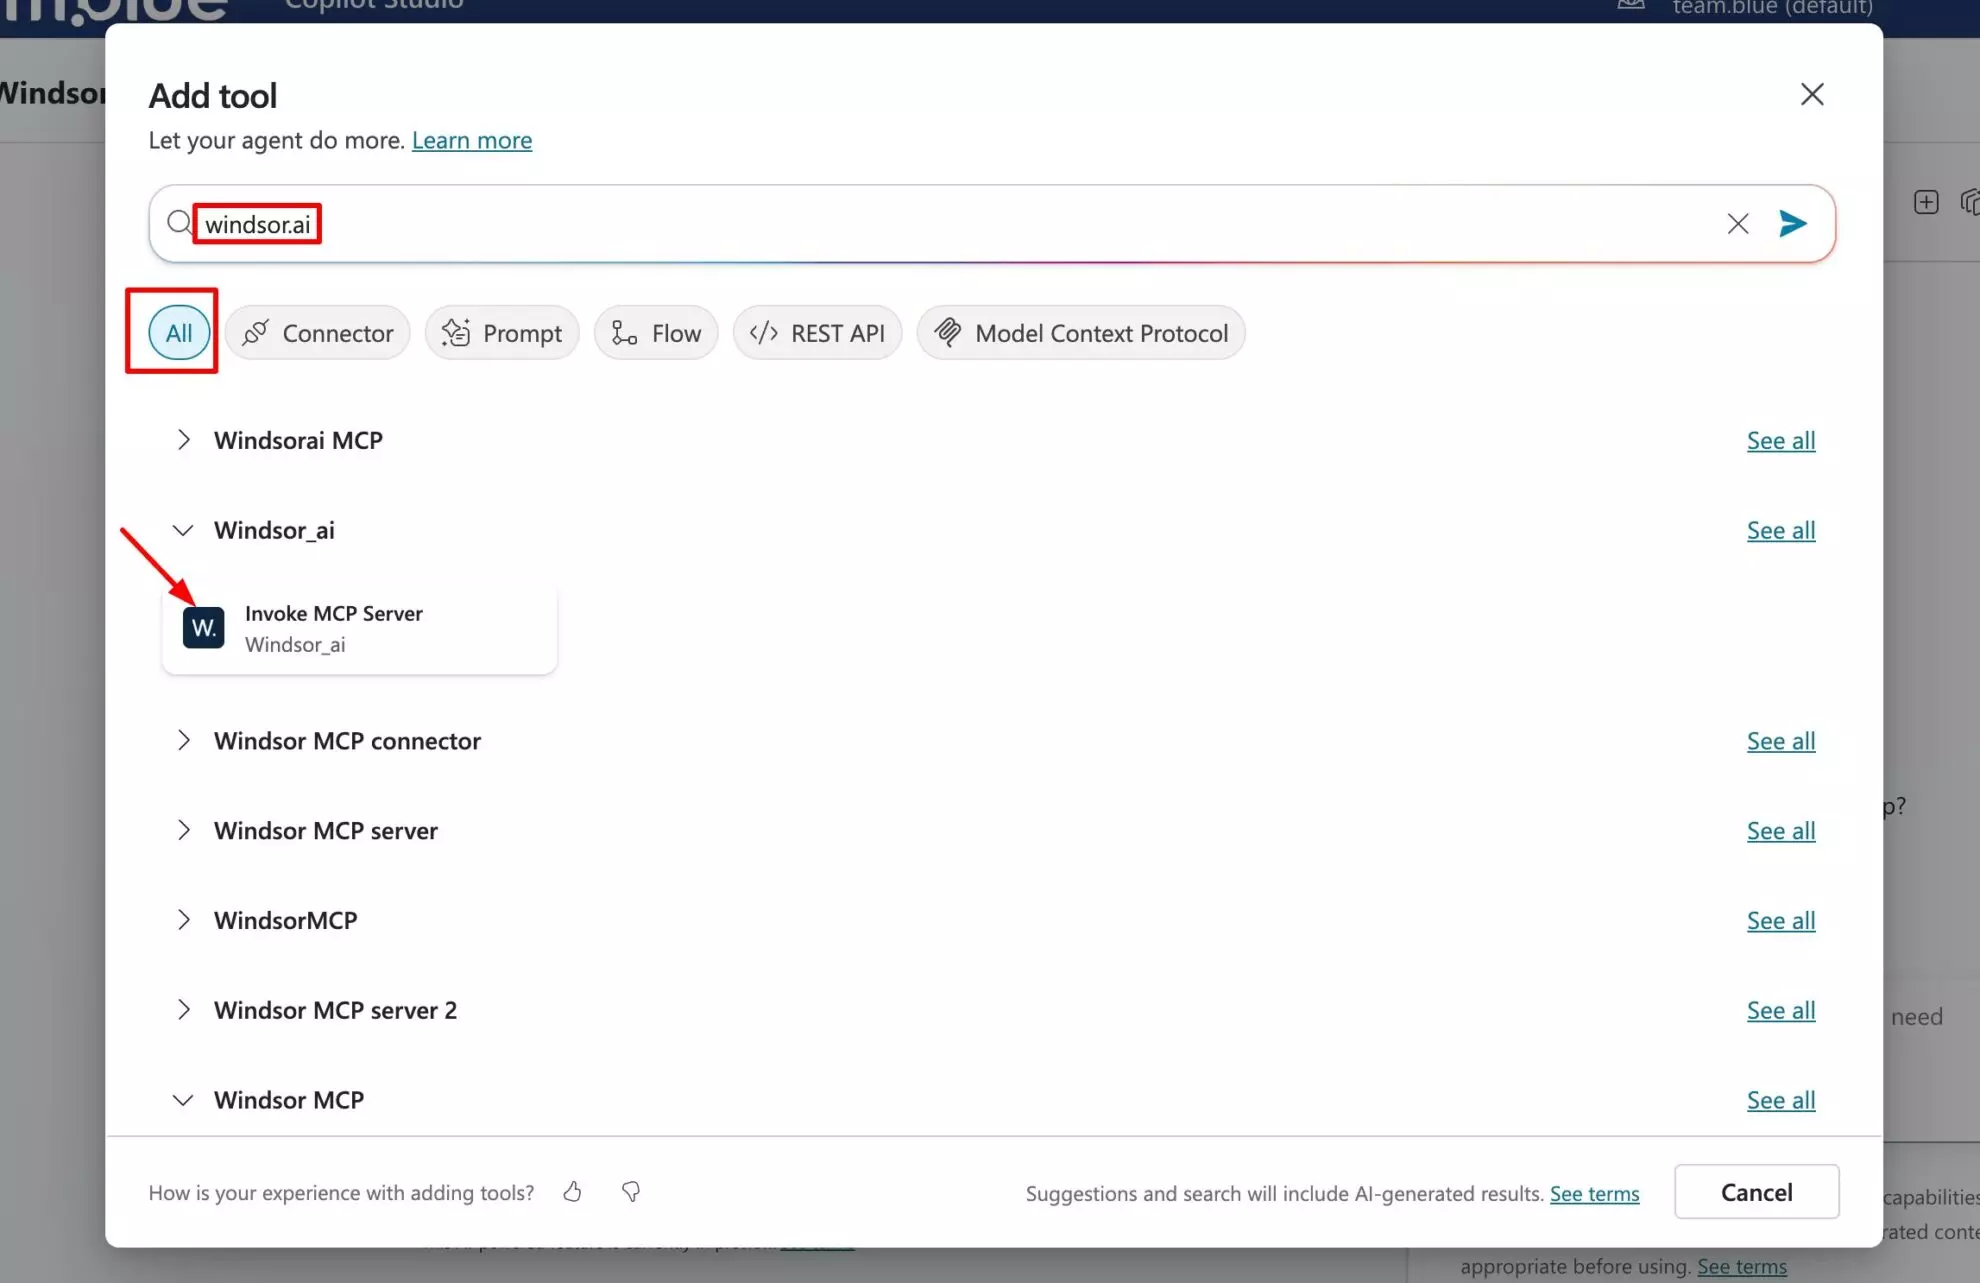
3. Search for Windsor.ai and add it (please, select the All category).
4. Create new connection and authorize access to your Windsor.ai account.
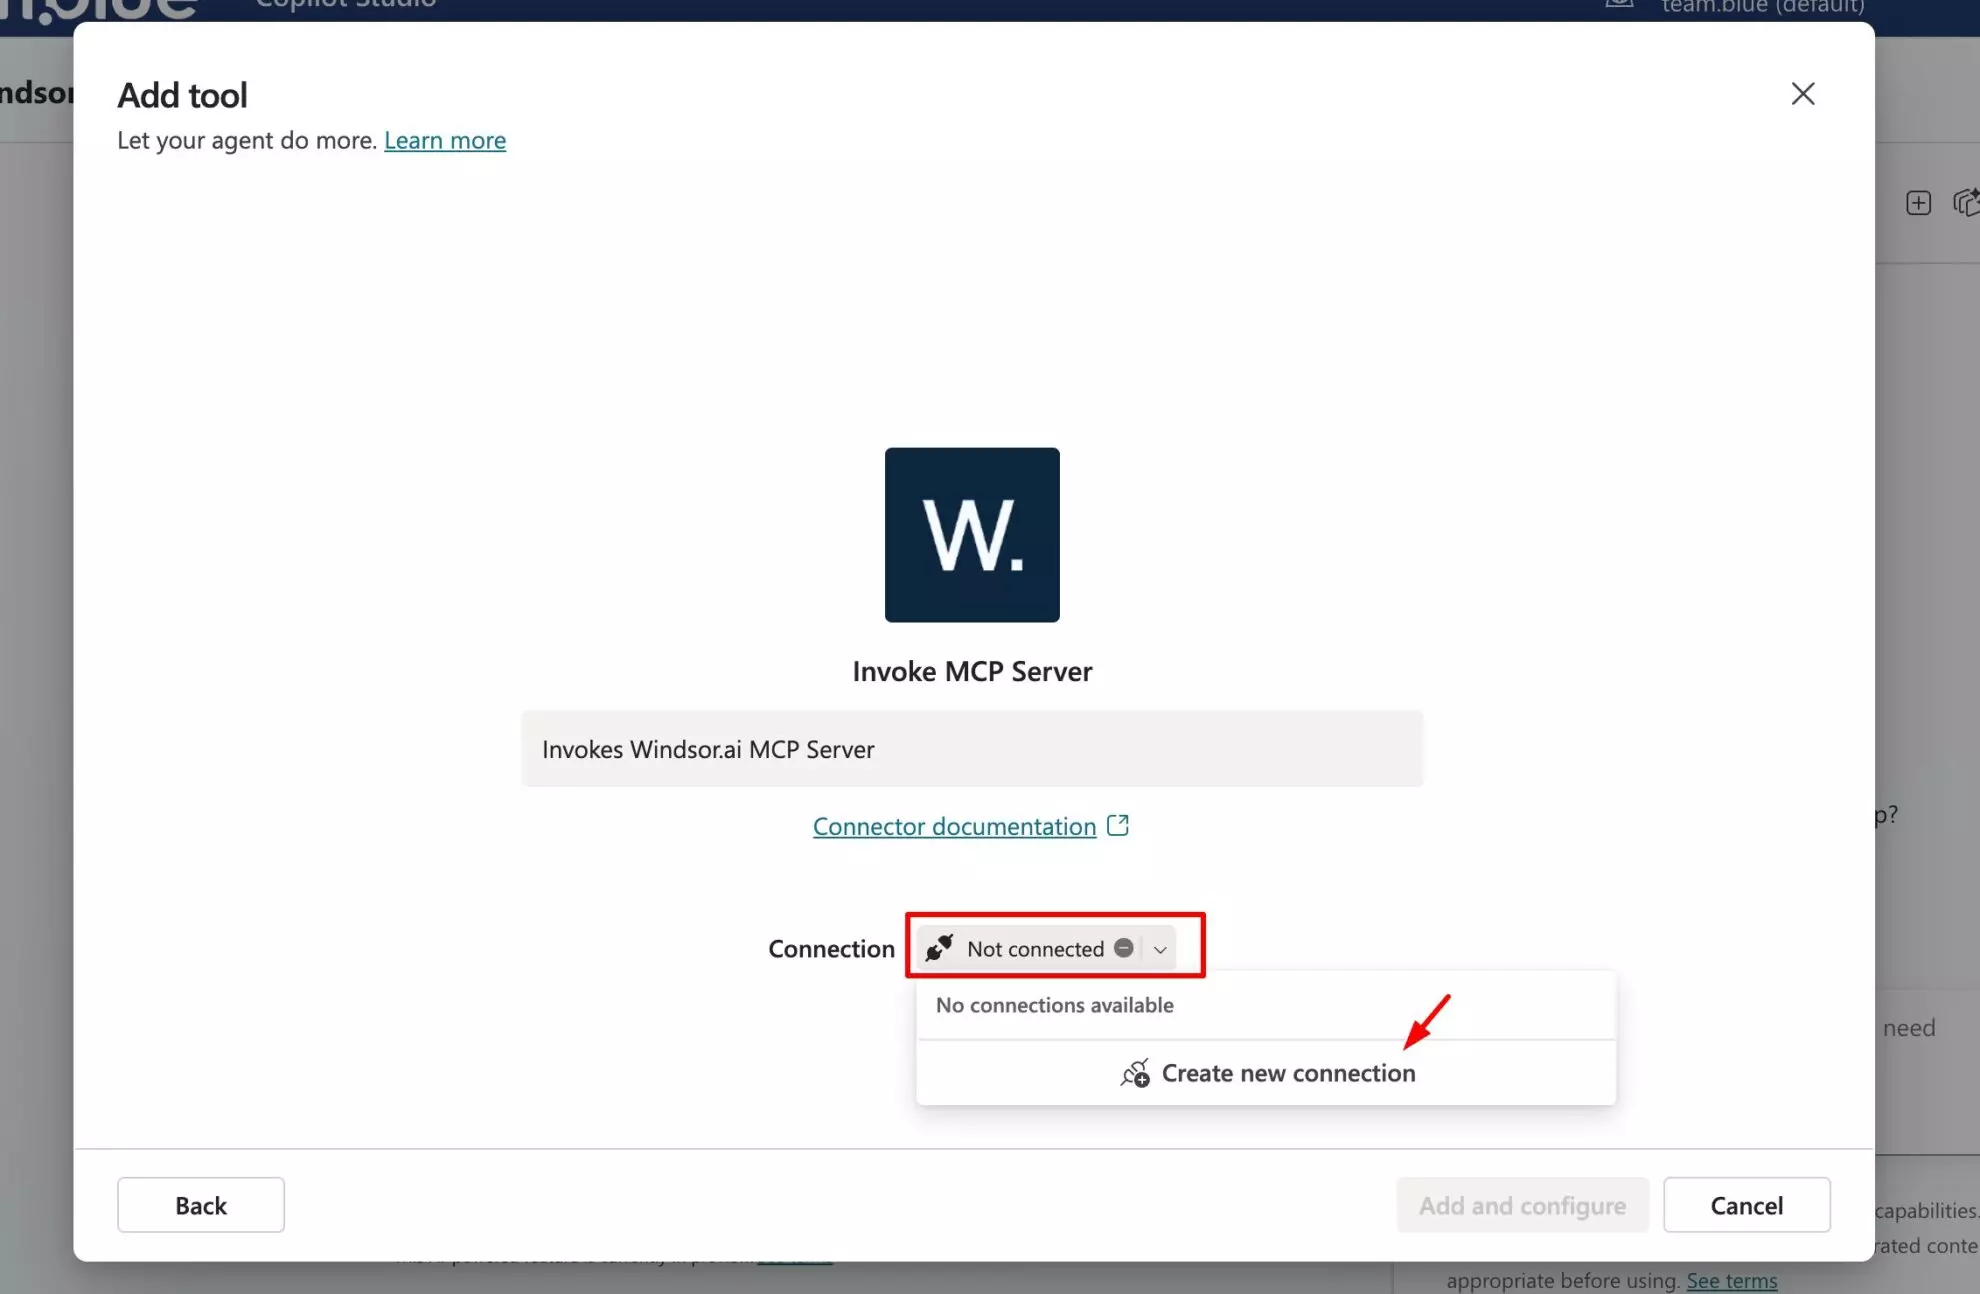
When connected, click Create -> Add and configure to complete the setup.
5. Now, you can query your agent, but first, it will ask you to connect to Windsor MCP.

Click Open connections manager. It will open a new window; click Connect.
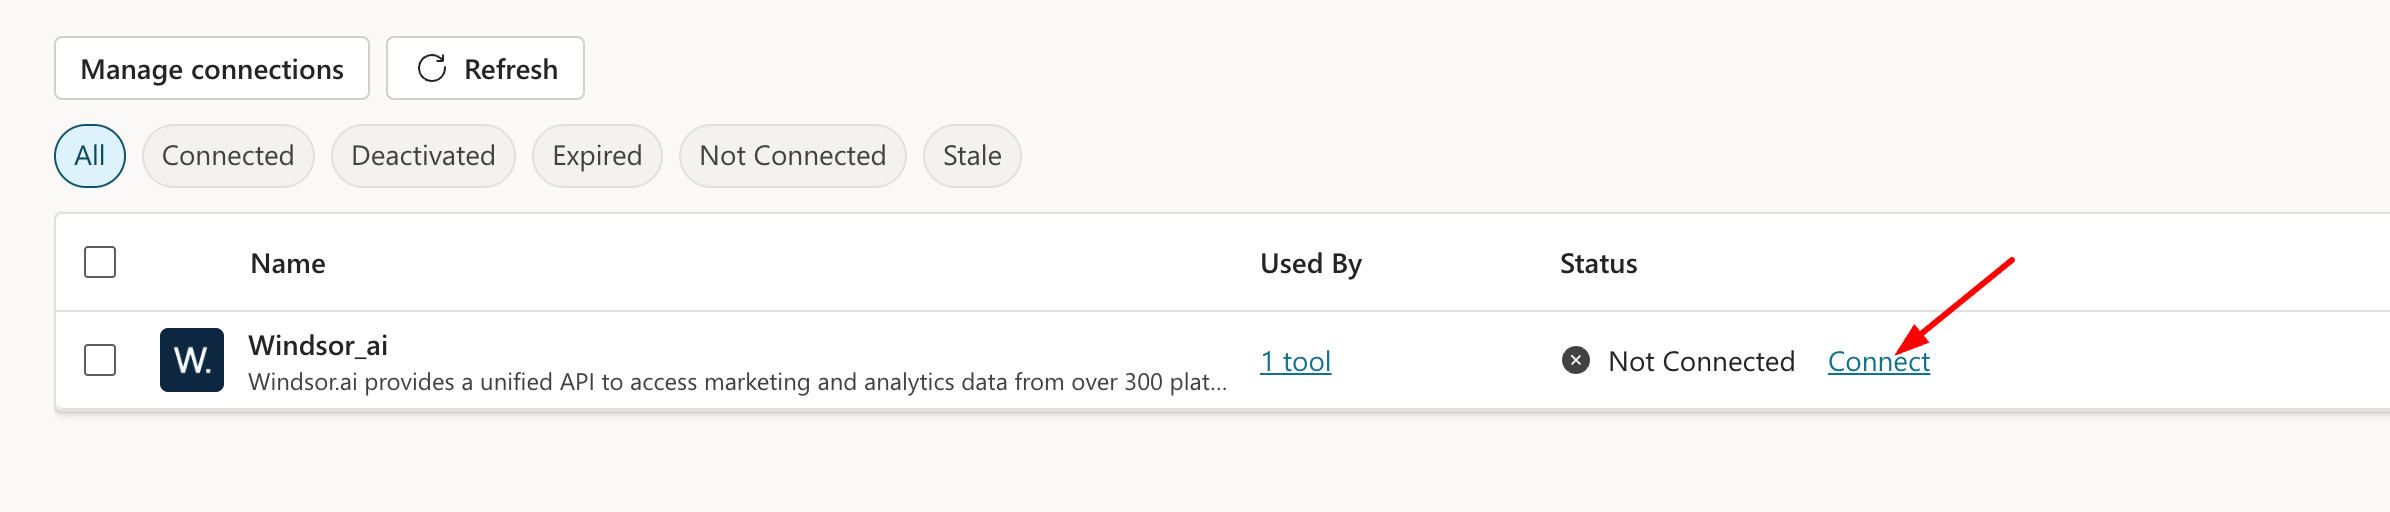
The connection pop-up will appear; click Submit.
Now, Windsor MCP is authenticated. Go back to your agent window.
6. Click Retry in your agent prompt and ask anything about your Windsor-integrated data.
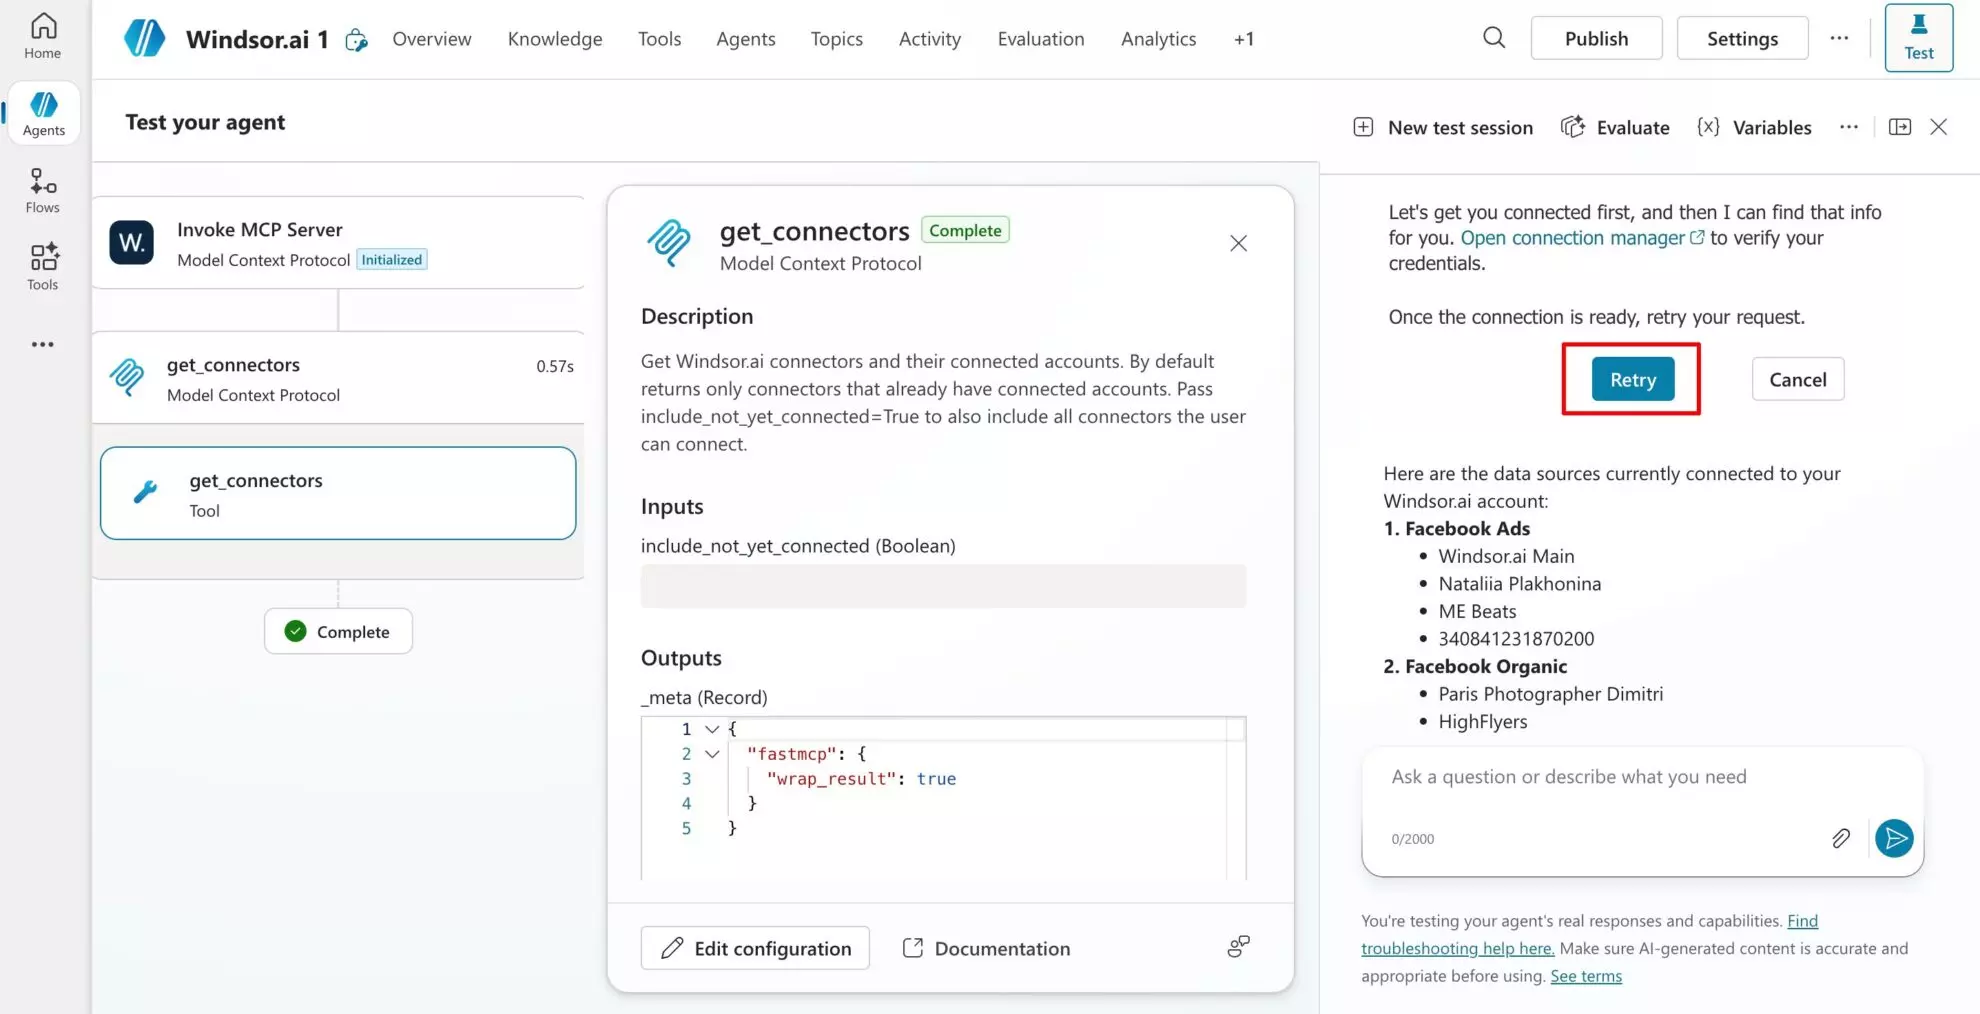
❗ Good to know: Windsor.ai provides read-only access to your data and does not write, update, or send any changes to your connected sources.
Method 2. Manual Windsor MCP configuration
Prefer to configure Windsor MCP manually? Follow these steps:
1. Log in to your Copilot Studio account and select your existing agent or create a new one.
2. Go to the Tools tab, click + Add tool, and select Model Context Protocol.

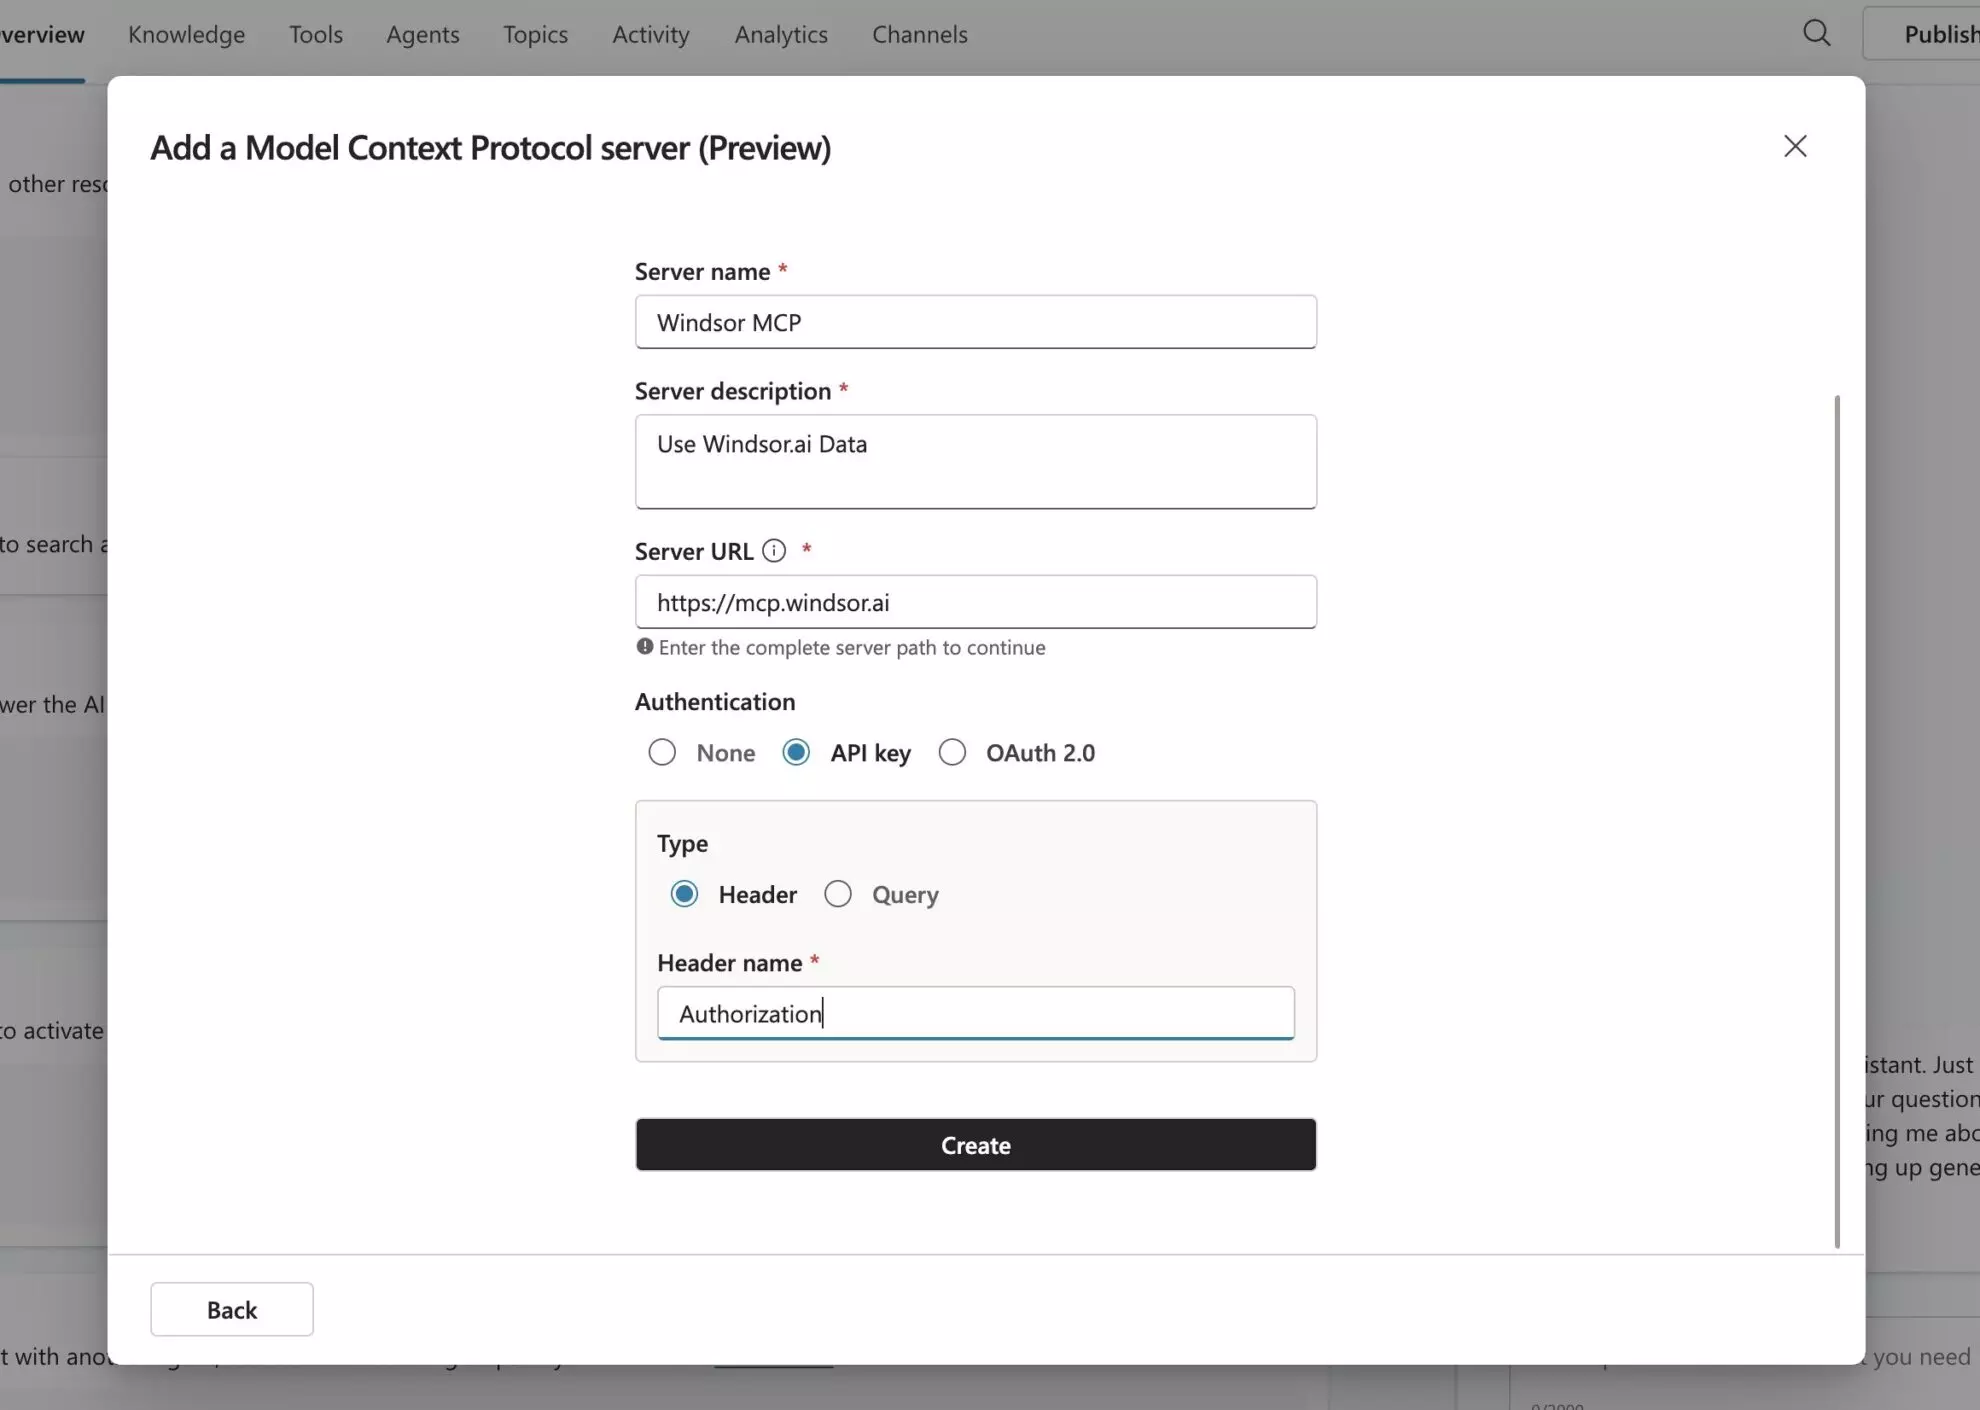
3. Fill in the MCP details:
- Server Name: Windsor MCP
- Server Description: Use Windsor.ai data (you can enter any description).
- Server URL: https://mcp.windsor.ai
- Select the API Key option in the authentication section.
- Enter Authorization in the Header name field and click Create.
4. On the next screen, click the dropdown under ‘Not connected’ and select Create new connection.
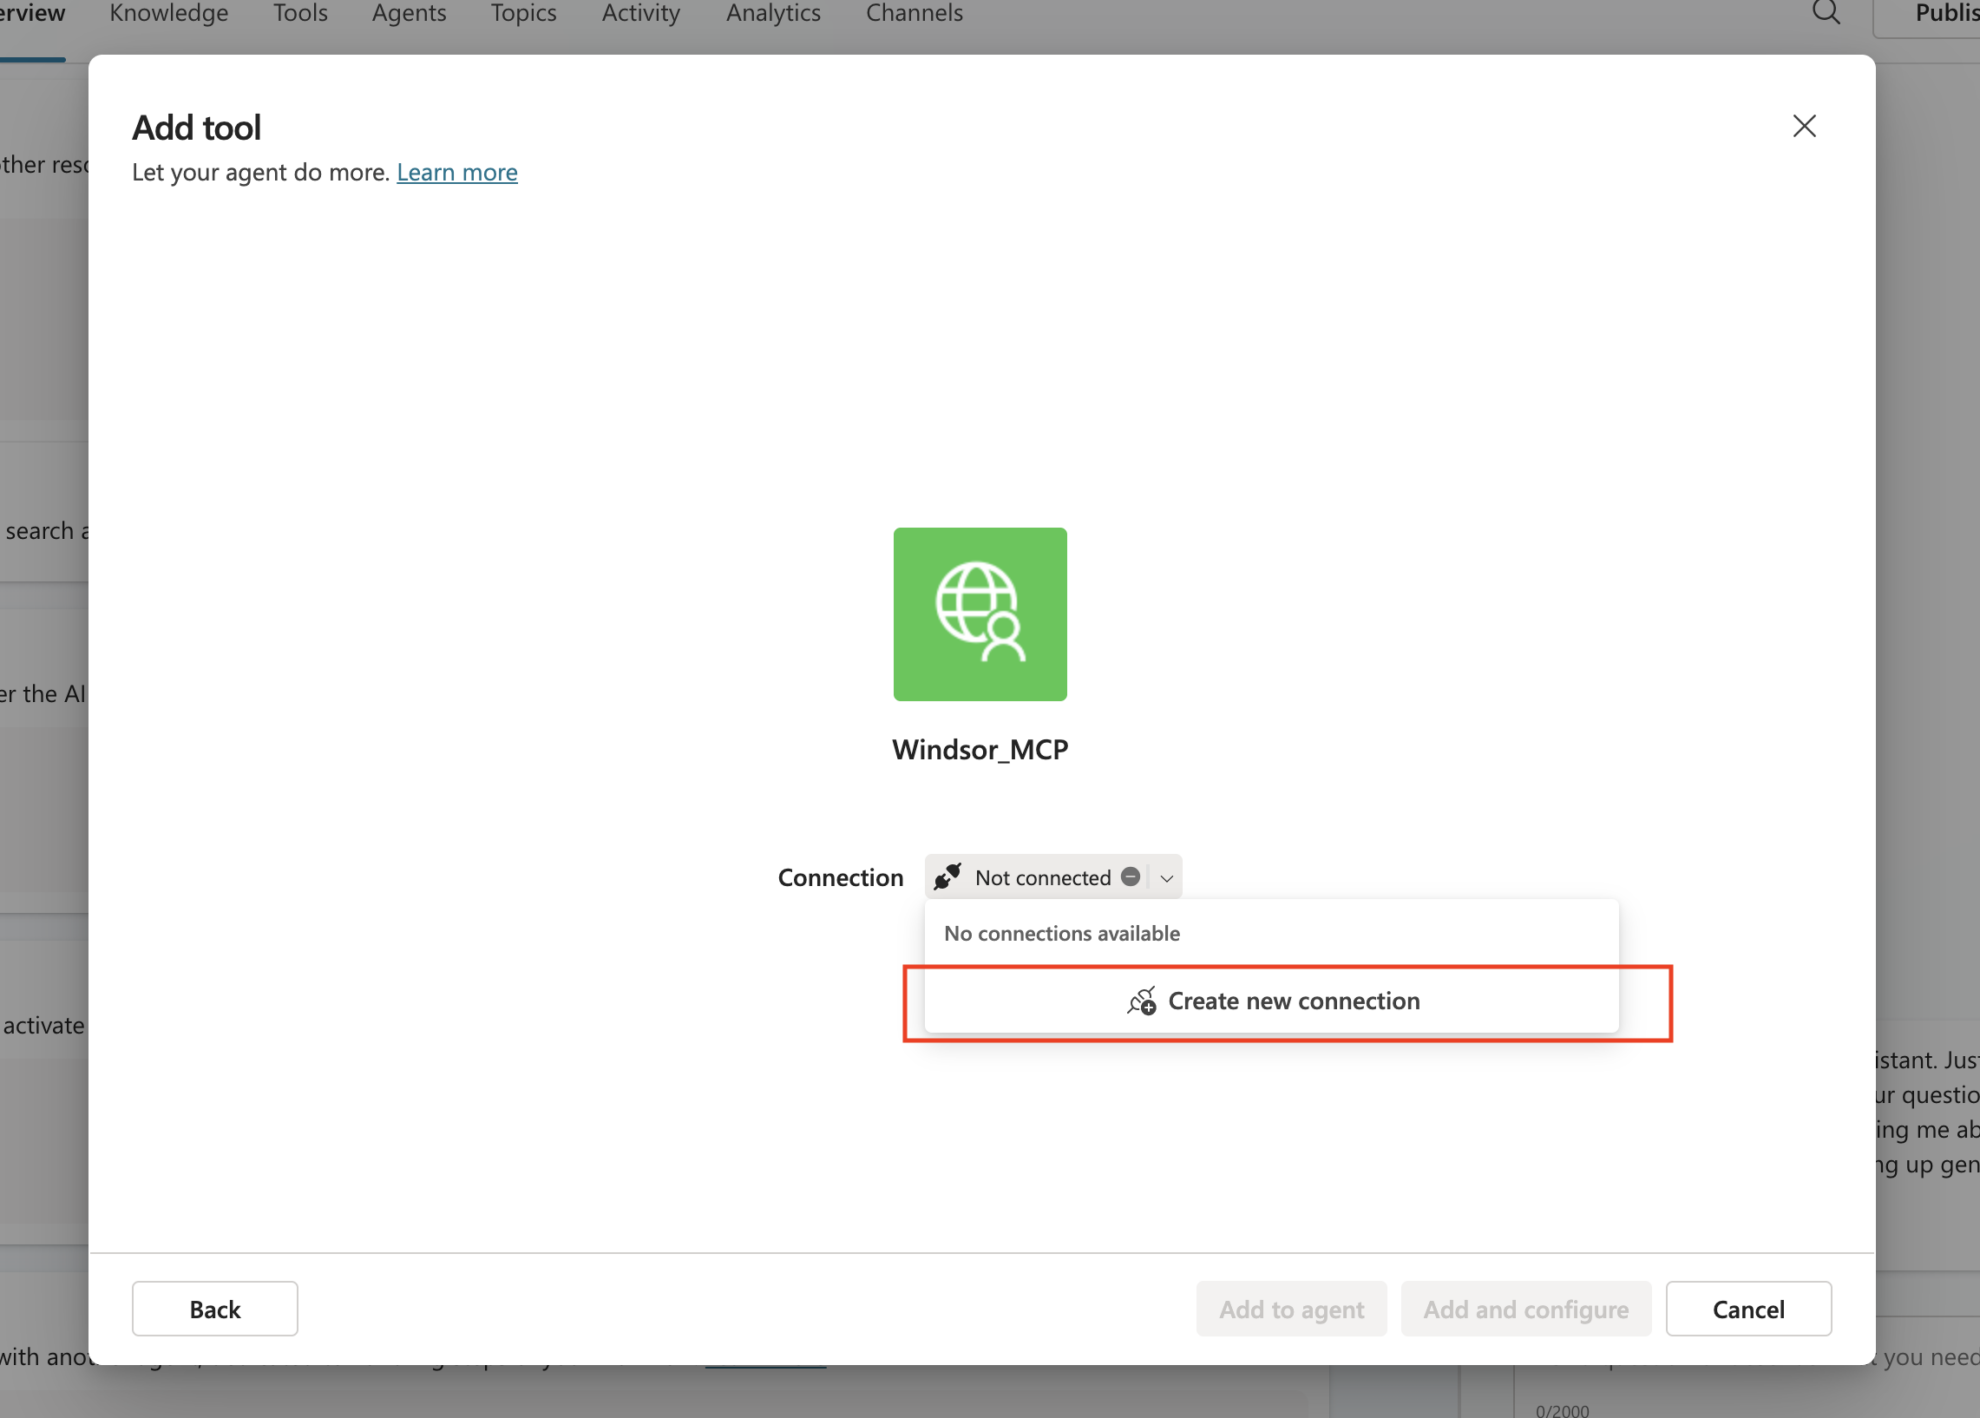
Important: Enter your Windsor API key with the Bearer keyword before it.
For example, if your api key is 6a7c3a7b91d269fc636d36aed62e8cde9acc, you should enter:
Bearer 6a7c3a7b91d269fc636d36aed62e8cde9acc
Click Create -> Add and configure.


Now, Windsor MCP is connected with your Copilot agent.

5. Now, you can query your agent, but first, it will ask you to connect to Windsor MCP.
Click Open connections manager. It will open a new window; then click Connect.

The connection pop-up will appear; click Submit.

Now, Windsor MCP is authenticated. Go back to your agent window.
6. Click Retry in your agent prompt and ask anything about your data.

Helpful links
- About Windsor MCP – Explore general info about Windsor MCP: supported data sources and LLMs, benefits, use cases, etc.
- Windsor MCP use cases & examples (30+ prompts inside) – If you don’t know what to ask or are looking for advanced Windsor MCP use cases, read this guide for a batch of practical examples and useful prompts to make your data analysis with Copilot even more effective and deeper.
Tired of manual data reporting and analysis? Get started with Windsor MCP today to unlock instant AI insights

