 AI insights
 About us
 Careers
 Security
 Customer reviews
 Contact us
 Affiliate program
 Solution partners
 Looker Studio templates
 Tableau templates
 Facebook Ads templates
 Google Ads templates
 Data fields & Metrics
 AI prompt library & Guides
 Product documentation
 API documentation
 Case studies
 Blog
Blog Data models
 Windsor vs Supermetrics
 Windsor vs Fivetran
 Windsor vs Portermetrics
How to integrate Windsor MCP into n8n
Windsor MCP for n8n allows you to connect your business data from 325+ sources to an AI agent and query it in natural language.
Follow this guide to connect Windsor MCP to n8n using the AI Agent and MCP Client Tool.
Prerequisites
To use Windsor MCP with n8n, make sure you have the following:
- An active Windsor.ai account with at least one connected data source
- An n8n instance (cloud or self-hosted)
- An OpenAI API key (recommended for n8n MCP node compatibility)
🚀 Get started with Windsor MCP today with a 30-day free trial: https://onboard.windsor.ai/ and experience the power of AI-driven analytics.
Steps to configure Windsor MCP for n8n
1. Connect your data sources
Connect the data sources you want to analyse in n8n at https://onboard.windsor.ai/.
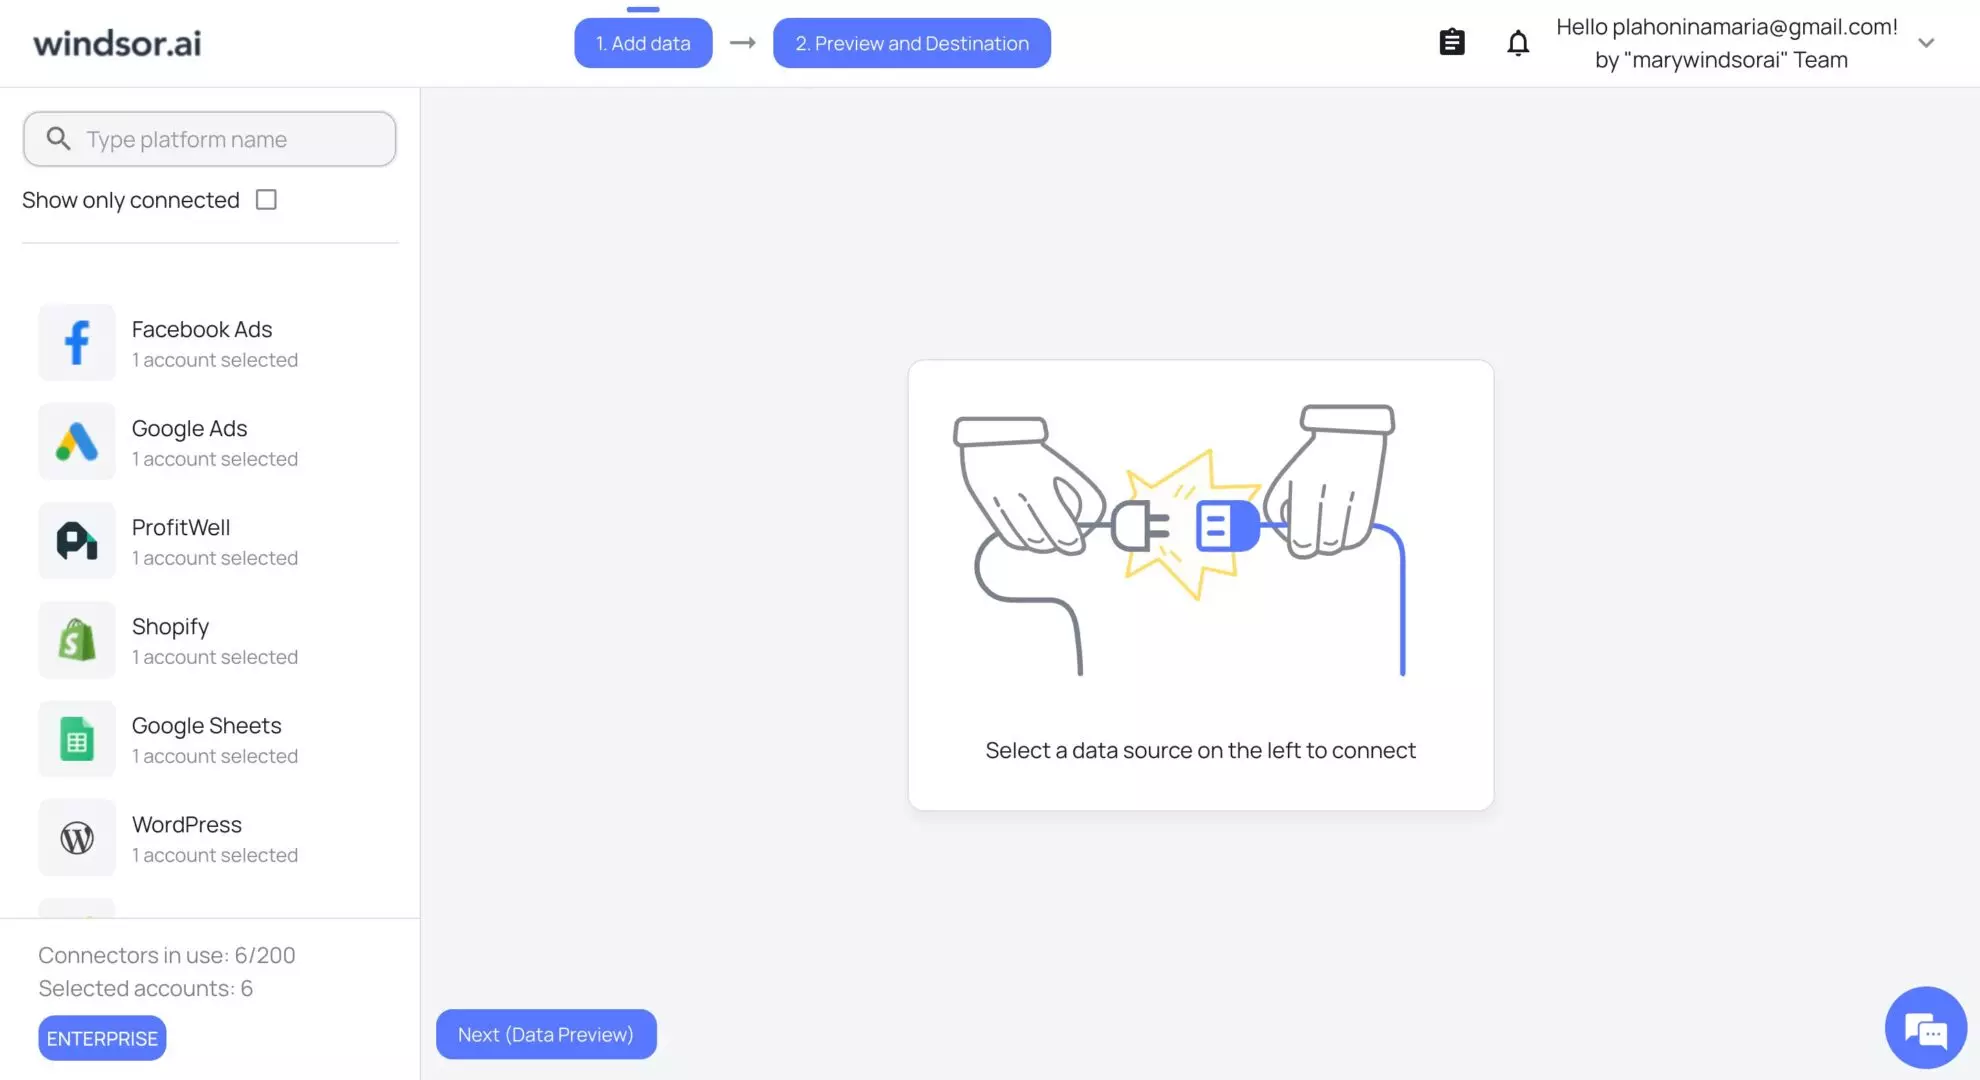
You don’t need to manually select fields. All available data is automatically accessible through MCP.
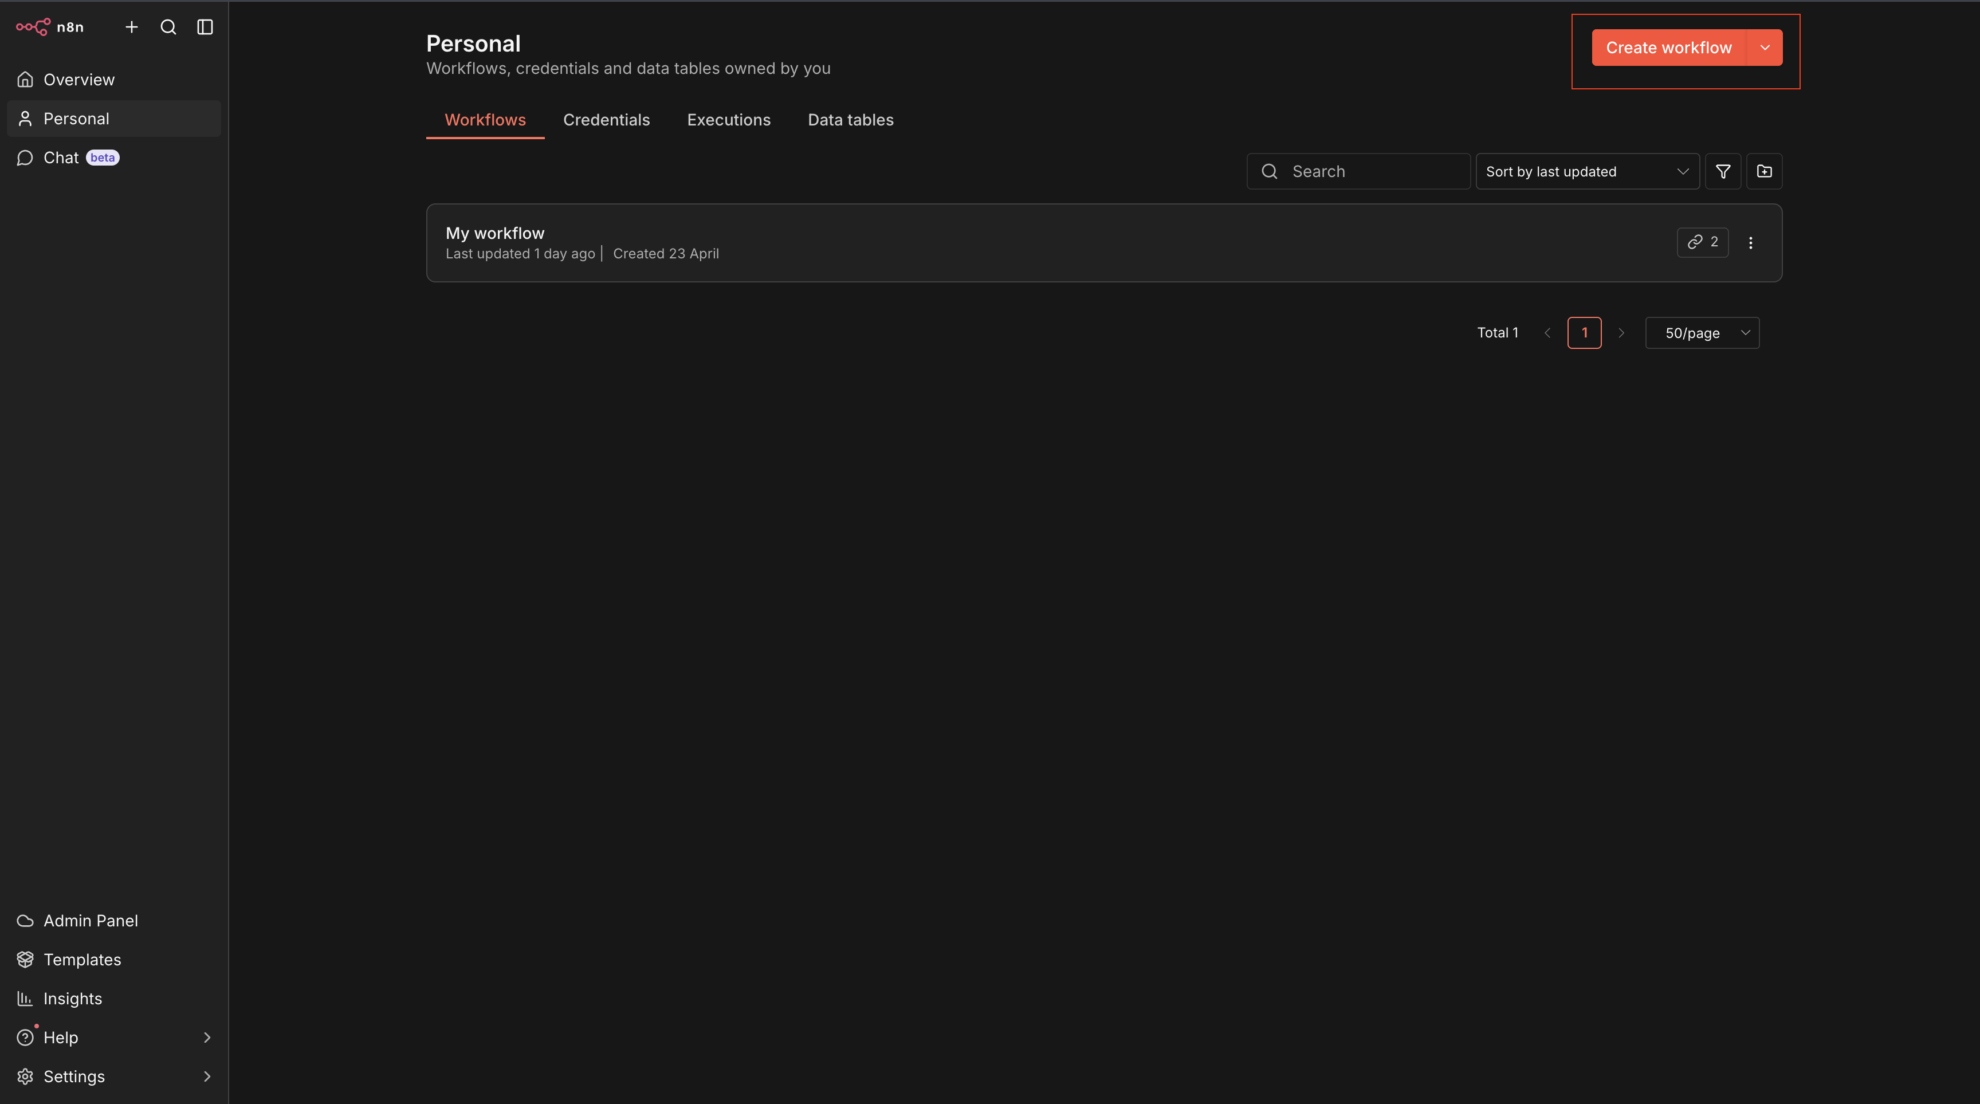
2. Create a new workflow in n8n
Open your n8n instance at https://n8n.io/ and click “Create workflow” to start.
3. Add Chat Trigger Node
- In your workflow, click “Add First Step” and search for Chat.
- Add it to the workflow.
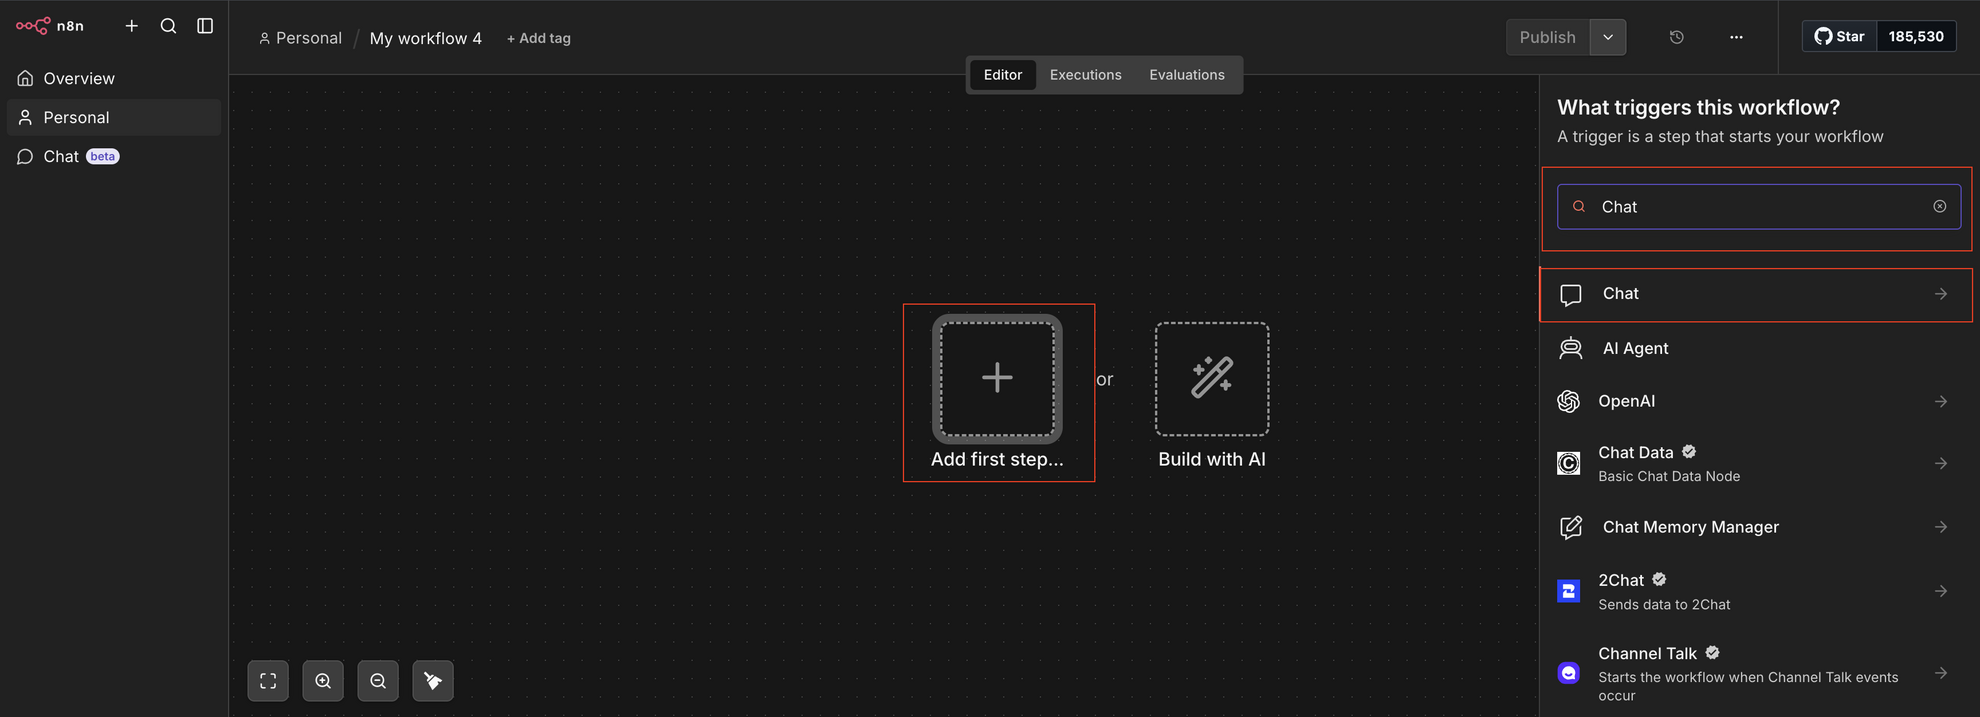
This node allows you to send prompts directly to the workflow.
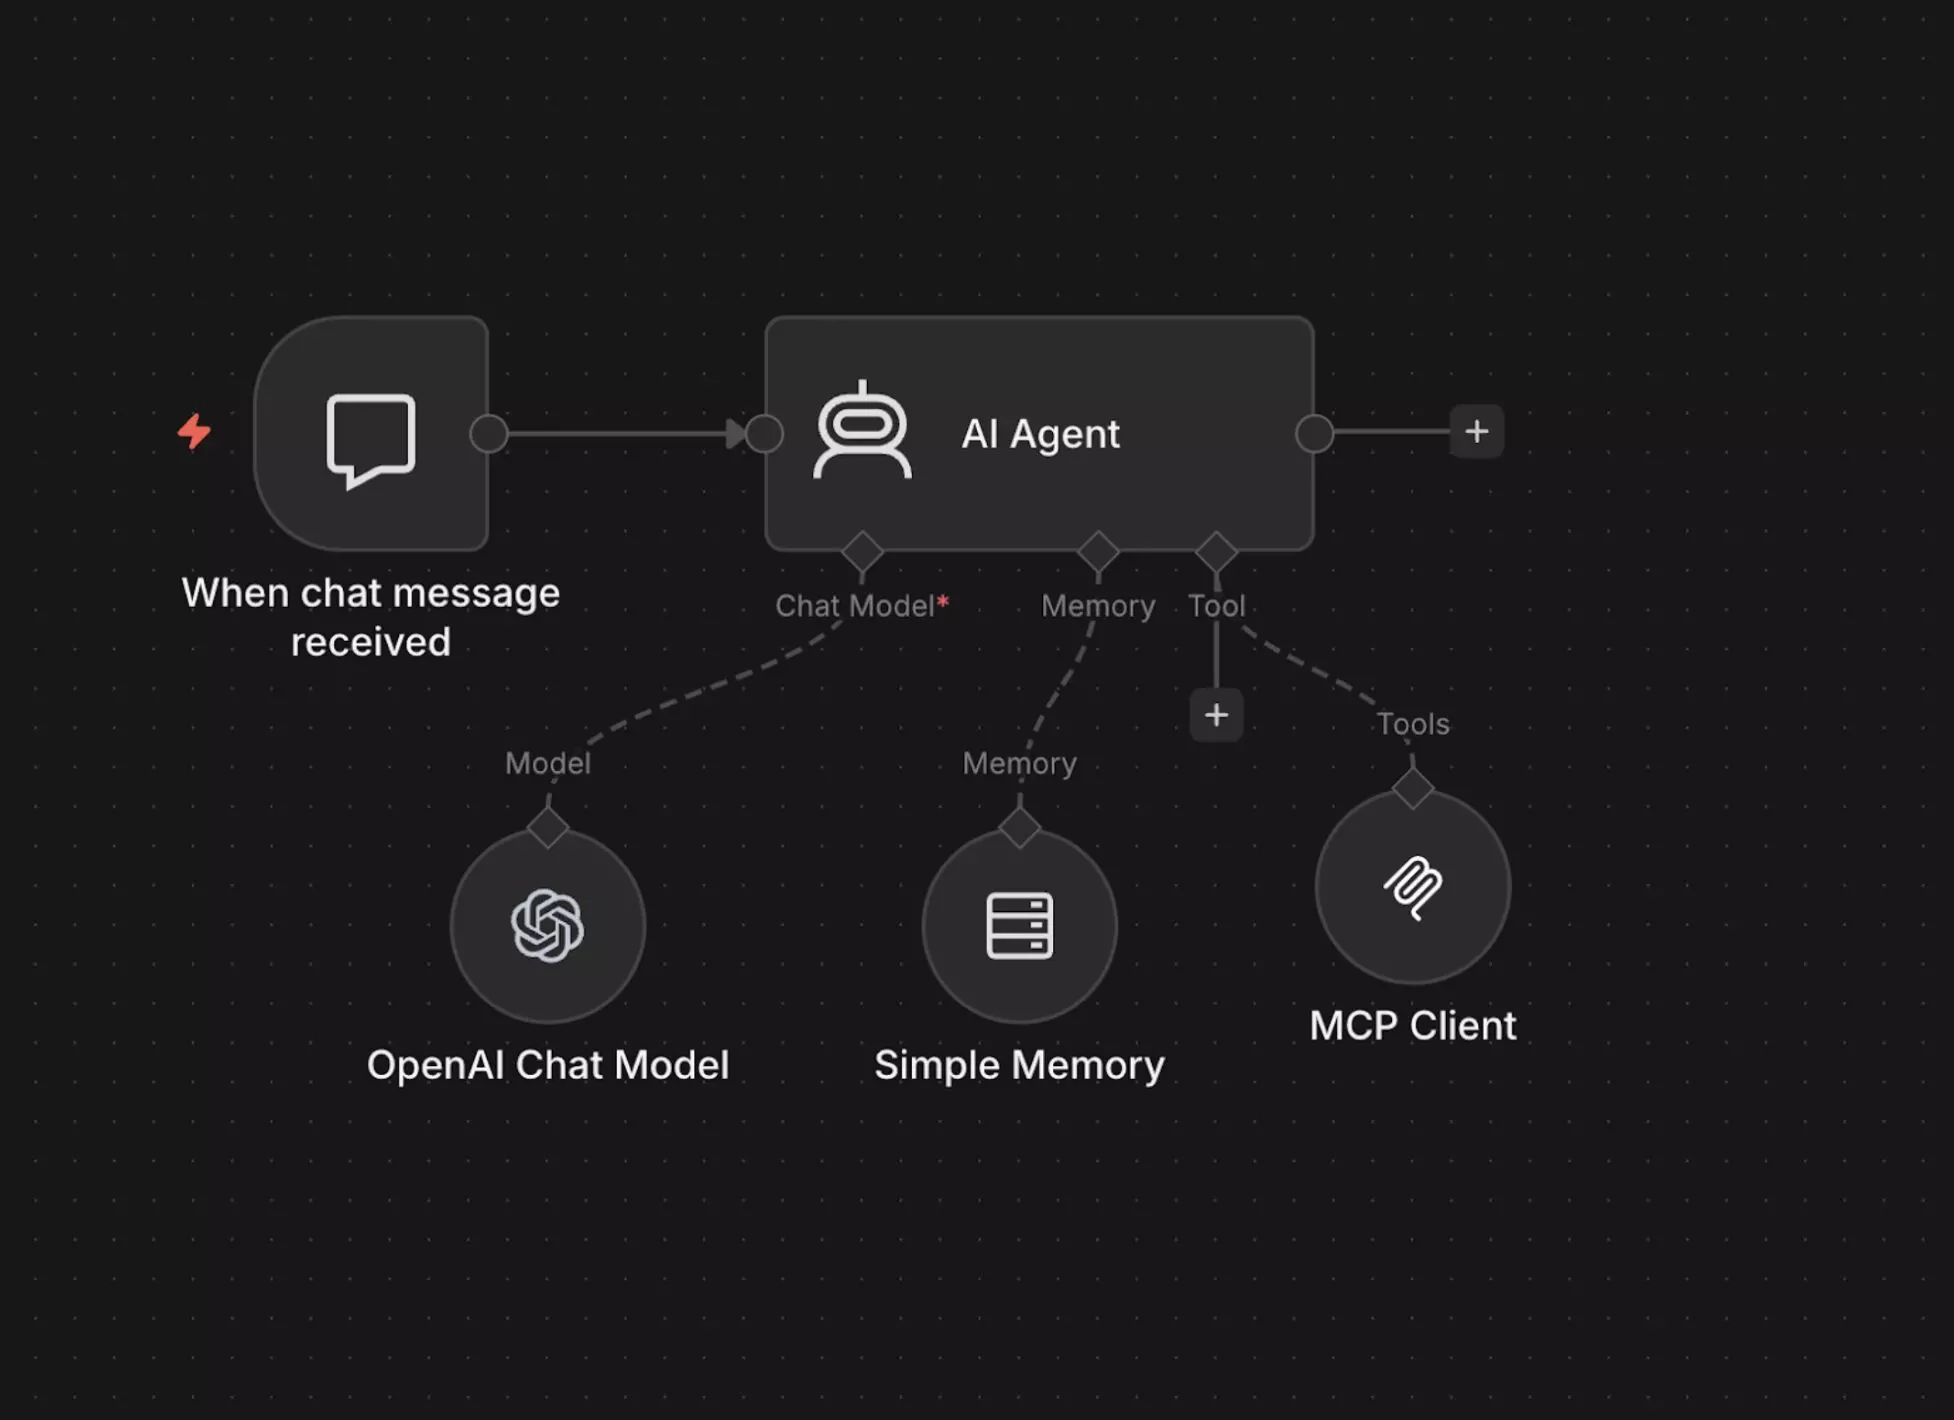
4. Add AI Agent
The AI Agent requires three input nodes:
1) Chat Model
2) Memory
3) MCP Client Tool
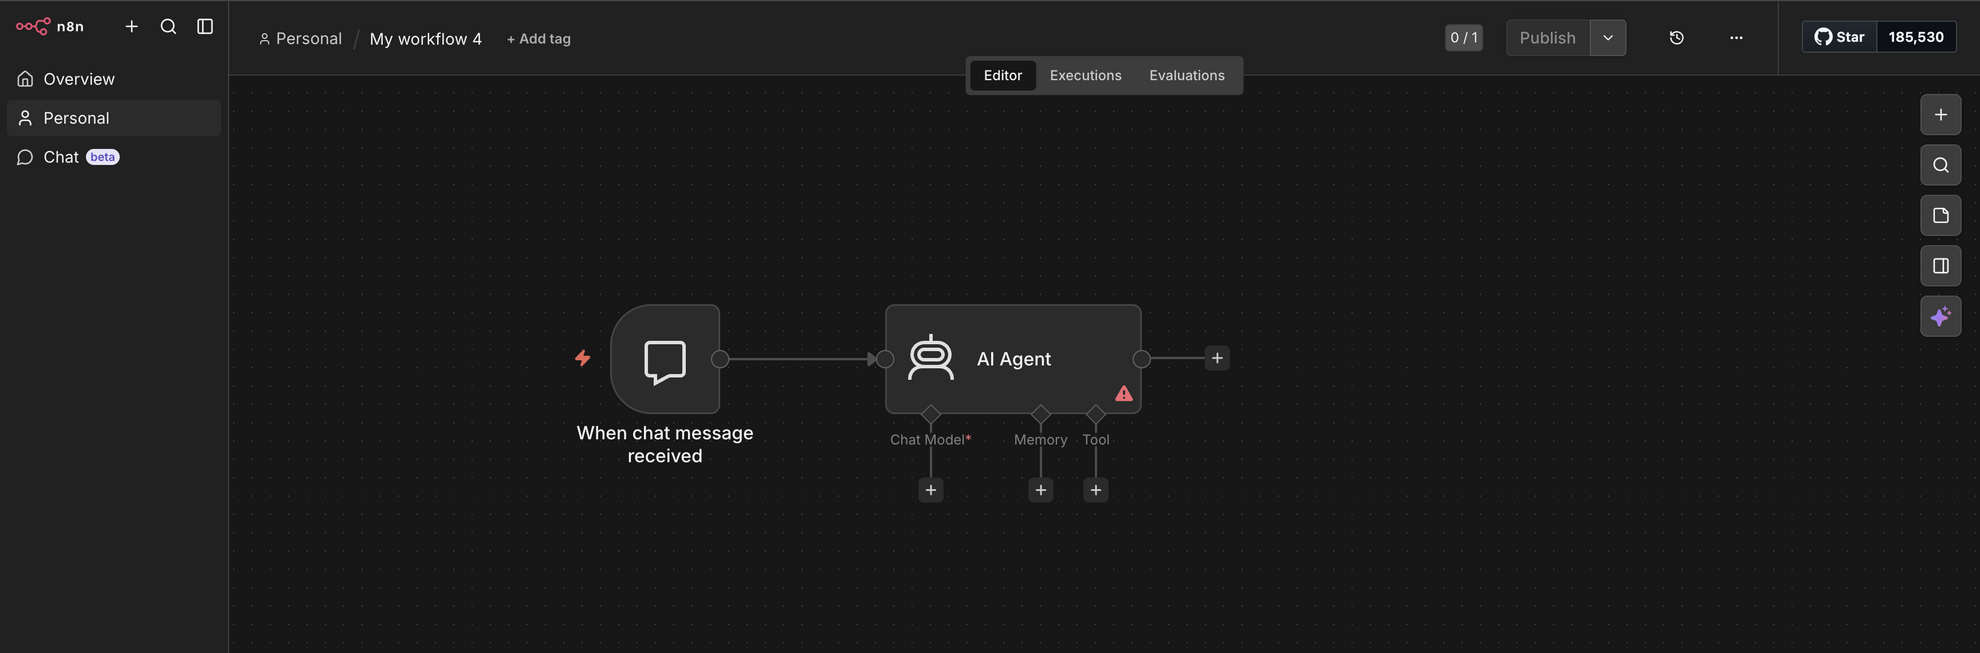
Let’s build this step by step, starting with adding the AI agent.
- Click + in your workflow window (on the top right side).

- Search for AI Agent.
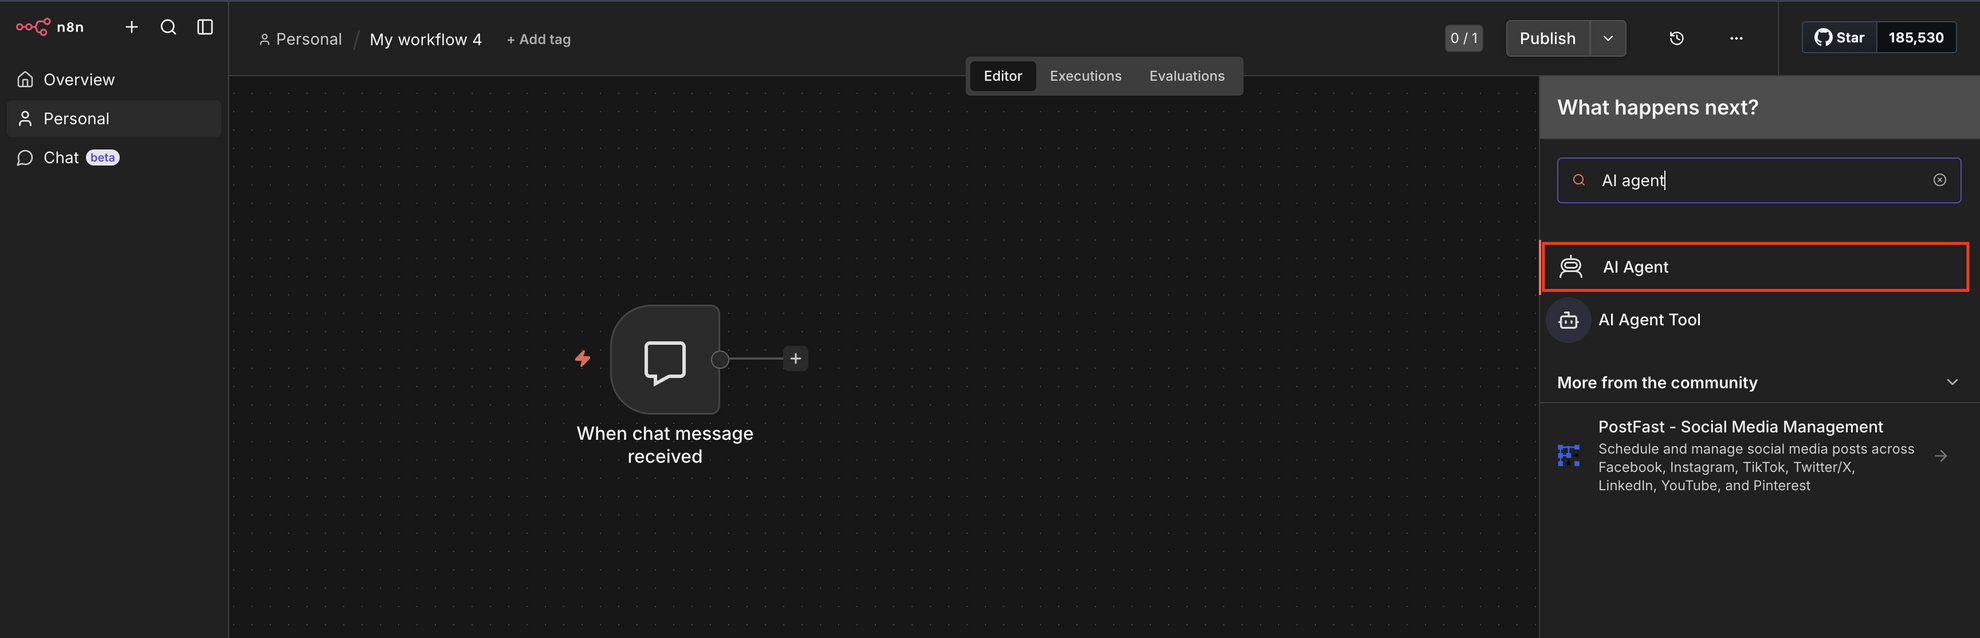
- Connect it to Chat Trigger.
Please follow the instructions below to set AI Agent input nodes one by one.
5. Add Chat Model to AI Agent
- For the Chat Model input of AI Agent, click +.
- Search for OpenAI Chat Model.
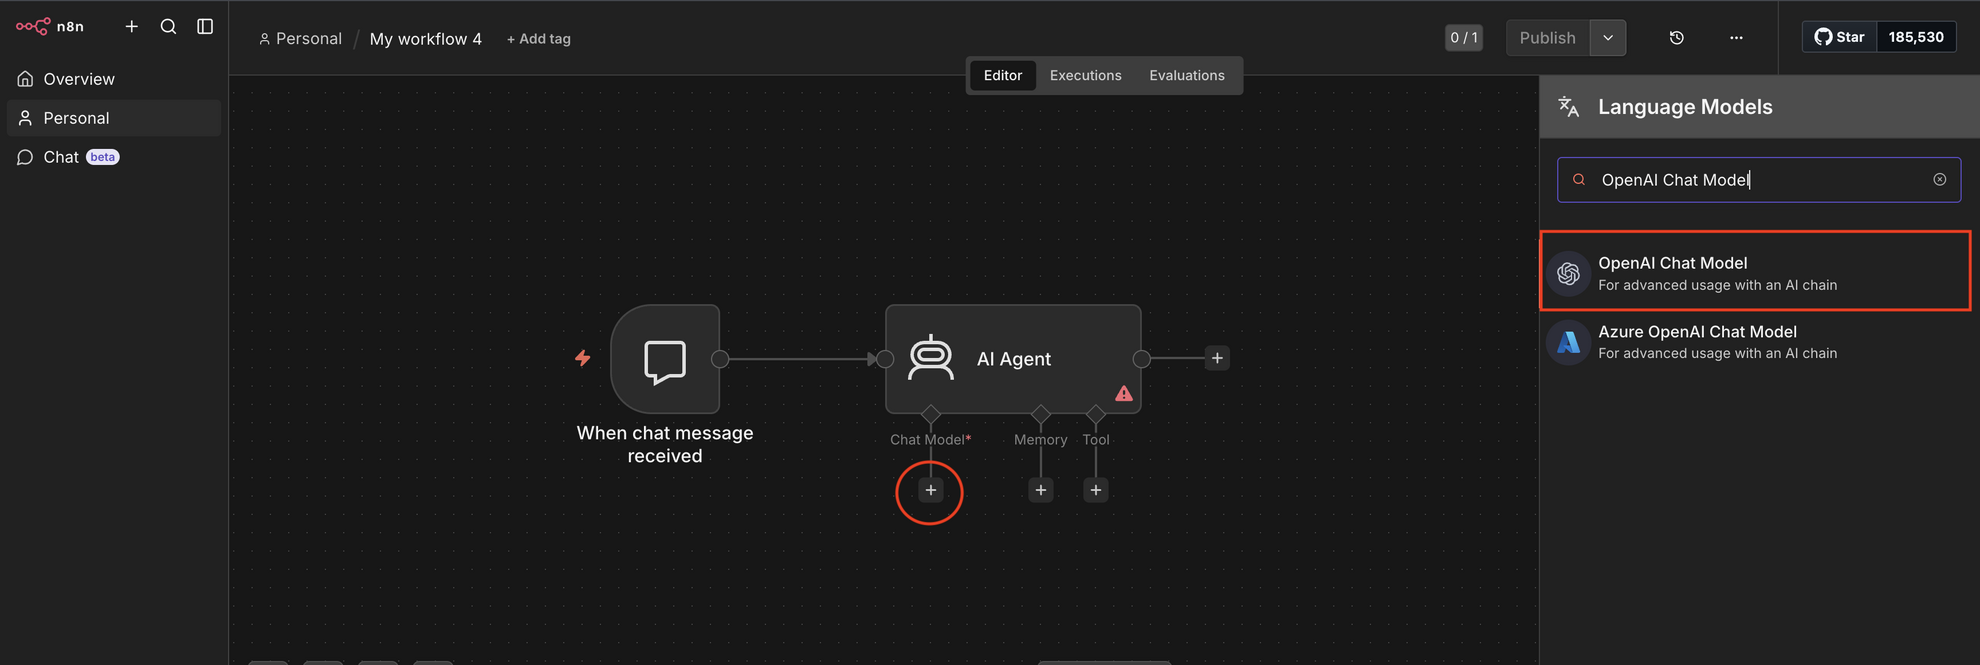
- Connect it to the Chat Model input of the AI Agent.
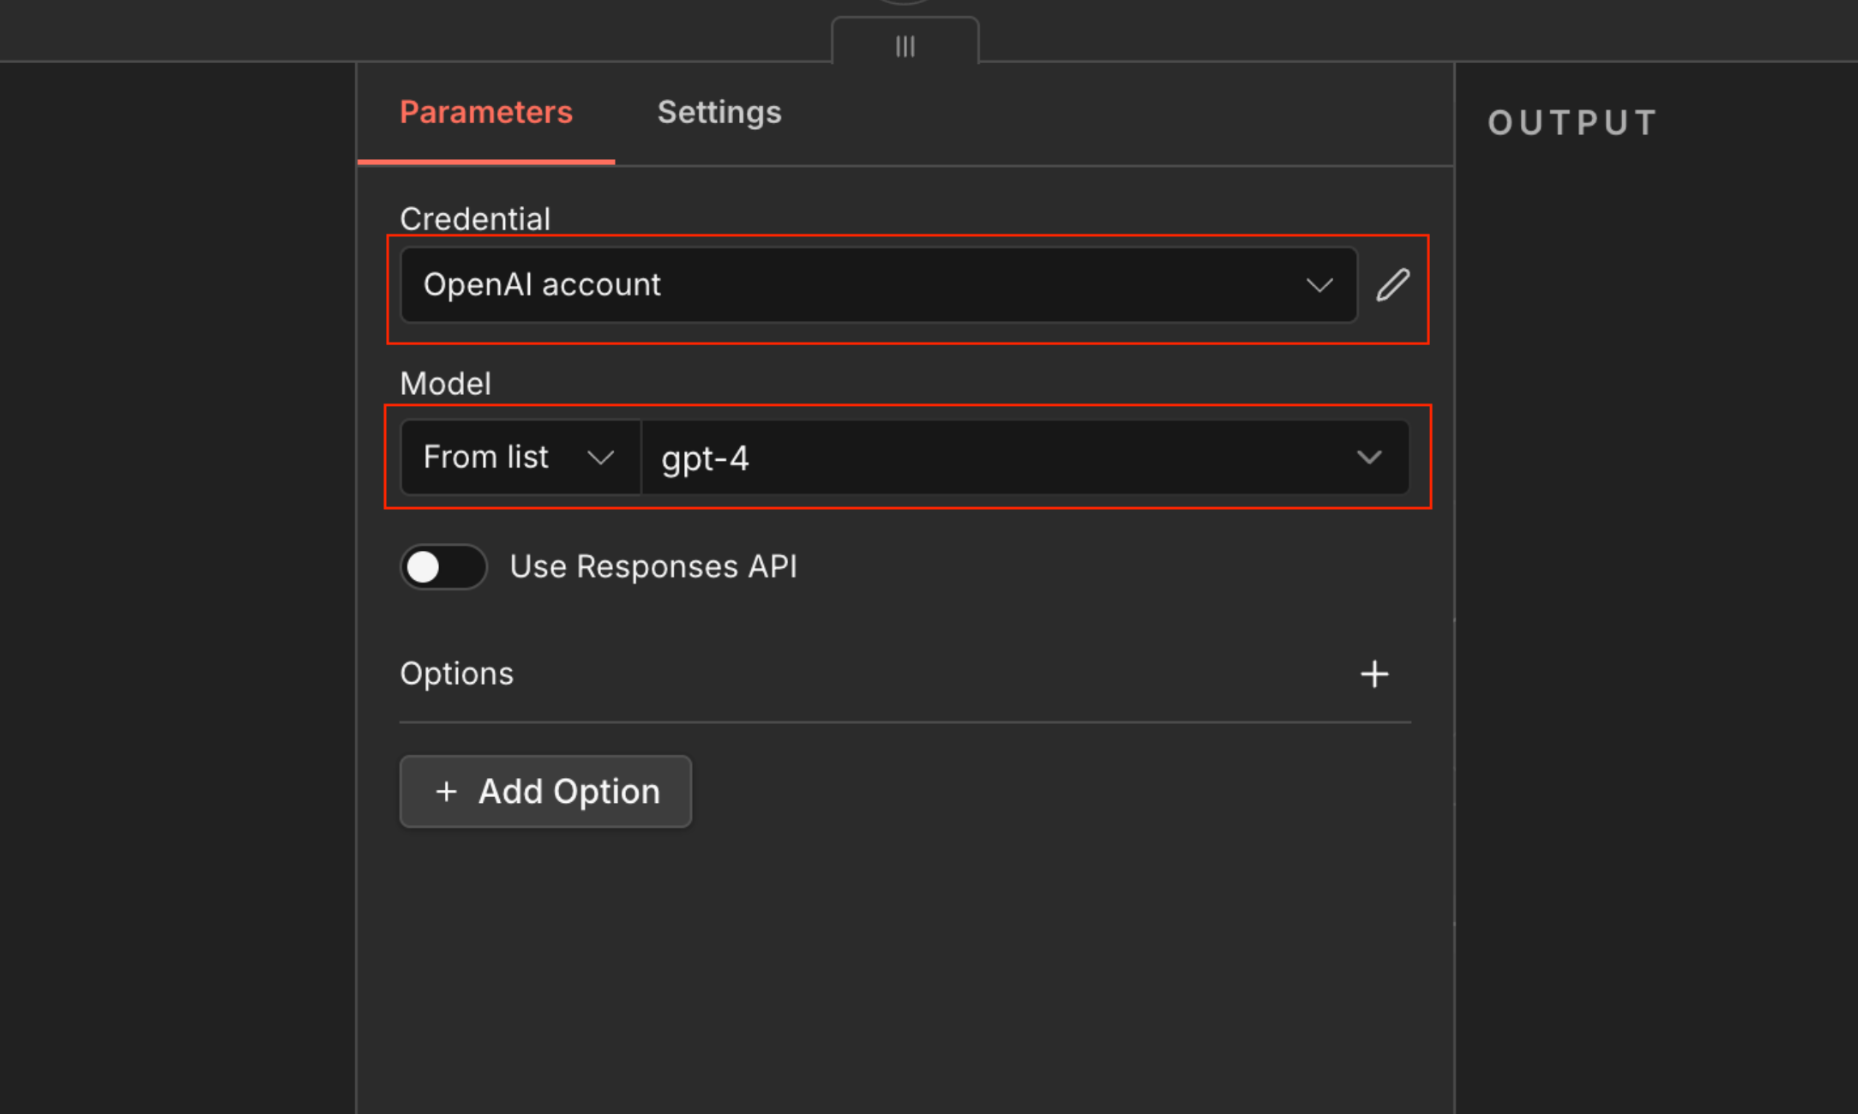
Configuration:
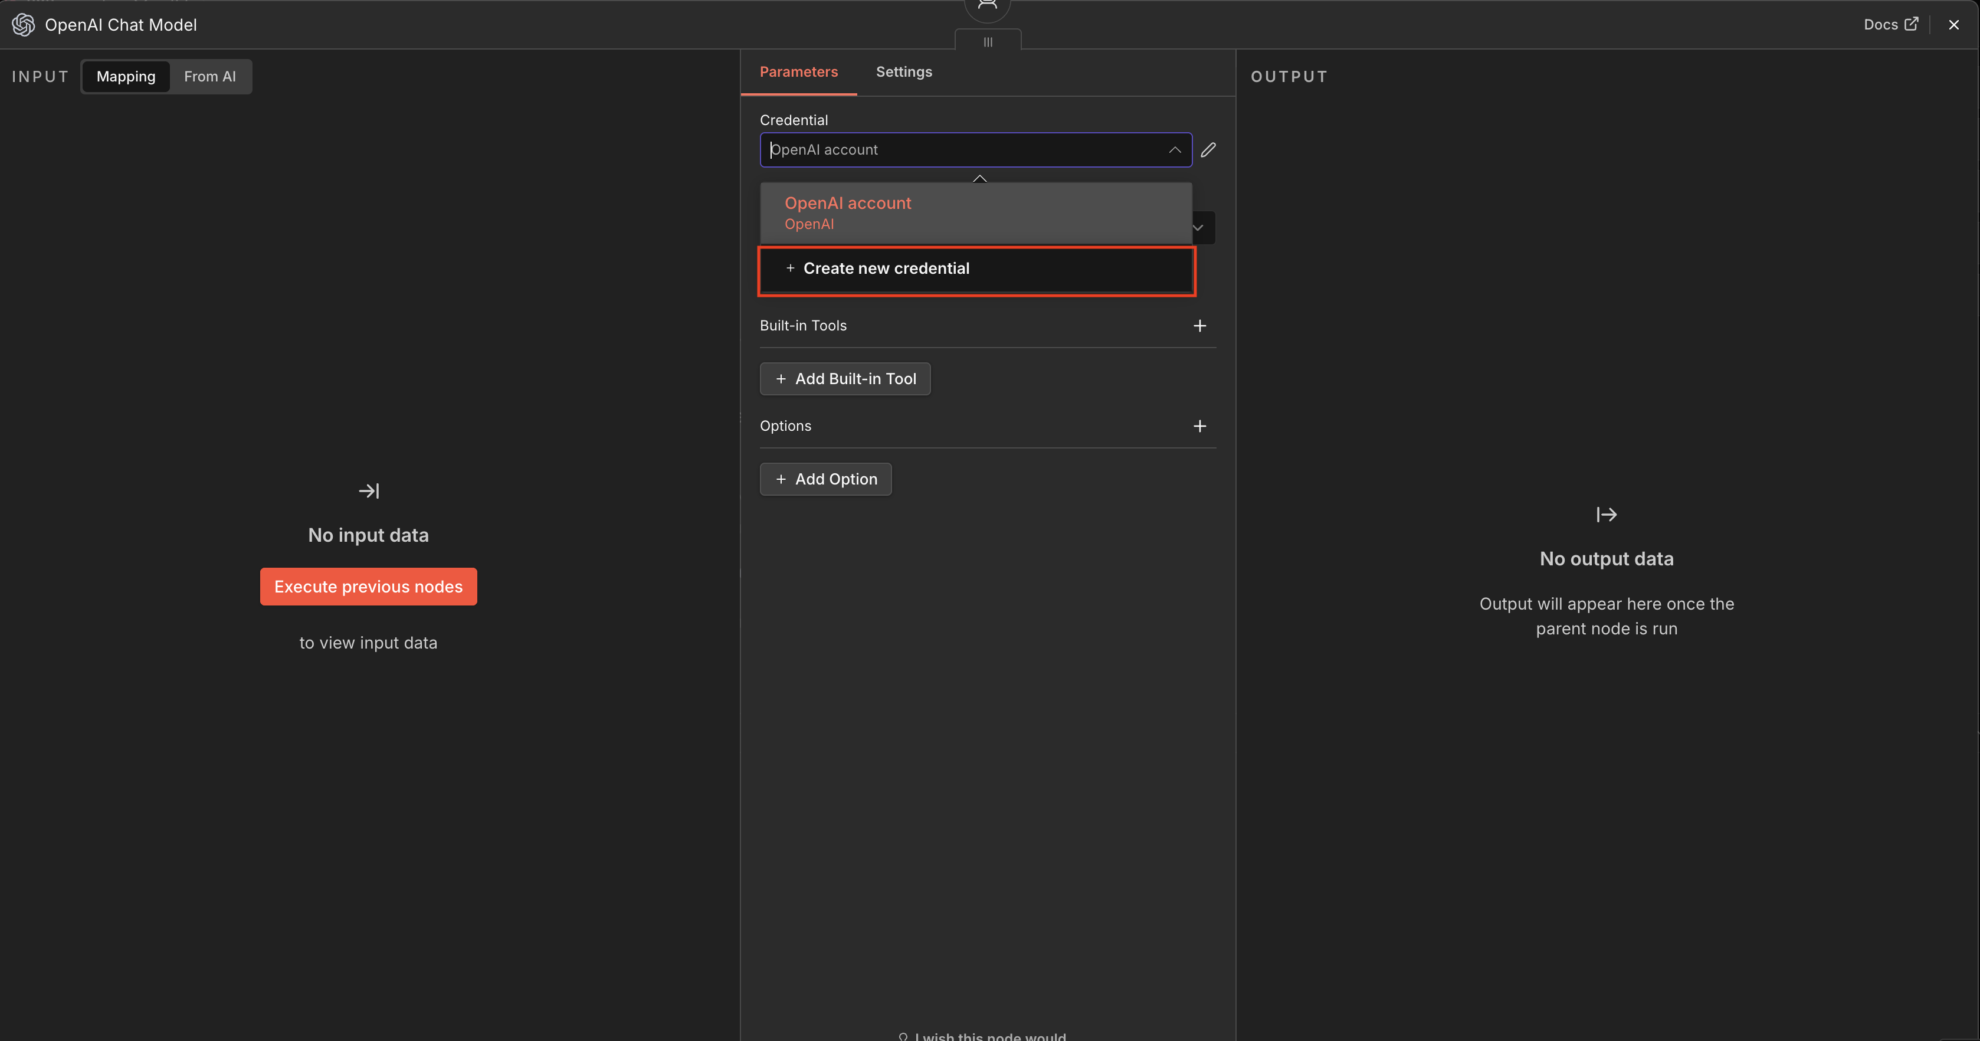
Once you add this node, the configuration panel will open.
Under Parameters → Credentials, click Create new credential.
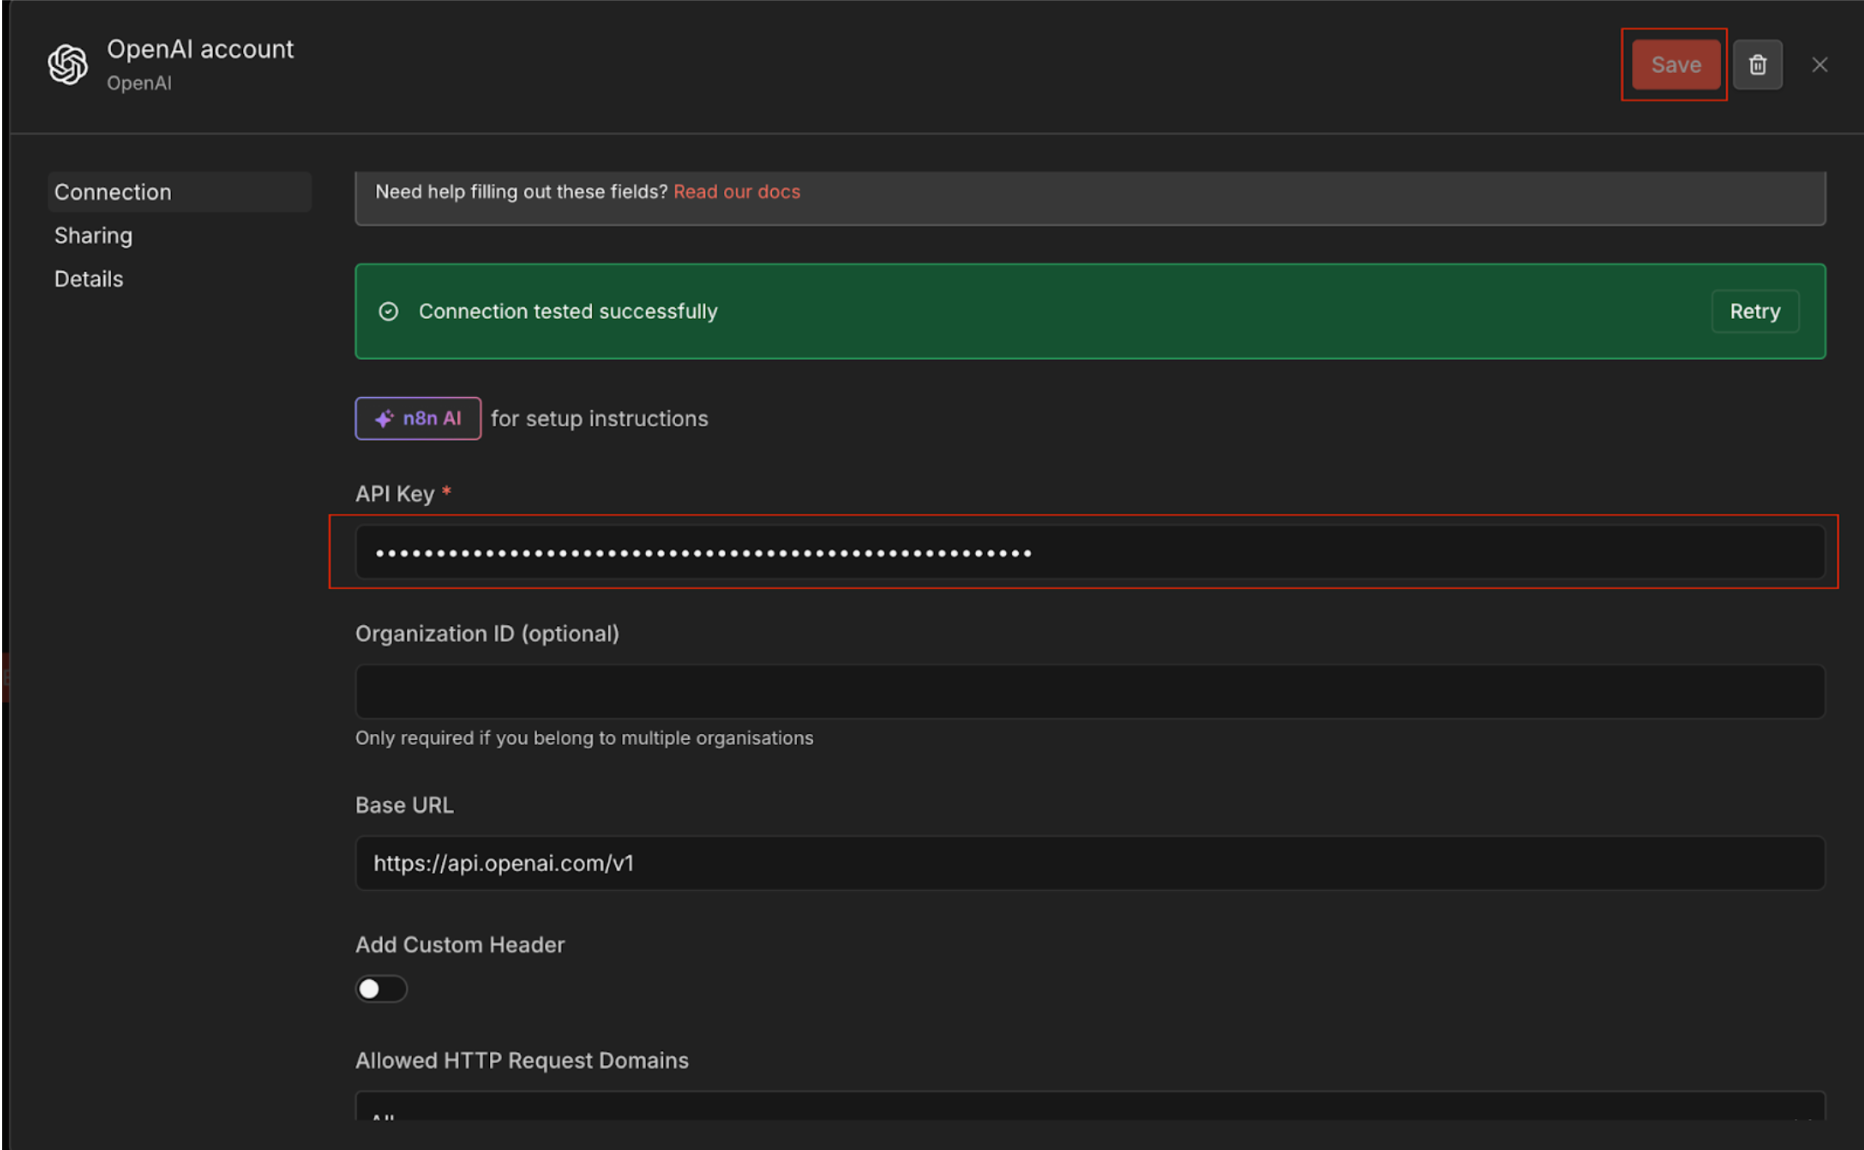
- Enter your OpenAI API key in the API key field. The status will be verified automatically. Once it turns green with a success message, click Save.
- Then select your preferred model from the model list. Leave all other settings as the default.
6. Add Memory to AI Agent
Memory allows the agent to maintain conversation context.
- For the Memory input of AI Agent, click +.
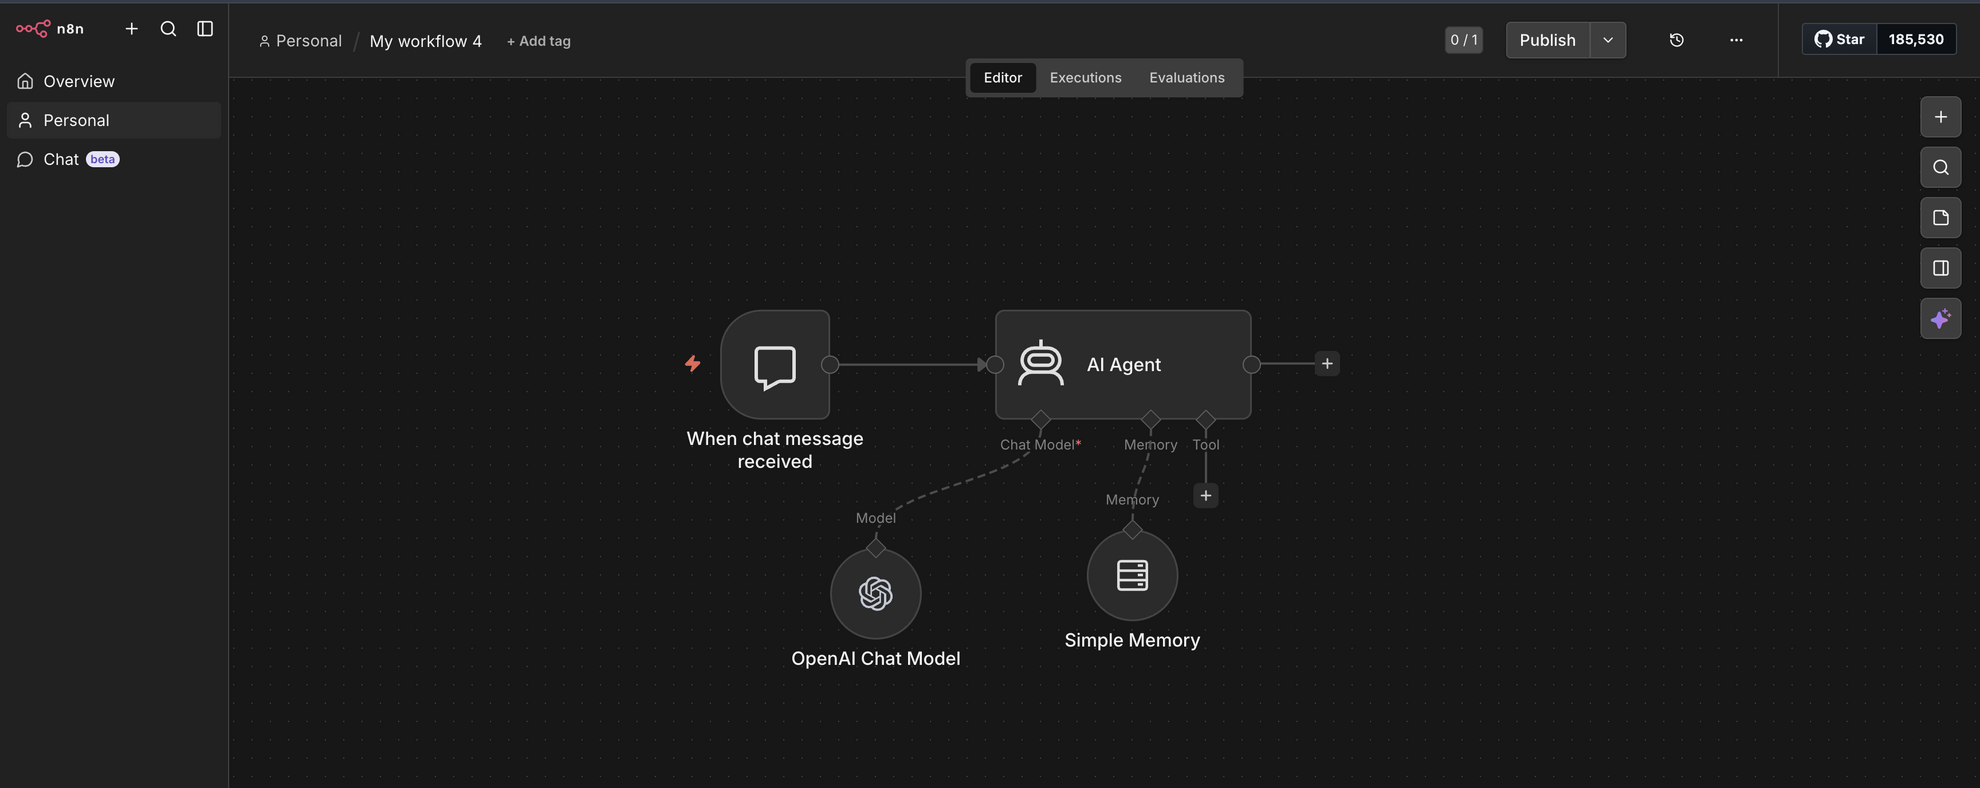
- Search for Simple Memory and add it to the workflow.
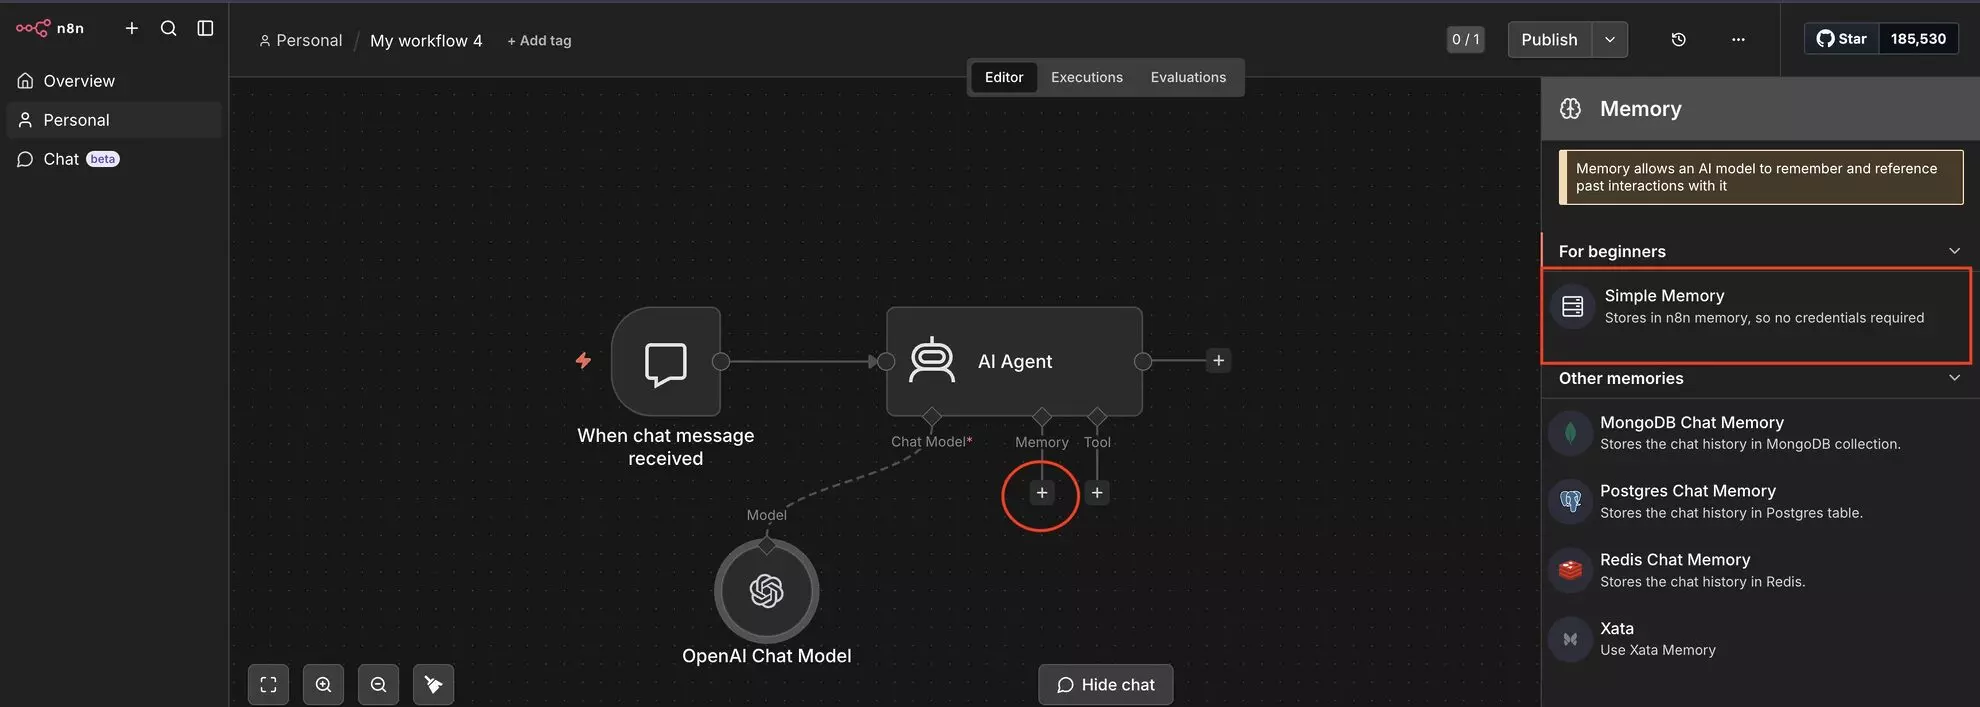
It will connect to the Memory input of the AI Agent.
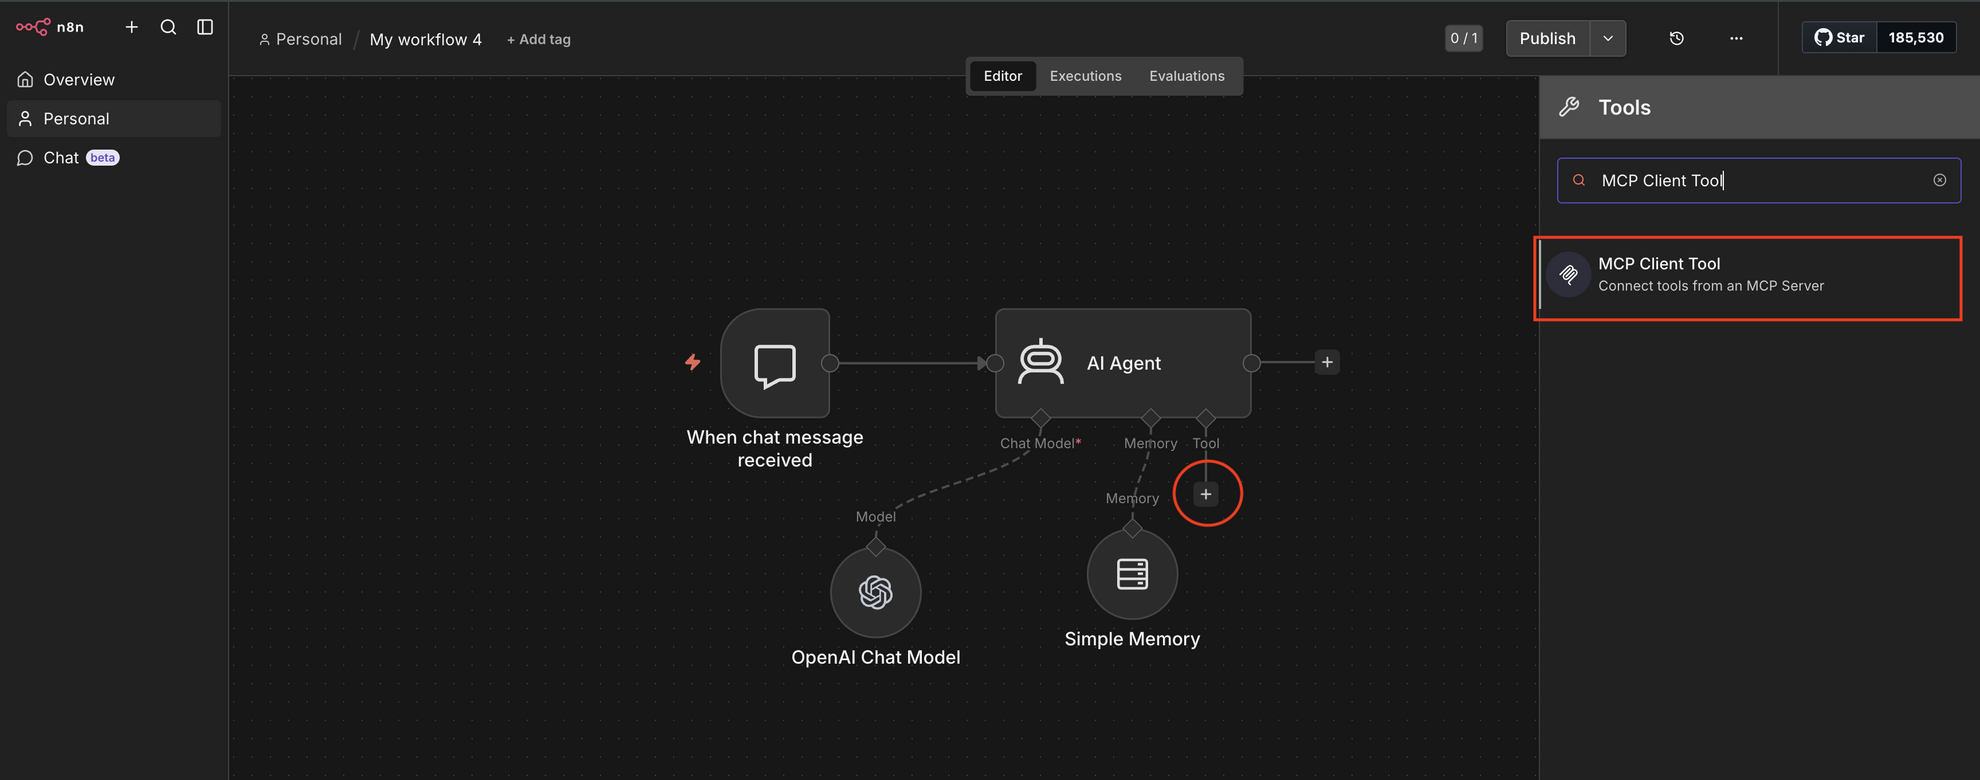
7. Add MCP Client Tool to AI Agent
- For the Tool input of AI Agent, click +.
- Search for MCP Client Tool.
Configuration:
Once you add this node, it will open the Configuration page. Open the Parameters tab.
Enter the following configurations for Windsor MCP:
- Endpoint: https://mcp.windsor.ai/
- Authorization: Bearer
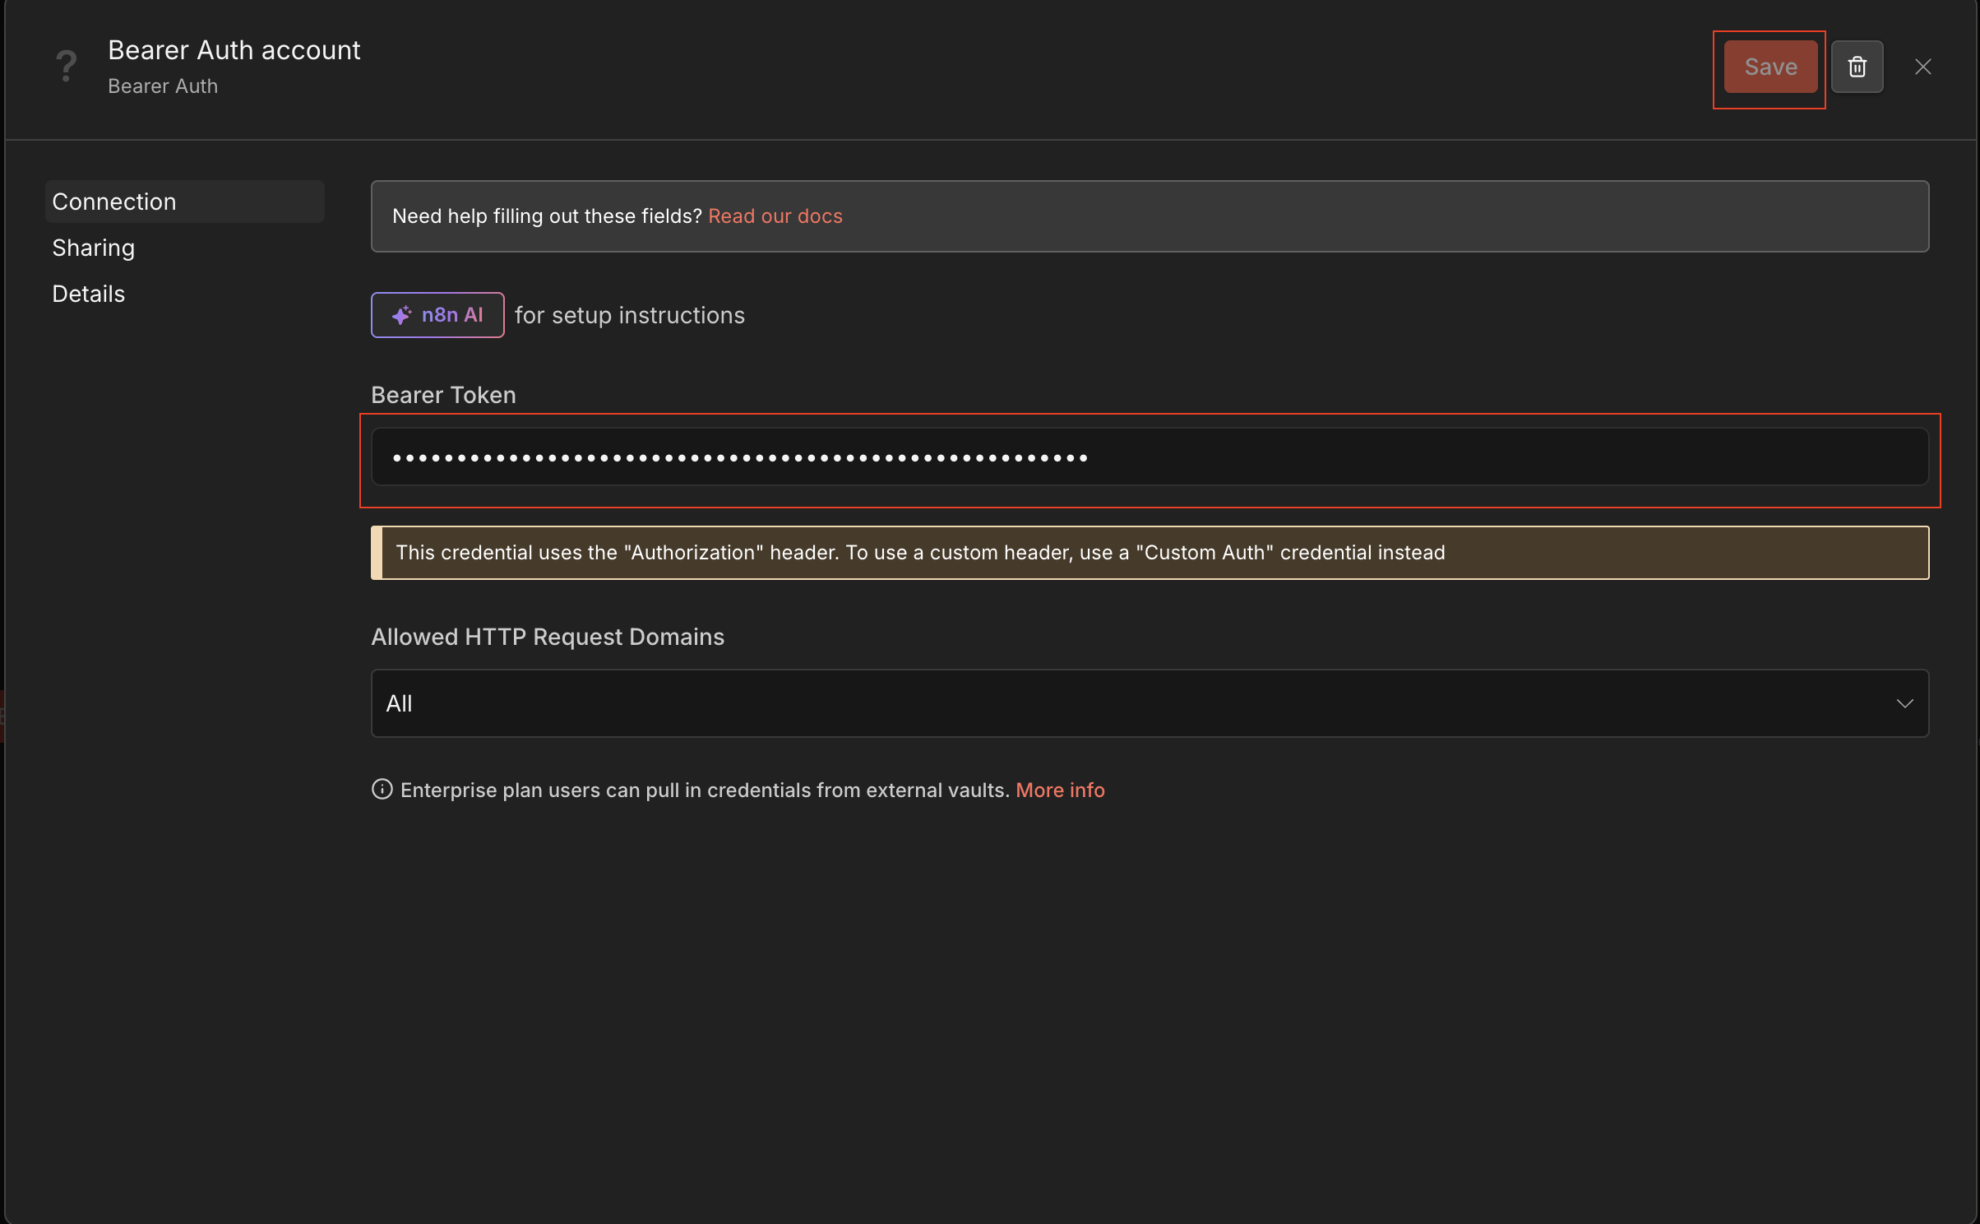
- Credentials for Bearer Auth: Select “Set up Credentials”
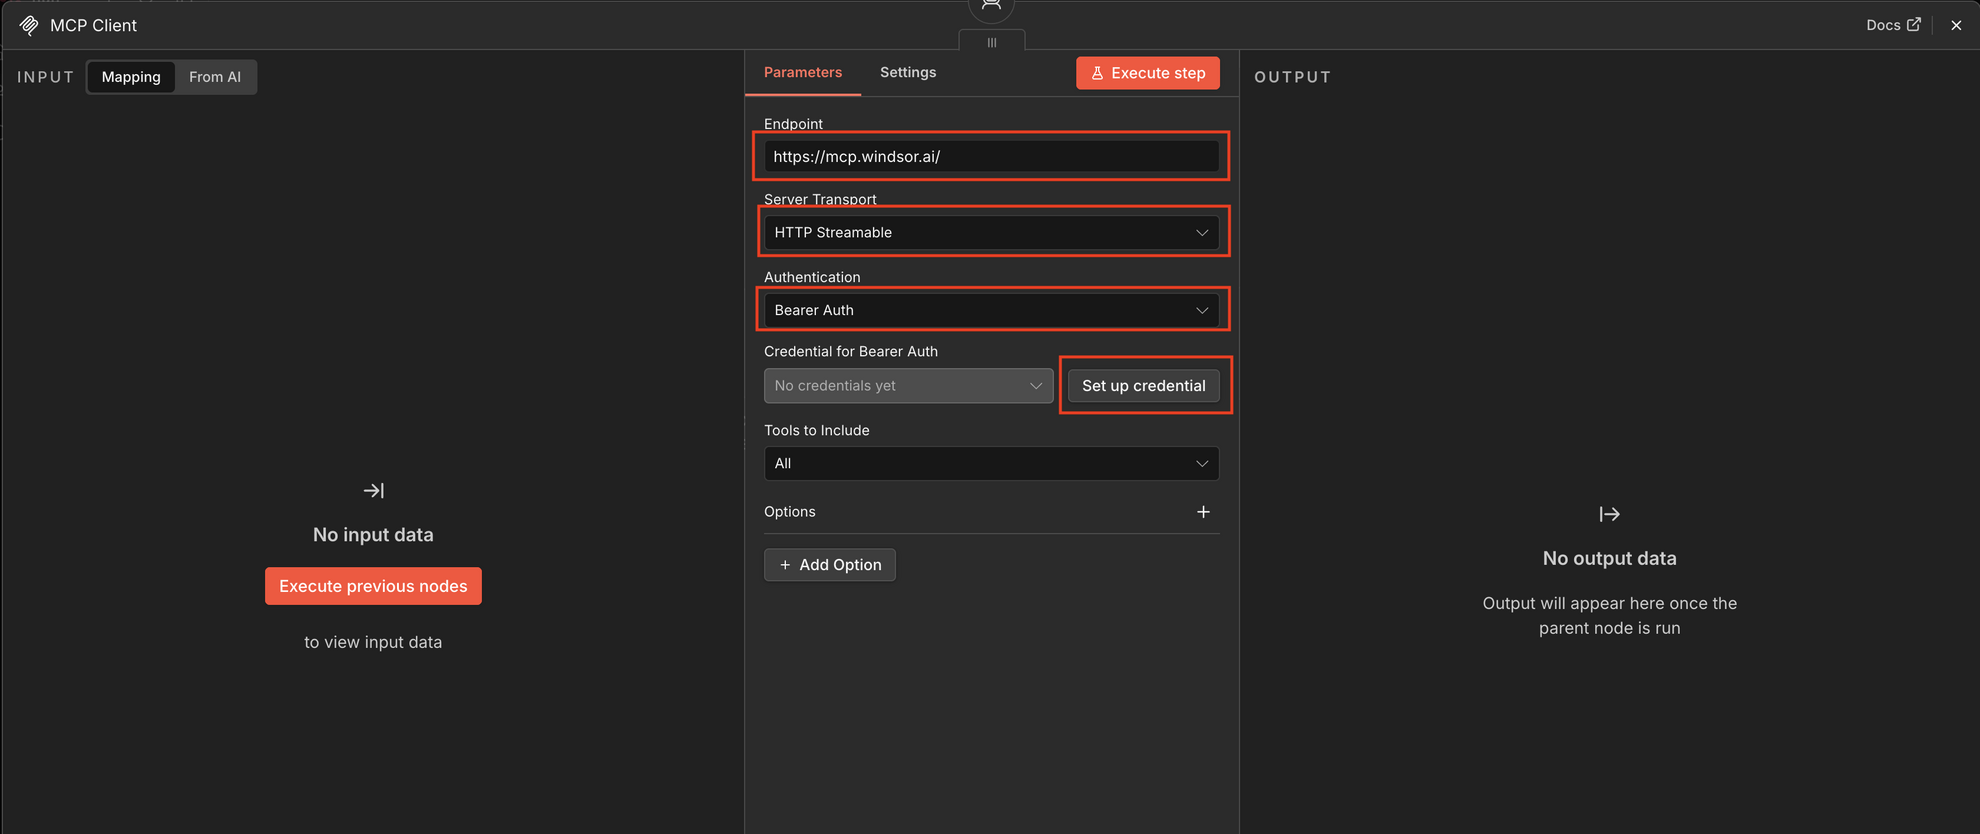
- Under Bearer Token: Enter your Windsor API Key and click Save.
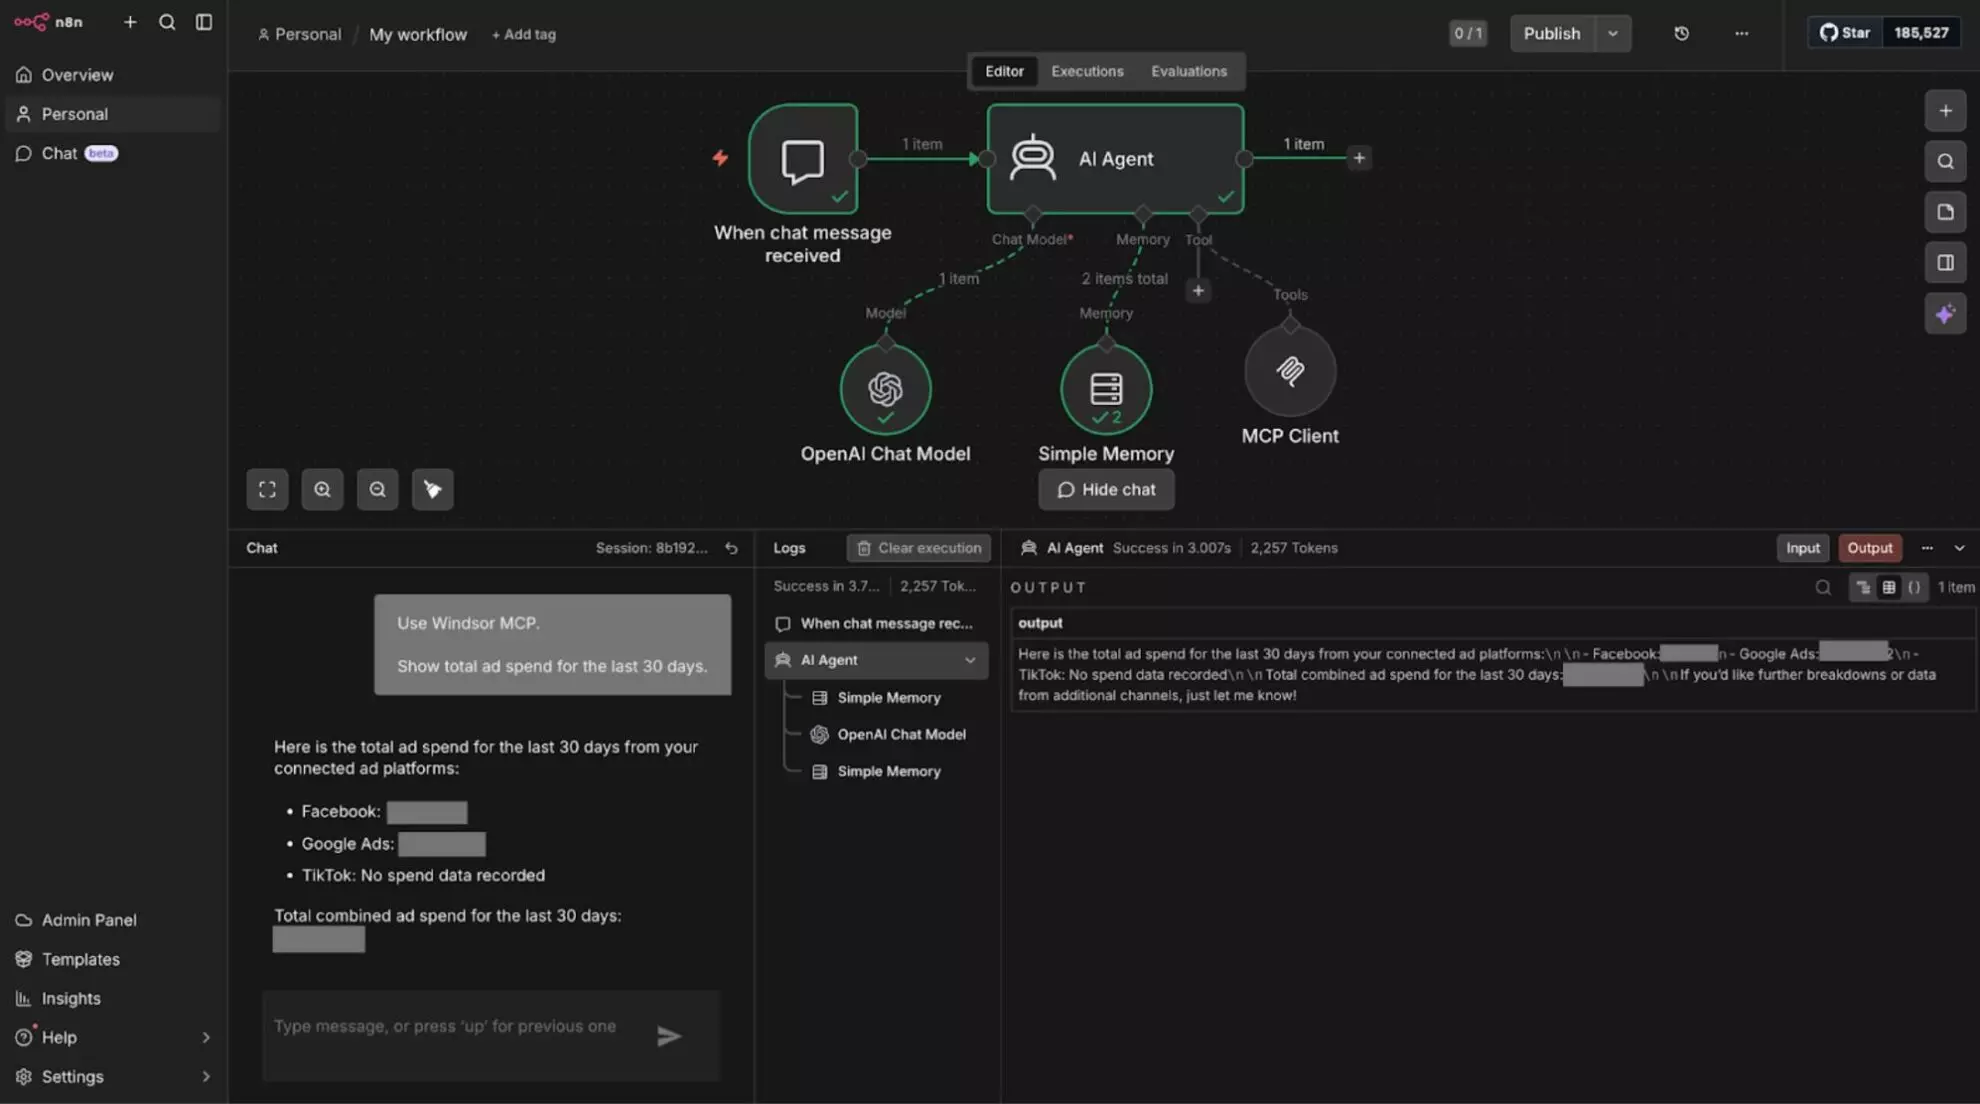
Final workflow
Your setup is now complete to use Windsor MCP in n8n.
You can start your workflow (go to the chat node and click “Open chat”) and get AI-powered insights from your connected data.
For example, you can ask:
“Use Windsor MCP and show total spend for the last 30 days across all paid media chanels.” The AI Agent will automatically fetch, analyze, and respond based on your data through Windsor MCP.
Feel free to use these insights in your workflows for reporting automation and decision-making.
Helpful links
- AI analytics learning hub – Your AI analytics playbook: 200+ prompts & real use cases with platform-specific tutorials.
- About Windsor MCP – Explore general info about Windsor MCP: supported data sources and LLMs, benefits, use cases, etc.
- Windsor MCP use cases & examples (30+ prompts inside) – If you don’t know what to ask or are looking for advanced Windsor MCP use cases, read this guide for a batch of practical examples and useful prompts to make your data analysis with Manus AI even more effective and deeper.
Tired of juggling fragmented data? Get started with Windsor.ai today to create a single source of truth

