 AI insights
 About us
 Careers
 Security
 Customer reviews
 Contact us
 Affiliate program
 Solution partners
 Looker Studio templates
 Tableau templates
 Facebook Ads templates
 Google Ads templates
 Data fields & Metrics
 AI prompt library & Guides
 Product documentation
 API documentation
 Case studies
 Blog
Blog Data models
 Windsor vs Supermetrics
 Windsor vs Fivetran
 Windsor vs Portermetrics
 Last updated: 17 October 2025

MailChimp is the world’s largest email marketing platform, helping millions of businesses send fantastic email campaigns.
It’s simple to use and offers many features to help you get your message out there.
You can create beautiful email campaigns, create custom templates to make your campaigns look amazing, and track your results using its analytics features.
So, since MailChimp has analytics features, why do you need a google data studio MailChimp connection, you might ask?
One reason is the convenience it provides to get all of your data into one report, including data from Google Analytics, Facebook Ads, Microsoft Advertising, etc.
When you successfully connect to Looker Studio, you can create an all-in-one report visualization, integrating data from your different data sources.
The more efficient your reporting on Looker Studio, the better you can evaluate the data and discover insights to help your email marketing campaigns and boost sales.
This blog post will show you how to connect MailChimp to Looker Studio in 10 Easy Steps via Windsor.ai and how Windsor.ai can help you create better reports.
Let’s dig in!
Table of content:
1. Introduction to Looker Studio MailChimp connector
2. Mailchimp Looker Studio Dashboard Overview
3. Available metrics and dimensions in Mailchimp Looker Studio Dashboard
4. How to connect MailChimp to Looker Studio in 10 Easy Steps
5. Wrapping up
Introduction to Looker Studio MailChimp connector
Windsor.ai’s Looker Studio MailChimp connector is a great tool that you can use to seamlessly bring your MailChimp email marketing campaigns data into Looker Studio for proper report visualization and analysis.
Looker Studio, on the other hand, is a robust data analysis and visualization tool that you can explore and interact with data.
However, it can be challenging to connect to different data sources and comprehensively visualize data without a custom connector.
To make data analysis and visualization easier, Google released several custom connectors for Looker Studio.
These allow you to connect to different data sources, including Google Sheets, Google Ads Manager, Google Cloud Storage, Google Analytics, etc.
But suppose you want to bring in data from sources such as Salesforce, or Facebook Ads, which is not a Google application, into Looker Studio.
In that case, you will need a custom connector like Windsor.ai that meets Google’s requirements.
Custom Windsor.ai connectors
There are many connectors on the market, but what makes a custom connector stand out is the fact that it is designed specifically for a given application, often using custom designs and processes.
A Custom Connector such as Windsor.ai is a software that allows a data source’s API to connect to a flow and send data into a Looker Studio report for easy visualization and analysis based on user-defined criteria.
You can use Custom connectors with various applications compatible with iOS and Mac platforms. For organizations managing Apple ecosystems, understanding how managed IDs work can also help streamline user access, enhance security, and maintain control over business-critical tools and data.
There are several ways to use custom Windsor.ai connectors; for instance, you may use it to sync data from your MailChimp email list into Looker Studio for analysis or automatically update a Google Sheet.
Mailchimp Looker Studio Dashboard Overview

The image above is an overview of a connected MailChimp to Looker Studio via Windsor.ai, showing campaign type, open rate, CTR, and unique subscriber clicks, among other essential data metrics.
This Mailchimp Looker Studio report helps you visualize your Mailchimp campaign data in Google for easy reporting and analysis.
We have added three pages to it.
- Lists
- Regular Campaigns
- Unsubscribes
To keep the dashboard simple, we’re only using a few of the available dimensions available in our connector. The whole list of supported metrics and dimensions is down below.

Try Windsor.ai today
Access all your data from your favorite sources in one place.
Get started for free with a 30 - day trial.
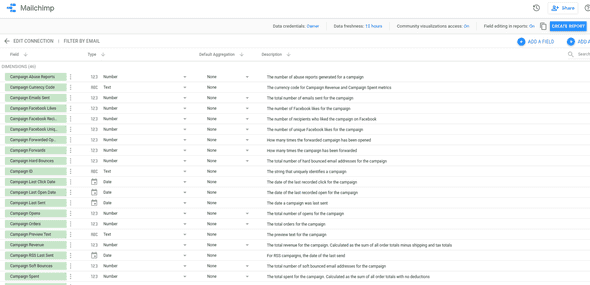
Available metrics and dimensions in Mailchimp Looker Studio Dashboard
Name | Type | Description |
Abuse Reports | NUMERIC | The number of abuse reports generated for this campaign. |
Campaign ID | TEXT | A string that uniquely identifies this campaign. |
Campaign Title | TEXT | The title of the campaign. |
Campaign Type | TEXT | The type of campaign (regular, plain-text, ab_split, rss, automation, variate, or auto). |
Click Rate | NUMERIC | The number of unique clicks divided by the total number of successful deliveries. |
Clicks Total | NUMERIC | The total number of clicks for the campaign. |
Date | DATE | The Date (copy of send_time, but this represents date only with no time) |
Emails Sent | NUMERIC | The total number of emails sent for this campaign. |
Forward Count | NUMERIC | How many times the campaign has been forwarded. |
Forwards Opens | NUMERIC | How many times the forwarded campaign has been opened. |
Last Click | DATE | The date and time of the last recorded click for the campaign in ISO 8601 format. |
Last Open | DATE | The date and time of the last recorded open in ISO 8601 format. |
List ID | NUMERIC | The unique list id. |
List Is Active | TEXT | The status of the list used, namely if it’s deleted or disabled. |
List Name | TEXT | The name of the list. |
Open Rate | NUMERIC | The number of unique opens divided by the total number of successful deliveries. |
Opens Total | NUMERIC | The total number of opens for a campaign. |
Preview Text | TEXT | The preview text for the campaign. |
RSS Last Send | DATE | For RSS campaigns, the date and time of the last send in ISO 8601 format. |
Send Time | DATE | The date and time a campaign was sent in ISO 8601 format. |
Subject Line | TEXT | The subject line for the campaign. |
Unique Clicks | NUMERIC | The total number of unique clicks for links across a campaign. |
Unique Opens | NUMERIC | The total number of unique opens. |
Unique Subscriber Clicks | NUMERIC | The total number of subscribers who clicked on a campaign. |
Unsubscribed | NUMERIC | The total number of unsubscribed members for this campaign. |
Url | TEXT | The URL for the link in the campaign. |
Url Campaign Id | TEXT | The campaign id. |
Url Click Percentage | NUMERIC | The percentage of total clicks a link generated for a campaign. |
Url Id | TEXT | The unique id for the link. |
Url Last Click | DATE | The date and time for the last recorded click for a link in ISO 8601 format. |
Url Total Clicks | NUMERIC | The number of total clicks for a link. |
Url Unique Click Percentage | NUMERIC | The percentage of unique clicks a link generated for a campaign. |
Url Unique Clicks | NUMERIC | Number of unique clicks for a link. |
How to connect MailChimp to Looker Studio in 10 Easy Steps
To connect MailChimp to Looker Studio via Windsor.ai, follow the steps below.
Step 1: Sign up to Windsor.ai
I will assume that you already have a Google account and a MailChimp account.
If you don’t have an account, quickly open a Gmail account and an account with MailChimp, and then head over to Windsor.ai to sign up.
Windsor.ai offers a 30-day free trial to allow you to see how convenient and efficient your marketing data report becomes when you use the Windsor.ai platform.
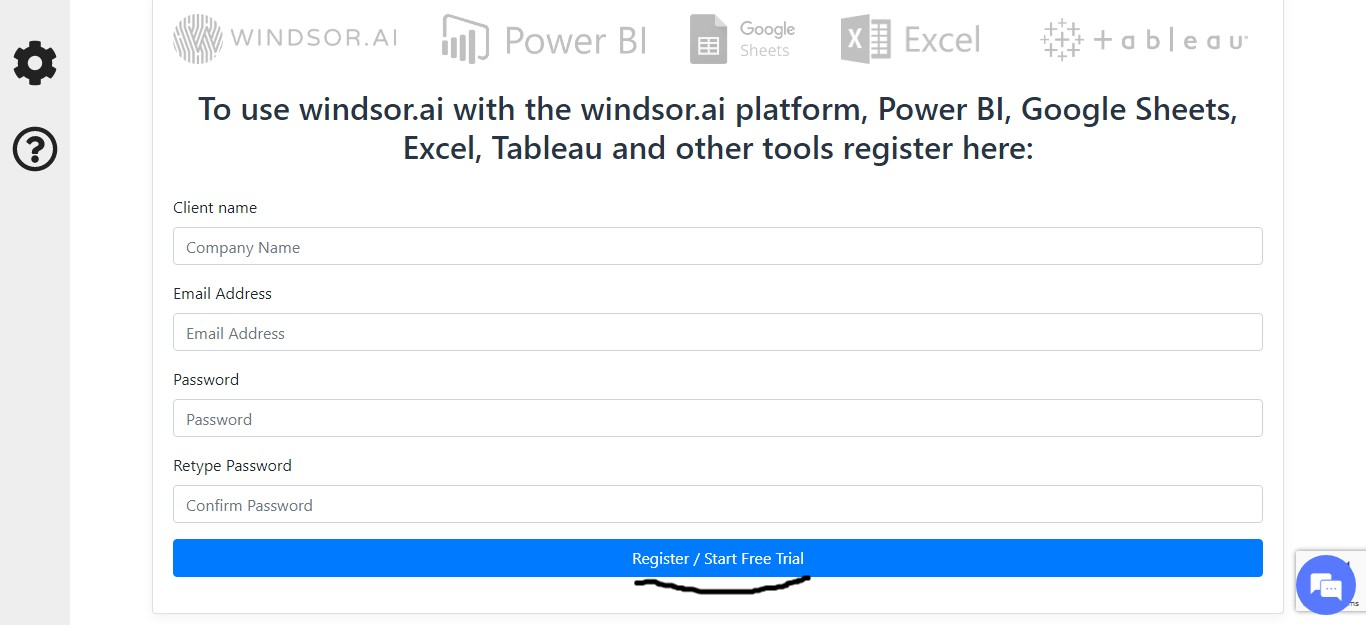
Step 2: Connect Windsor.ai with data studio

Once you have registered an account with Windsor.ai, click on the “To use Windsor.ai with data studio click here” option.
Also, make sure you are logged in with the Google username in Looker Studio that you want to use.
Step 3: Set up your Google account for MailChimp Looker Studio
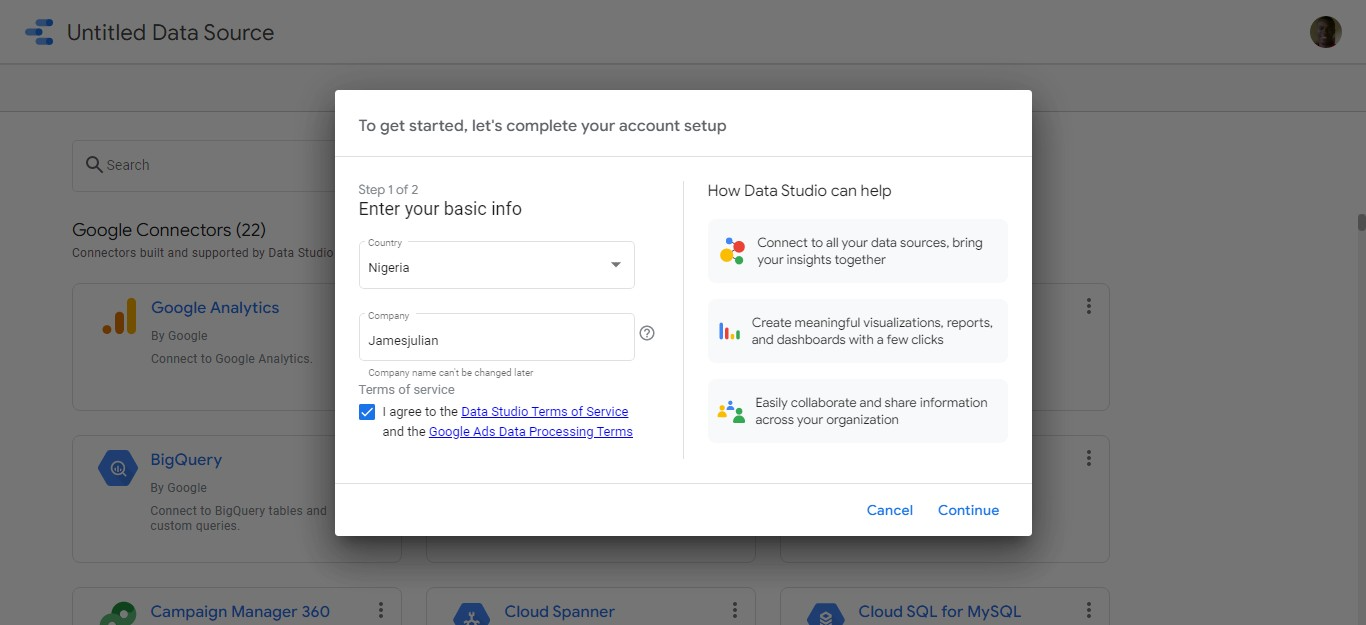
After you click on “use Windsor.ai with data studio,” this action will redirect you to Looker Studio Connector Gallery.
If you have not set up your Google account, a prompt will appear on Looker Studio asking you to complete your account setup, as shown in the image above.
At this stage, you can choose or change the Google account you want to use for the marketing data report.
Step 4: Create a new Looker Studio report
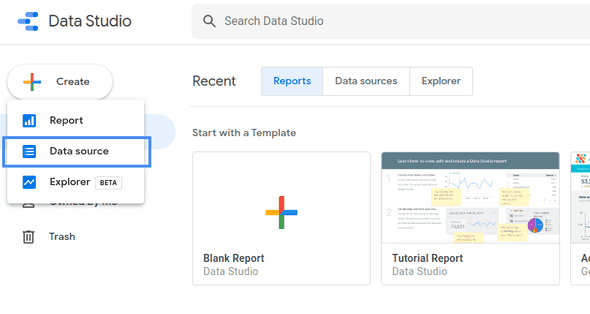
Once you have chosen the Google account you want to use, a new page opens up in Looker Studio, where you can create a new Looker Studio report.
Click on create and then on data source as shown on the image above.
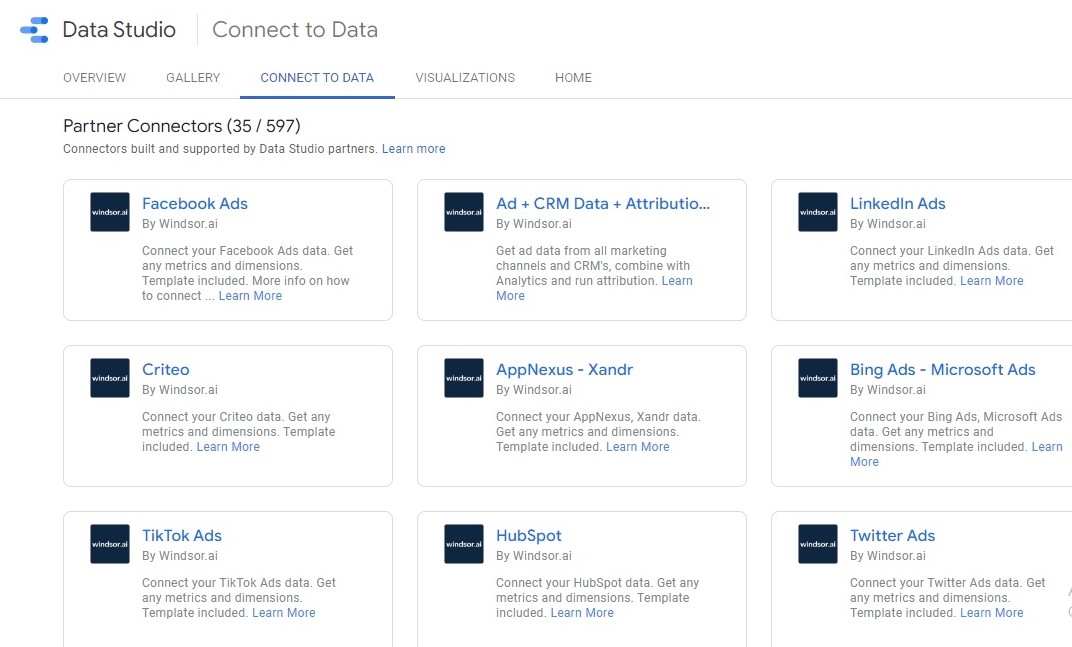
Step 5: Add Windsor.ai Looker Studio MailChimp Connector
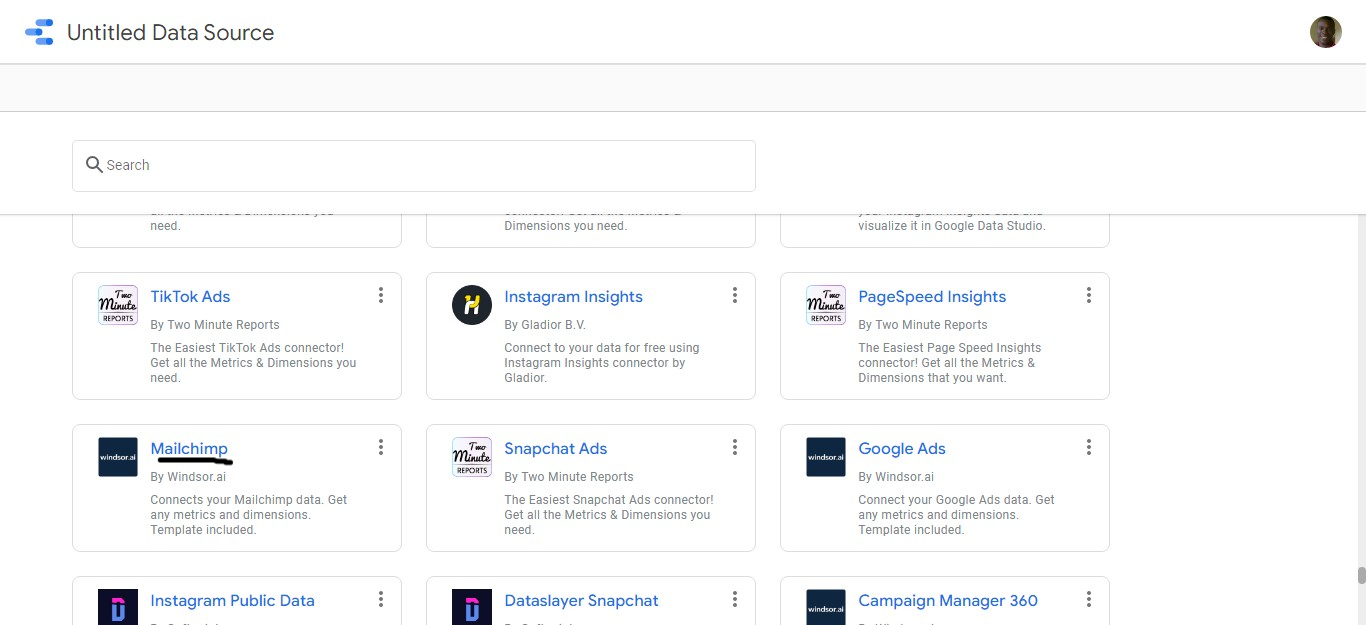
After clicking on “create” and on “data source” on Looker Studio, the Looker Studio Connector Gallery page opens up. Search for Mailchimp by Windsor.ai connector and click on it.
Step 6: Authorize the Connector

The next step is to authorize the connector to access the Google account you want to use when you sign up for the free trial.
Once you click on authorize, a Google authorization prompt pops up requesting that you sign in to your Google account.
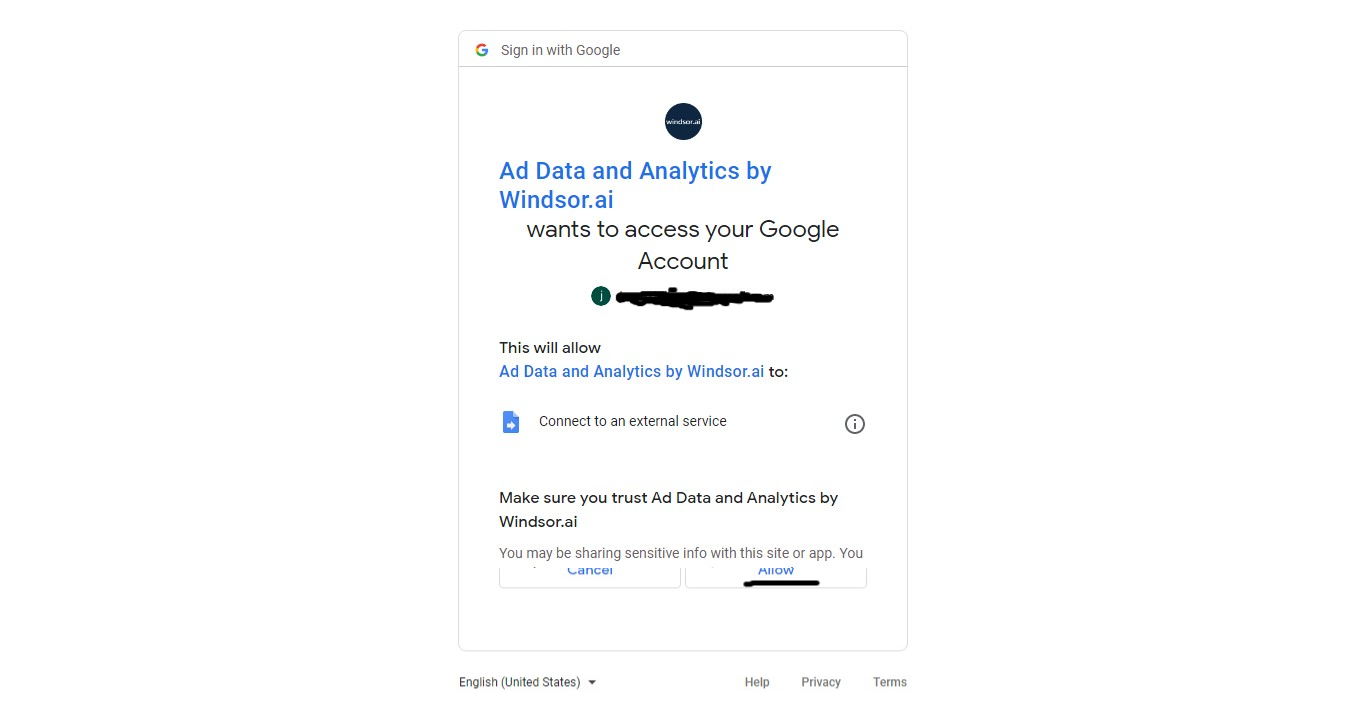
After you sign in, a new prompt pops up requesting that MailChimp by Windsor.ai gets access to your Google Account.
Click on allow.
Step 7: Grant MailChimp authorization to Data
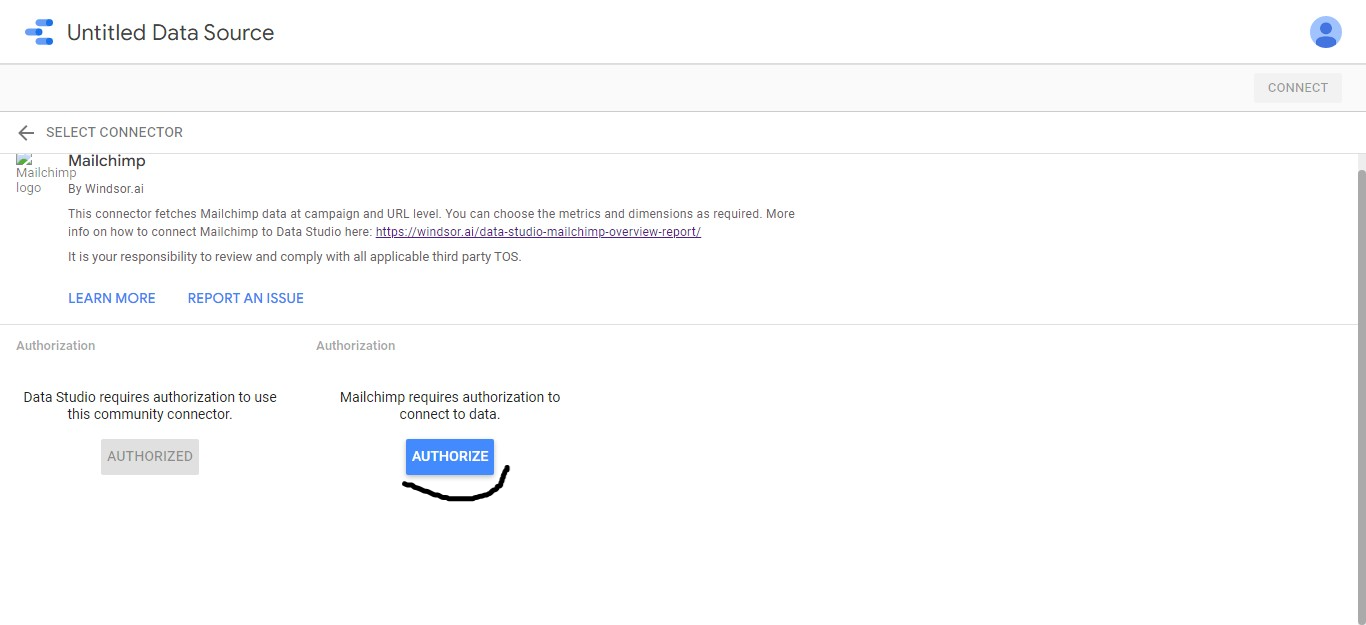
After giving MailChimp by Windsor.ai access to your Google Account, you need to provide MailChimp with authorization to connect to Data.
Click on the blue authorization button as shown in the image above.
Clicking on authorize opens up a new window that takes you to the Windsor.ai onboarding page.
Step 8: Grant MailChimp authorization via Windsor.ai
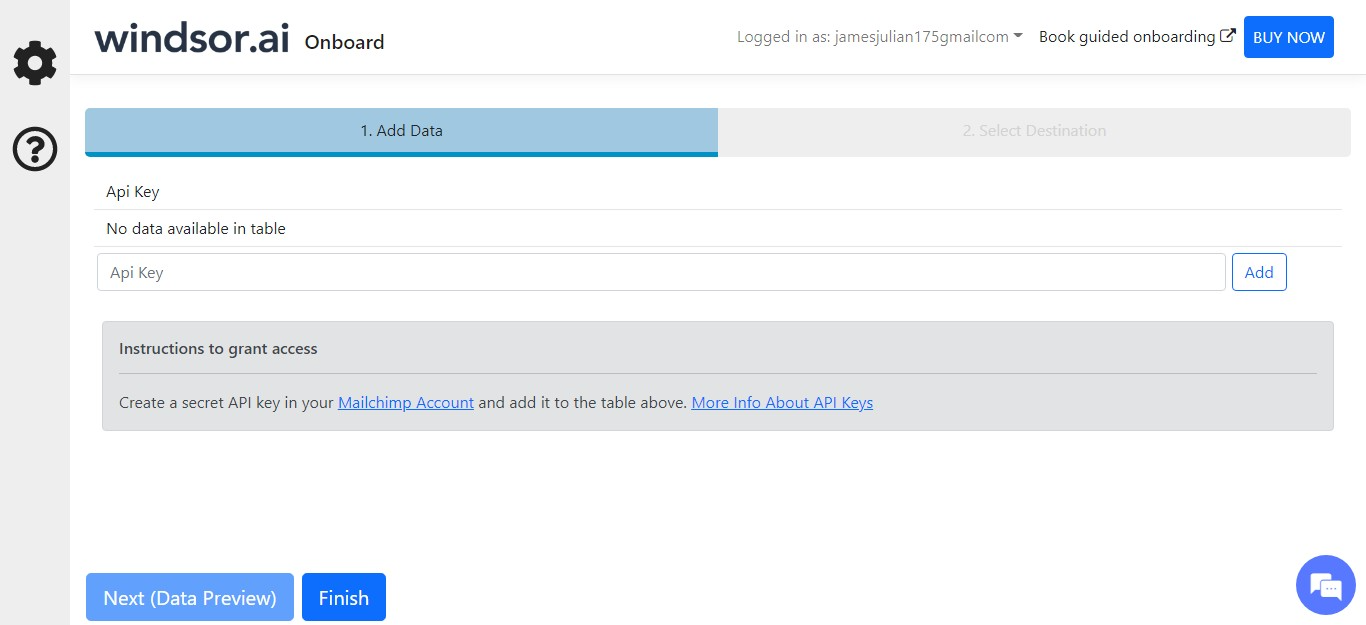
On the Windsor.ai onboarding page, you get access to all of the data sources on Windsor.ai. Here, you can then grant access to Google Analytics, Linkedin Page, or any data sources that you want to use.
To view other data sources on Windsor.ai, click on the setting icon. The link you will click from Looker Studio takes you directly to the MailChimp onboarding page on Windsor.ai.
You’ll be required to input an API Key to grant access to this page. Without an API key, you won’t be able to import data from MailChimp into Looker Studio via Windsor.ai.
You can create a secret API key in your Mailchimp account.
Step 9: Connect your MailChimp data to your Looker Studio report
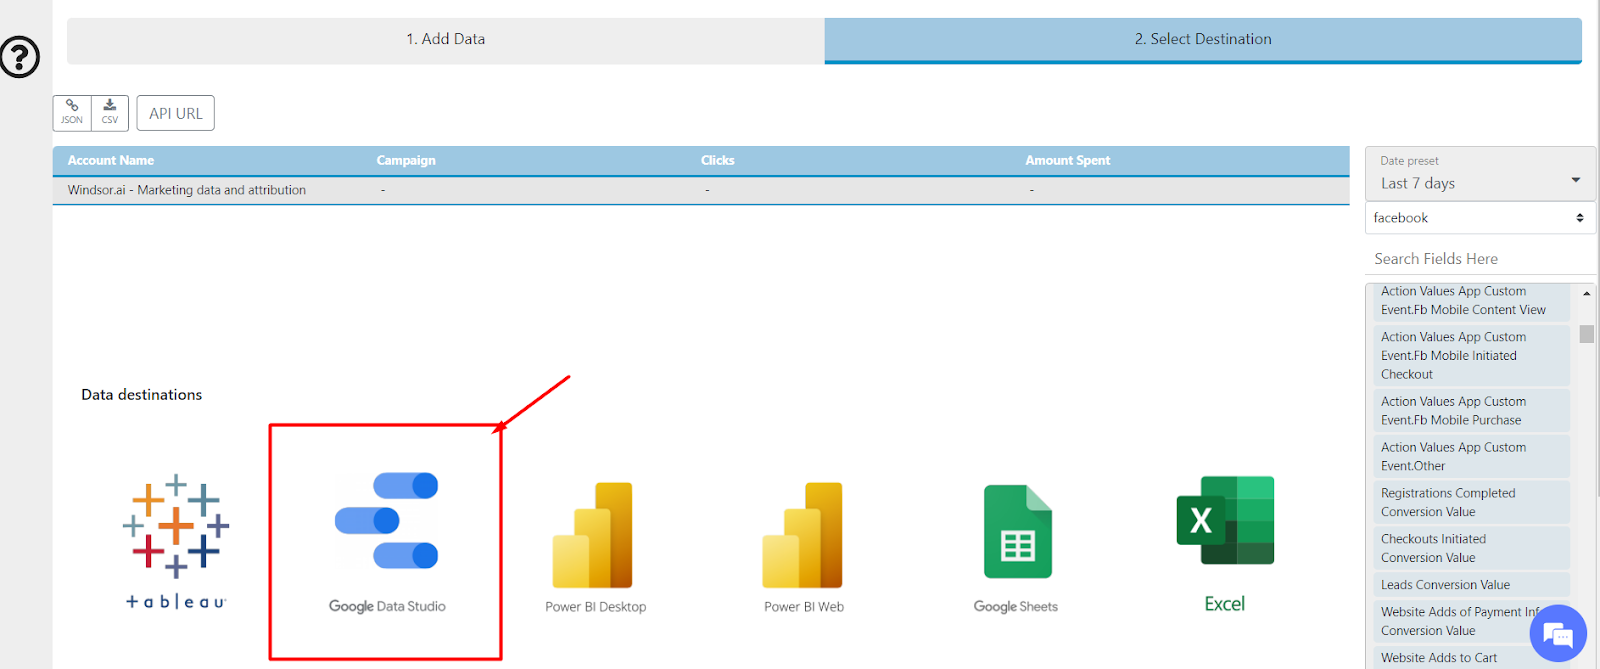
After granting access, a new page opens up that requires you to select the data destination. And since we are connecting MailChimp to Looker Studio, select Looker Studio as the data destination and click connect on the Looker Studio page that opens up.
Step 10: Add your MailChimp data to your Looker Studio report
Once you are connected, it is easy to use the template for MailChimp and get all the data into the Looker Studio and create a report.
Once you have the data in Looker Studio, you can customize it with whatever metrics and dimensions you want and then click “create report.”

This “create report” action then pulls in the data in the Looker Studio for easy visualization, reporting, and analysis that you can share or collaborate with your team on.
Wrapping Up
Now that you have seen how easy it is to connect MailChimp to Looker Studio in just a few minutes, let’s take a few seconds to discuss why you should get onboard with this now and how Windsor.ai can help you create better reports.
I mentioned earlier that connecting MailChimp to Looker Studio provides convenience.
As a Data analyst, Data scientist, or digital marketer, getting all of your data in one place makes it easier to create meaningful reports, visualizations, and analyses that can better inform you and your team on performance, providing insights for improvement.
Using Looker Studio via Windsor.ai makes achieving that easy.
Connecting platforms that are not an application by Google, such as Facebook Ads, Salesforce, Stripe, and Twitter Ads, to Looker Studio
would require a custom connector that meets Google requirements, such as Windsor.ai custom connectors.
For example, to get MailChimp to Looker Studio, you need the Windsor.ai MailChimp connector.
When you get on board with Windsor.ai, it is easier for you to customize, collaborate, and share reports with your team and management. For instance, let’s assume it’s been seven days since you launched a new email campaign to your organization’s recent email subscribers.
Now your CMO wants to get a report on the performance of the campaign in the last week in a live, interactive dashboard, and your CEO wants to see the basic metrics, but in PDF form.
Looker Studio allows you to do both. You will be able to easily customize your reporting and share the information with each person based on the agreed criteria.
Try Windsor.ai today
Access all your data from your favorite sources in one place.
Get started for free with a 30 - day trial.
How Windsor.ai can help you create better reports
It would be quite time-consuming to create a template for your marketing report from scratch. Windsor.ai makes it easier by offering a variety of marketing templates that allow you to create reports in just a few simple steps.
Once you have successfully connected MailChimp to Looker Studio, all that is required of you is to select the template that suits your needs. In the case described, you will select Looker Studio Mailchimp template.
This Looker Studio Mailchimp template helps you get a one-page overview of your email campaign’s performance. Further, you can customize the metrics and dimensions you want within the template.
You can build templates with custom metrics and blend other data sources into your report.
For example, you could build a dashboard using MailChimp data and also blend in email session data from Google Analytics in the same report.
You can also add your organization’s logo and have a nice-looking report that is ultimately yours.
Just select the data source, copy and use it easily!
Windsor.ai offers a 30-day free trial, so you can get to see how convenient it is using MailChimp Looker Studio.
To get started, please visit Windsor.ai.

